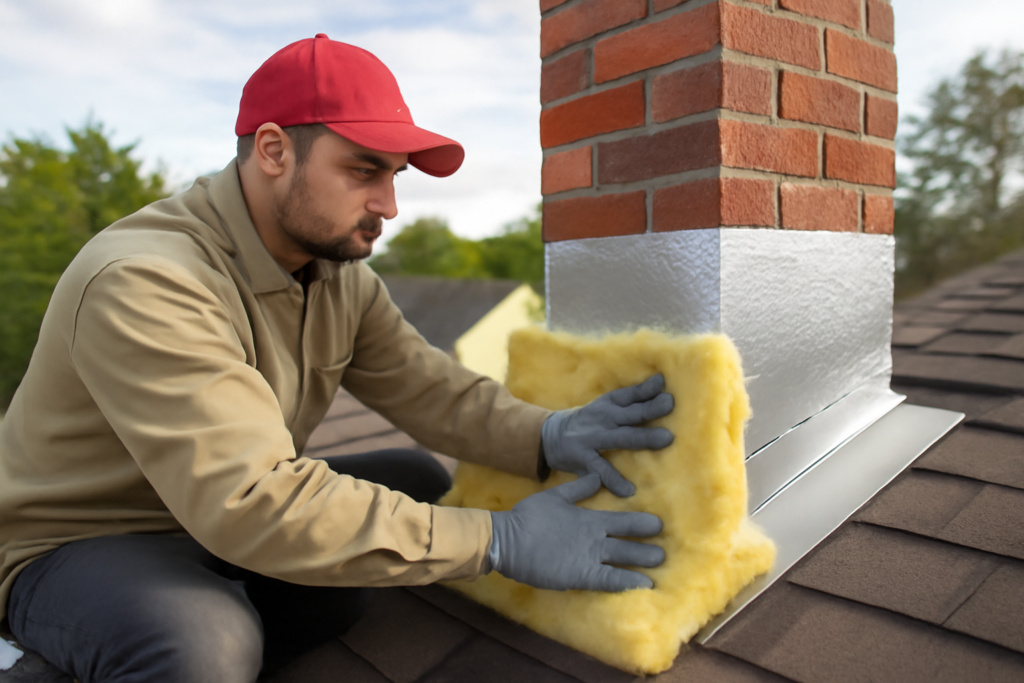
A cold chimney is a hole in the middle of your house. When the fireplace is idle, warm air rises straight up the flue and out the top, and in winter that single opening can leak as much conditioned air as a cracked window. Done correctly, chimney insulation stops that draft, keeps condensation from rotting the surrounding framing, and lets a wood stove or liner reach operating temperature faster so it burns cleaner. Done wrong, it is a genuine fire hazard. I have opened up chases where a previous owner stuffed pink fiberglass tight against a hot metal flue, and the scorch marks were an inch from catching. This guide separates what is safe from what will burn.
The word “chimney” covers three different situations, and each one gets insulated differently: the masonry chase around the flue, the metal liner inside a masonry chimney, and the framed chase around a factory-built metal chimney. Match the method to your setup and you will cut heat loss without ever touching a clearance rule.
- Why an Uninsulated Chimney Costs You Money
- Insulating a Metal Liner Inside Masonry
- Insulating the Chimney Chase on a Factory-Built Unit
- Safe Materials and the Clearances You Cannot Skip
- Sealing the Damper and Smoke Chamber
- Handling Condensation and Air Sealing the Chase
- Common Chimney Insulation Mistakes
- How Often to Inspect and Maintain It
- When to Call a Pro Versus DIY
Why an Uninsulated Chimney Costs You Money
Stack effect is the culprit. Heated air in your home is buoyant, and it wants to escape at the highest point. An open or poorly damped flue gives it an express route. Even with the damper closed, a typical throat damper leaks badly because it is a bare metal plate that warps over the years. On a 20-degree night, that leak can pull enough warm air out of a living room to make the whole floor feel drafty.
Cold flues cause a second, sneakier problem: condensation. When warm flue gases hit a chimney wall that is stuck at outdoor temperature, moisture and creosote condense on the inside. That accelerates liner corrosion and creosote buildup, which is the fuel for a chimney fire. Keeping the flue warmer through proper insulation actually makes the system safer, not just more efficient.
Insulating a Metal Liner Inside Masonry
When you install a stainless steel liner in an old masonry chimney, the gap between the liner and the clay tile or brick should be insulated. This does two things at once — it keeps flue gases hot so they draft strongly and deposit less creosote, and many liner manufacturers require insulation to maintain the UL 1777 listing that lets the liner serve an oversized or damaged flue.
There are two accepted approaches. The first is a ceramic fiber insulation blanket, typically 1/2 inch thick with a foil facing, wrapped around the liner before it goes down the chimney and secured with stainless steel wire and foil tape. The second is a pour-down vermiculite or perlite-based insulating mix, poured into the annular space around an installed liner. Blanket wrap is the standard for solid-fuel appliances because it gives a known, uniform R-value. Expect a wrapped 6-inch liner to add roughly R-1 to R-1.5, which is modest in number but plenty to keep flue temperatures where they belong.
Insulating the Chimney Chase on a Factory-Built Unit
Prefab metal fireplaces vent through a double- or triple-wall Class A chimney pipe, and that pipe runs up through a framed chase — essentially a hollow wood box wrapped in siding. The pipe itself is air-insulated and rated for close clearances, usually 2 inches to combustibles, and you must never violate that. What you can and should insulate is the chase wall itself, treating it exactly like an exterior wall of the house.
Use standard batt or blown insulation in the chase stud cavities, keeping every bit of it back from the required air-space clearance around the pipe. A metal firestop spacer at each floor and ceiling level maintains that gap. The goal is an insulated, air-sealed chase box with an untouched clearance tunnel running up the center. Cap the top with an insulated chase cover, because an uninsulated metal chase top is a notorious spot for condensation to form and drip back down inside.
Safe Materials and the Clearances You Cannot Skip
This is the part that keeps houses standing. Ordinary fiberglass batts, spray foam, and cellulose are combustible or will melt, and none of them may contact a hot flue or sit inside a required clearance space. The only materials that belong in direct contact with chimney components are those rated for high temperature.
- Ceramic fiber blanket: rated to roughly 2,300°F, used to wrap liners. This is the workhorse for direct-contact insulation.
- Mineral wool (rock wool): rated to about 1,200°F, non-combustible, used to pack the gap where a chimney passes through a wall or to insulate a chase while holding clearance.
- Vermiculite or perlite insulating mix: poured around masonry liners; non-combustible and lightweight.
- Standard fiberglass or cellulose: fine in the chase cavity, but only outside the manufacturer’s clearance-to-combustibles distance, never touching the pipe.
The clearance number lives on the appliance and pipe labels. Class A chimney is commonly 2 inches; masonry chimneys require a 2-inch air gap to framing on exterior walls and 1 inch elsewhere. Insulation stuffed into that gap defeats the entire safety system, because the gap is designed to let air carry heat away. When you insulate a chase, you are insulating the wood box, not the tunnel the pipe travels through.
Sealing the Damper and Smoke Chamber
The single cheapest efficiency upgrade is not insulation at all — it is stopping the draft at the damper. A top-sealing damper mounts at the top of the flue with a silicone gasket and a stainless cable that lets you open and close it from the firebox. Unlike a rusty throat damper, it seals airtight, so the whole flue below it stays out of the stack-effect loop. These run $150 to $350 installed and often pay for themselves in a couple of heating seasons.
If you keep the original throat damper, a fireplace draft stopper — an inflatable plug or a rigid foam damper insert — blocks the throat when the fireplace is not in use. Just tie a bright ribbon to it so nobody lights a fire on top of a foam plug. That mistake fills a room with smoke in seconds.
Handling Condensation and Air Sealing the Chase
Warm indoor air leaking into a cold chase is what drives condensation and mold behind the fireplace wall. Air-seal every penetration where wiring, gas lines, or framing gaps let household air into the chase, using fire-rated caulk or high-temperature sealant near the pipe and standard sealant elsewhere. On the exterior, make sure the chase cover slopes to shed water and has a proper drip edge, and confirm the storm collar and flashing are intact. A dry, air-sealed, insulated chase will not sweat.
Common Chimney Insulation Mistakes
A handful of errors show up again and again, and every one of them either wastes money or creates a hazard. The worst is packing combustible insulation against a hot flue, which I mentioned but cannot stress enough — fiberglass, foam, and cellulose belong in the chase cavity outside the clearance zone, never touching the pipe. The second is insulating the liner but forgetting the top, leaving an uninsulated chase cover that becomes a condensation factory dripping rusty water back down inside the enclosure.
Another frequent miss is skipping the flue insulation entirely on a relined chimney, then wondering why the new stainless liner keeps building creosote. Cold flue walls condense the gases; warm, insulated flue walls do not. People also forget to air-seal the chase before insulating, so household air keeps leaking in and defeats the whole effort. And finally, homeowners routinely undersize the job — they insulate the visible section in the attic but leave the run above the roofline bare, where wind strips heat fastest. Insulate the whole system, top to bottom, or you have only done half a job.
How Often to Inspect and Maintain It
Insulation is not a set-and-forget install on a working chimney. The Chimney Safety Institute of America and NFPA 211 both recommend a chimney inspection at least once a year for any solid-fuel appliance. During that visit, the sweep should confirm the liner insulation is intact, the chase cover is sealed and draining, and no combustibles have migrated into a clearance space over the years — attic insulation loves to slump against pipes as people add more of it up there.
Check the storm collar, flashing, and chase-top caulk each fall, because a failed seal there lets water into the insulation, and wet insulation loses most of its R-value and can promote rot in the surrounding framing. If you burn wood heavily, plan on the annual sweep-and-inspect regardless of how good your insulation is; a warm, well-drafting flue burns cleaner, but it still needs the yearly look to stay safe.
When to Call a Pro Versus DIY
Wrapping and dropping an insulated liner is realistic for a confident DIYer on a straightforward straight flue, and expect $300 to $600 in materials for the liner and insulation kit on an average two-story chimney. Air-sealing a chase, installing a top-sealing damper, and adding batt insulation to chase walls are all reasonable weekend jobs. What you should not improvise is clearance to a solid-fuel appliance, a liner sizing decision, or anything involving a chimney fire history. Have a CSIA-certified chimney sweep inspect the flue first — a Level 2 inspection with a camera runs $200 to $500 and tells you whether the existing liner is even sound enough to insulate. Get that baseline, respect every clearance, use only high-temperature materials in contact zones, and your chimney insulation will make the house warmer and the fireplace safer at the same time.