Getting fireplace insulation right is one of the few home projects where the wrong material choice can burn the house down — literally. The chase around a fireplace and chimney is usually the leakiest, coldest cavity in the building envelope, so the urge to stuff it full of insulation is understandable. But fireplace insulation lives under fire-safety rules that ordinary wall insulation never touches: clearance-to-combustibles distances, non-combustible material requirements, and firestop details that inspectors check closely. I’ve opened up enough chases to find melted foam board and scorched kraft facing against flue pipes. Here’s how to do it correctly.
- Why Fireplace Areas Leak So Much Energy
- Rule One: Clearance to Combustibles
- Materials That Belong Near a Fireplace
- Insulating a Chimney Chase, Step by Step
- Stopping Losses Through the Flue Itself
- Insert and Prefab Surround Insulation
- Signs Your Fireplace Assembly Needs Attention
- What the Work Returns in Energy Terms
- Safety-First Bottom Line
Why Fireplace Areas Leak So Much Energy
Three problems stack up around a typical fireplace. The chimney chase — the framed shaft the flue runs through — is often built with zero insulation and open framing gaps, functioning as a highway from crawl space to attic. Second, the flue itself is a hole in your house; an open damper leaks as much air as a cracked-open window, and even closed dampers seal poorly. Third, builder-grade prefab fireplaces are essentially metal boxes with R-values near zero set into an exterior wall. Energy auditors regularly clock fireplace assemblies as responsible for 10 to 20 percent of a home’s total air leakage. The fix is a system: air-seal the chase penetrations, insulate the chase walls with the right materials, and address the flue opening — in that order.
Rule One: Clearance to Combustibles
Before any material goes in, understand the clearances, because they define where insulation may and may not exist:
- Masonry chimneys: the IRC requires 2 inches of air clearance between the chimney’s exterior face and any combustible framing (1 inch for chimneys entirely outside the structure). That 2-inch gap must not be packed with combustible insulation — no fiberglass with kraft facing, no cellulose, never foam.
- Factory-built (prefab) fireplaces and metal flues: clearances are set by the manufacturer’s listing — commonly 1 to 2 inches to the firebox standoffs and 2 inches to double-wall flue pipe. The listing label on the unit is law; some units are approved for insulation contact on specific surfaces, most are not.
- Firestops: where the chase passes each floor and the attic plane, code requires non-combustible firestop material (sheet metal or cement board, sealed) — this is also your primary air-sealing surface.
Violating these clearances is how chase fires start: wood in prolonged contact with surfaces cycling at 200°F+ undergoes pyrolysis and can eventually ignite at temperatures far below open-flame ignition.
Materials That Belong Near a Fireplace
- Unfaced mineral wool (Rockwool): the workhorse. Stone wool tolerates roughly 2,150°F, won’t burn, and comes in batts (R-15 in 2×4, R-23 in 2×6) at $0.90 to $1.50 per sq ft. Use it for chase walls and around — never touching, unless listed — the firebox.
- Unfaced fiberglass: acceptable for chase walls at proper clearance; the glass itself won’t flame but binders can scorch, and facing is combustible — always unfaced here.
- High-temperature caulk (RTV silicone rated 500°F to 650°F, e.g., Rutland or Meeco’s Red Devil): for gaps near the appliance, about $8 to $15 per tube.
- Intumescent firestop sealant (3M FB-136, Hilti FS-One): for firestop penetrations — expands when heated to seal the gap; $12 to $25 per tube.
- Sheet metal and cement board: for firestop planes and shields, sealed at edges with fire caulk.
Never use within the clearance zones: spray foam (ignites around 700°F and burns ferociously), rigid foam board, cellulose, or any faced batt. Foam products in a chimney chase are an automatic inspection failure and a genuine hazard.
Insulating a Chimney Chase, Step by Step
- Open access from the attic or exterior sheathing side and vacuum out debris — chases collect construction scrap that sits against flues.
- Air-seal the attic firestop: cut sheet metal or cement board to fit around the flue, leaving the listed 2-inch gap to the pipe, screw it to framing, then seal the perimeter with intumescent caulk and the flue gap with fire caulk rated for the temperature. This single detail often cuts more energy loss than all the batts combined.
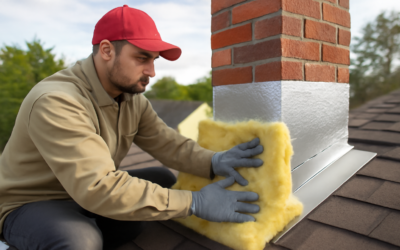
- Insulate chase walls: fit unfaced mineral wool into the framed exterior walls of the chase, flush with framing, respecting every clearance. The goal is insulating the chase’s outer envelope, not wrapping the flue.
- Cap the chase at the attic with insulation above the sealed firestop where clearances allow.
- Inspect annually: confirm nothing has slumped against the flue and the caulk joints remain intact.
Materials for a typical chase run $150 to $400 DIY. A weatherization contractor charges $500 to $1,200 for the same scope; add a Level 2 chimney inspection ($150 to $400) if the system hasn’t been evaluated in years — money well spent before sealing anything around an older flue.
Stopping Losses Through the Flue Itself
An unused or lightly used open fireplace bleeds conditioned air year-round. Options in ascending order of commitment: a chimney balloon or flue plug ($40 to $90) inflates in the flue and cuts draft loss to near zero — remove it before lighting a fire, and buy the type with a warning tag; a top-sealing damper (Lyemance or Lock-Top, $200 to $500 installed) replaces the leaky throat damper’s job with a gasketed lid at the crown; glass doors with gasketed frames ($300 to $800) reduce standby loss and radiate less room air up the stack. For fireplaces that never get used, a balloon plus a decorative draft-stopper insert is the cheapest meaningful fix in the whole house.
Insert and Prefab Surround Insulation
Wood and gas inserts change the rules again. Most insert manufacturers specify a faceplate seal and permit — sometimes require — a specific insulation blanket or mineral wool packing between the insert’s liner and the old flue at the top plate, per the listing. Follow the manual exactly; generic stuffing around a liner can block required convection air. On prefab zero-clearance fireplaces, the standoff spacers exist to preserve airflow — never pack insulation into standoff gaps unless the label diagram explicitly shows it. When in doubt, the model number plus the installation manual PDF settles every argument, including with your building inspector.
Signs Your Fireplace Assembly Needs Attention
- Cold drafts pouring from the surround or hearth in winter
- A chase wall noticeably cold to the touch, or frost inside the chase
- Smell of smoke in rooms above — possible firestop gaps letting the chase communicate between floors
- Ice dams concentrated near the chimney: warm chase air melting roof snow
- Scorched or darkened framing visible in the attic near the flue — stop and call a chimney professional before insulating anything
What the Work Returns in Energy Terms
Numbers help justify the weekend. A sealed attic-level firestop plus insulated chase typically removes 100 to 300 cubic feet per minute of stack-effect leakage in blower-door testing — comparable to sealing every window in the house at once. On heating bills, weatherization programs commonly attribute $80 to $250 per year in savings to a full fireplace-assembly treatment in cold climates, which pays back a DIY material spend in one to three seasons. A top-sealing damper on a rarely used flue adds another measurable slice, and unlike almost every other efficiency upgrade, these improvements also fix comfort complaints you can feel the same evening — the cold-hearth draft that makes the fireplace end of the living room unusable in January disappears when the chase stops pulling air.
Sequence the work with the heating season in mind: chase and firestop work is far more pleasant in October than in a 130°F July attic, and chimney sweeps book out 3 to 6 weeks once the first cold snap hits. Booking the Level 2 inspection in late summer gets you a clean flue, a documented baseline, and time to fix whatever it finds before you seal around it.
Safety-First Bottom Line
Insulating around a fireplace pays real dividends — sealed and insulated chases routinely knock double-digit percentages off a home’s air leakage. But the hierarchy is fixed: verify clearances first, use only non-combustible materials inside them, air-seal with rated fire caulk at every firestop, and honor the appliance listing over any general advice, including this article’s. When a detail conflicts, the label on the unit and your local inspector win. A warm house is the goal; a fire-safe one is the requirement.