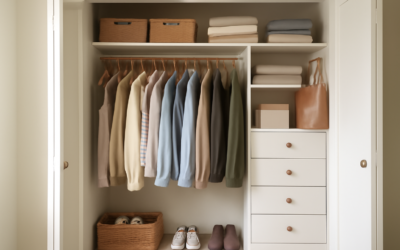
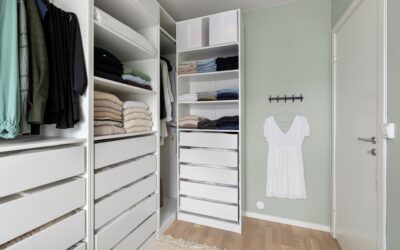
The average reach-in closet with a single rod and one shelf wastes more than half its cubic space, and that empty air above your hanging clothes and below your short shirts is exactly where a good clothes closet organizer earns its keep. By stacking double rods, adding shelves, and carving out drawer and shoe zones, a well-planned system can effectively double how much you store in the same footprint. I have installed everything from $40 wire kits to $2,000 custom builds, and the principles that make them work are the same. Choosing the right clothes closet organizer starts with measuring your space and matching the system to what you actually own.
- Types of Clothes Closet Organizer Systems
- Measuring and Planning Your Layout
- Ideal Heights and Dimensions
- Maximizing a Small Reach-In Closet
- Installing a Closet Organizer Step by Step
- Keeping It Organized Long Term
- Organizing a Walk-In Versus a Reach-In
- Budget-Friendly Upgrades That Punch Above Their Cost
Types of Clothes Closet Organizer Systems
There are three broad categories, and they differ in cost, strength, and looks. Picking the right one depends on your budget and how much weight the system will carry.
- Wire (ventilated) systems: the classic epoxy-coated wire shelving. Cheap, breathable, easy to install, and widely available. Best for closets on a budget.
- Wood and laminate systems: melamine or plywood panels with adjustable shelves and drawers. More expensive, sturdier, and far more finished-looking.
- Modular and track-based systems: components hang from a wall-mounted rail, so they are adjustable and easy to reconfigure later.
Wire kits start around $40 to $150 for a reach-in closet. A quality laminate system runs $300 to $1,200 depending on drawers and size. Fully custom cabinetry can exceed $2,000. If you want flexibility to change the layout as your wardrobe shifts, a track-based modular system is worth the small premium.
Measuring and Planning Your Layout
Before buying anything, take accurate measurements and inventory what you store. Measure the closet width, depth, and height, and note the location of the door opening, since you cannot block it. Then count how many long-hanging items you own versus short-hanging, folded, and shoes.
This inventory drives the design. Someone with mostly folded jeans and t-shirts needs more shelving and drawers than rods, while a person with lots of dresses and coats needs long-hang space. Sketch the elevation on paper and assign zones: double-hang for shirts and pants, single long-hang for dresses and coats, shelves up top for bins, and a lower section for shoes.
Ideal Heights and Dimensions
Getting the measurements right is what separates a system that works from one that frustrates you daily. These are the standard dimensions I use, and they are built around how clothing actually hangs.
- Double-hang rods: mount the lower rod about 40-42 inches off the floor and the upper rod about 80-84 inches, giving each roughly 40 inches of drop
- Single long-hang rod: about 68-70 inches high for dresses and coats that need up to 66 inches of drop
- Shelf above the rod: keep at least 2 inches of clearance above the rod for hanger clearance
- Shelf depth: 12-16 inches works for folded clothes; 14 inches is a good all-purpose depth
- Shoe shelves: space them 7-8 inches apart, tilted or flat
Standard rod depth from the wall should be at least 12 inches so hangers clear without rubbing. If your closet is shallower than that, angled or front-facing rods are an alternative that keeps clothes accessible.
Maximizing a Small Reach-In Closet
Reach-in closets are the most common and the most wasteful when left with a single rod. The single biggest gain comes from adding a second rod in the section that holds shirts, pants, and skirts. That one move doubles your hanging capacity instantly.
Use the full height. Add a top shelf that runs the width of the closet for seasonal bins and luggage. Reserve one vertical tower of shelves or drawers for folded items and accessories, which frees the rest for hanging. On the back of the door, a mounted rack handles shoes, belts, or scarves without eating into the closet depth. These four moves alone typically add 40 to 60 percent more usable storage.
Installing a Closet Organizer Step by Step
Most systems are a satisfying weekend DIY project. The critical rule is anchoring into studs or using proper wall anchors, because a loaded closet system carries hundreds of pounds and a pull-out failure can be dangerous. Have a stud finder, a level, and a drill ready.
- Empty the closet completely and remove the old rod and shelf, patching and painting any holes now while the space is clear.
- Mark a level line for your top mounting rail or the first shelf bracket using a 4-foot level.
- Locate studs and mark them. Anchor the track or brackets into studs wherever possible; use heavy-duty toggle or wall anchors elsewhere.
- Install the top rail or upper shelf first, confirm it is dead level, then hang the vertical standards or side panels.
- Add rods, shelves, and drawers, checking level as you go, then load the closet and adjust shelf spacing to fit your items.
Do not skimp on anchors. A single shelf loaded with folded sweaters can hold 30 to 50 pounds, and a full hanging rod easily carries more. Rated drywall anchors like heavy toggles hold well where a stud is not available, but a stud is always the better bet.
Keeping It Organized Long Term
A system only helps if you maintain it, so build in habits and accessories that keep clutter from creeping back. Matching slimline velvet hangers save several inches of rod space compared with bulky plastic ones and keep clothes from sliding off. Clear bins with labels on the top shelf make seasonal storage findable.
Group like with like: all shirts together, all pants together, sorted by color if that helps you. Add a small bin or valet hook for the items you handle daily so they do not pile on a chair. Reassess twice a year, ideally at the season change, and donate what you have not worn. A closet organizer gives you the structure; a simple twice-yearly edit keeps it working. Done right, the same closet that felt cramped will hold your entire wardrobe with room to spare.
Organizing a Walk-In Versus a Reach-In
The two closet types call for different strategies, and applying reach-in logic to a walk-in wastes its potential. A walk-in has usable wall space on multiple sides, so you can run hanging on two or three walls and dedicate one section to a dresser or a bank of drawers. Leave a clear path of at least 24 to 36 inches down the middle so you can actually stand and dress.
In a walk-in, put daily-use items at eye and arm level, seasonal and rarely-used items up high, and shoes down low. If the closet is wide enough, an island with drawers adds a folding surface and hidden storage, though you need at least 10 by 10 feet to fit one comfortably. A reach-in, by contrast, has only one wall to work with, so every inch of that wall and the door back must earn its keep. The vertical stacking of double rods and a full-width top shelf is where a reach-in wins back space, while a walk-in wins through sheer wall area and dedicated zones.
Budget-Friendly Upgrades That Punch Above Their Cost
You do not need a full custom system to transform a closet. Several inexpensive additions deliver an outsized improvement, and I recommend them to nearly every client watching their budget. Start with a second tension or fixed rod to double your hanging space for well under $30.
- Add a second closet rod: doubles hanging capacity for $15 to $30
- Slimline velvet hangers: reclaim inches of rod and stop slipping, about $1 each
- Stackable shelf dividers: keep folded stacks from toppling
- Over-the-door shoe organizer: frees floor space for $10 to $25
- Clear labeled bins for the top shelf: tame seasonal storage
- Under-shelf baskets: use the dead air beneath a fixed shelf
These add-ons total well under $150 for most closets, install in an afternoon with no tools beyond a drill, and often deliver 80 percent of the benefit of a full system. If you later want a complete rebuild, none of it is wasted; the hangers, bins, and dividers carry right over. Start with the second rod and the velvet hangers, since those two changes alone visibly free up space the day you install them.
Lighting is the finishing touch most people skip, and it transforms how a closet functions. A dim reach-in makes you guess at colors and miss items pushed to the back, so add a battery-powered motion-sensor LED puck light or a plug-in LED strip along the top shelf. Hardwired options with a door-activated switch look cleanest if you are already in the walls for a remodel. Aim the light so it washes down over the hanging clothes rather than glaring in your eyes. For a walk-in, a single overhead fixture plus strip lighting under the shelves eliminates the shadows that hide shoes and folded stacks. Good light costs very little, installs in minutes, and makes even a modest organizer feel like a boutique, because you can finally see everything you own at a glance and put outfits together without dragging clothes into the bedroom to check them.