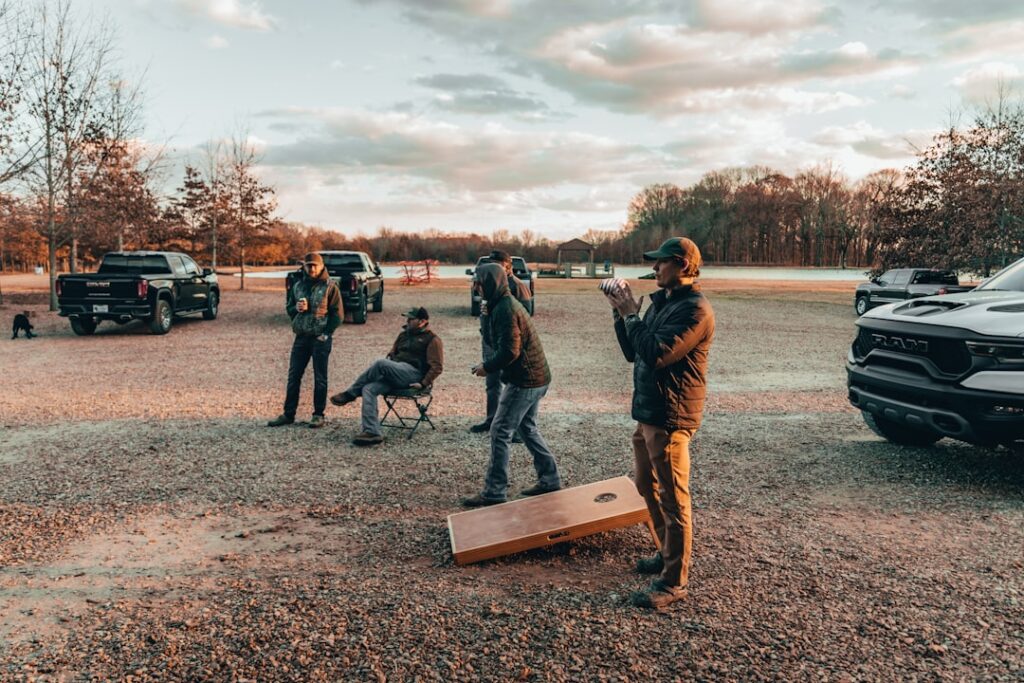
Plywood cornhole boards warp in the dew, fade in the sun, and spend most of their lives leaning in a garage. Concrete cornhole boards solve all three problems at once — cast them, set them on the lawn, and they become permanent backyard fixtures that play the same in April as they do in August. This is also one of the most satisfying intermediate concrete projects you can take on: a weekend of form-building and pouring, another weekend of finishing, and about $150 to $250 in materials for a set that would cost $800-plus from a custom fabricator. Here is the full build, including the mix that keeps the slabs from cracking and the geometry that keeps the game regulation.
Regulation Dimensions Still Apply
Concrete does not exempt you from the rulebook. An American Cornhole League regulation board is 48 inches long by 24 inches wide, with a 6-inch-diameter hole centered 9 inches from the top edge. The playing surface sits 12 inches off the ground at the back and 3 to 4 inches at the front, giving the classic ramp angle of roughly 10 degrees.
Where concrete demands a design decision is thickness and weight. A wood board weighs 15 to 25 pounds; you will not match that. Cast at 1.5 inches thick in fiber-reinforced mix, each 48 x 24 inch slab weighs roughly 130 to 145 pounds — heavy enough that two people can still reposition it, permanent enough that nobody steals it. Go to 2 inches and you are near 190 pounds per board, which is truly stay-put territory. Most builders land at 1.5 inches with GFRC-style reinforcement, which is the sweet spot of strength and manageability.
Materials and Tools
- Form stock: One sheet of 3/4-inch melamine (about $60) — its slick face casts a glassy playing surface with no finishing work.
- Mix: Countertop-grade concrete such as Quikrete Countertop Mix (about $25 per 80-lb bag; you need 3 bags per board) or a sand mix upgraded with acrylic fortifier. Add AR glass fibers or polypropylene micro-fibers (roughly $15 a bag) for crack resistance.
- Reinforcement: A ladder of 1/4-inch pencil rod or galvanized hardware cloth cut to sit mid-slab, stopping 4 inches clear of the hole.
- Hole form: A 6-inch section of 6-inch PVC pipe or a foam circle wrapped in packing tape.
- Hardware: Silicone caulk, 1-5/8-inch screws for the form, mold release (paste wax works), plastic sheeting for curing.
- Finishing: 200/400-grit diamond hand pads, penetrating concrete sealer plus a urethane or acrylic topcoat ($25 to $40).
- Legs/base: Concrete blocks and a cast wedge, welded steel stands, or pressure-treated 4×4 cradles — covered below.
Building the Form
Cut a melamine base at 48 x 24 inches, then rip side rails at the height of your slab thickness plus 3/4 inch. Screw the rails around the base from the outside so the inside cavity measures exactly 48 x 24. Run a thin bead of silicone along every interior seam and smooth it with a fingertip dipped in soapy water — every silicone flaw telegraphs into the finished edge, so take your time here.
Now the hole. Mark the centerline 12 inches from each side rail and 9 inches down from what will be the top of the board, and silicone your 6-inch PVC ring dead on that mark. Remember you are casting face-down: the melamine side of the pour becomes the playing surface, so the hole form and any logo inserts sit on the base of the form. Wax or spray release on all surfaces. If you want a recessed logo or team initials, silicone foam letters (reversed) to the base now.
Mixing and Pouring
Mix to a thick, peanut-butter consistency — countertop mixes want less water than the bag’s plump range suggests, and excess water is the number-one cause of weak, dusty slabs. Blend in fibers during the last minute of mixing. Pack the first lift about half depth, pressing mix firmly against the base and into corners, then lay in your reinforcement grid, keeping it clear of the hole and edges. Pour the second lift to the top of the rails and screed flat with a straight board.
Vibration is what separates a pro-looking slab from a pinholed one. With no vibrating table, run a random-orbit sander (no paper) against the form sides for several minutes per side, and tap the base repeatedly with a rubber mallet until air bubbles stop surfacing. Cover the pour with plastic and walk away. Strip the forms at 48 hours, but do not flip the slab solo — crack risk is highest in the first week. Keep it moist-curing under plastic for 7 days; full strength arrives around 28 days, but careful handling can start after one week.
Grinding, Sealing, and Surface Speed
Demolded off melamine, your playing face should already be smooth and semi-glossy. Ease all edges and the hole rim with a 200-grit diamond pad — a crisp concrete edge chips, a slightly rounded one lasts decades. Fill any pinholes on the face with a slurry of cement, water, and fortifier, let it cure a day, then hit the whole face lightly with 400 grit.
Sealing controls both durability and play. Cornhole bags need to slide, and here concrete has a genuine advantage: sealed concrete plays consistently, without the humidity-driven speed changes that plague wood. Apply a penetrating densifier first if your product system uses one, then two thin coats of a satin urethane concrete sealer. Satin is the right sheen — gloss plays icy-fast and glares in the sun, matte can drag. Test with real bags after curing; if the surface plays slow, an additional gloss topcoat speeds it up, and a light scuff with a gray pad slows a fast one down. Resealing every 2 to 3 years takes 20 minutes.
Legs and Setup: Three Ways to Hit 12 Inches
Folding legs make no sense on a 140-pound slab, so choose a fixed support strategy. Option one, the mason’s route: cast a pair of tapered concrete wedges (or stack solid concrete cap blocks at 12 inches rear, 4 inches front) and simply lay the board on top with construction adhesive or dabs of silicone. Option two: build pressure-treated 4×4 cradles — a short front sleeper and tall rear sleeper connected by side stringers — which lets you shim the assembly perfectly level on uneven lawn. Option three, the cleanest look: have a local welder bend a 1.5-inch square-tube steel stand for each board (about $75 to $150 per pair), prime and paint it, and bolt the slab through cast-in anchor sleeves.
Whatever the base, verify the finished geometry: 12 inches at the rear edge, front edge 3 to 4 inches, boards facing each other with 27 feet between front edges. Check for rock — a slab that teeters even slightly will click on every bag landing. Composite shims fix it in seconds.
Cost, Time, and Whether It’s Worth It
Tally for a two-board set: melamine $60, six bags of countertop mix $150, fibers and fortifier $30, sealer $35, hardware and release $20 — roughly $250 to $295, plus bases. Time investment is two weekends separated by a curing week. Compare that against $100 to $200 for decent wooden boards that live indoors, or $600 to $1,200 for fabricated concrete game boards from custom shops.
The honest verdict: if you want tournament portability, buy wood. But if you have a dedicated corner of patio or lawn and like the idea of game equipment that doubles as landscape architecture — pigment the mix charcoal, cast in a house number or family initial, grow the setup into a permanent game zone — concrete cornhole boards are one of the highest-payoff casting projects a DIYer can pour. Nothing about them wears out, and every barbecue for the next twenty years starts with someone picking up the bags.
Winter Care and Long-Term Upkeep
Permanent boards need almost nothing, but “almost” is worth spelling out. In freeze-thaw climates, the sealer is your defense: water that soaks into unsealed concrete and freezes will spall the surface, so keep the topcoat intact and renew it before it wears through rather than after. Sweep standing leaves off the slabs in fall — tannins stain sealed surfaces slowly and unsealed ones quickly. If the boards sit on wood cradles, check the ground contact points each spring and re-shim as frost heave settles out. Bags matter too: resin-filled all-weather bags shrug off dew, while corn-filled bags mold if left outside, so give them a dry bin by the back door. Should a corner ever chip from a mower strike or a dropped slab, a two-part concrete repair epoxy tinted with a drop of pigment makes the fix invisible in ten minutes. That is the entire ownership manual — compare it with sanding, repainting, and re-leveling folding wooden boards every second season, and the case for casting your set in concrete gets stronger every year the boards just sit there, level and ready.