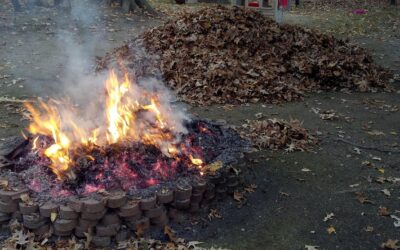
A fire pit is the highest-payoff project in backyard masonry: a weekend of work, a few hundred dollars, and you’ve built the spot everyone gravitates to for the next twenty years. A concrete fire pit — whether stacked from retaining-wall block, cast in place for a modern monolithic look, or assembled from a kit — outlasts every steel bowl at the big-box store. But concrete has one non-negotiable enemy here: direct flame. Ordinary concrete exposed to fire spalls, sometimes explosively, which is why every durable concrete pit is really a two-material system — a concrete body protecting itself behind a heat-rated liner. This guide covers the physics, the liner rule, both DIY builds step by step, kit options with prices, and code clearances.
Why Fire Spalls Concrete — and the Liner Requirement
Two mechanisms wreck unprotected concrete in a fire pit:
- Steam spalling. Concrete always holds moisture in its pores. Flame-side temperatures climb past 212°F fast, the water flashes to steam, and trapped steam pressure pops flakes — or chunks — off the hot face. Fresh or rain-soaked concrete can spall violently enough to throw fragments. This is why you never build a ring from river rocks or damp block and light it the same day.
- Paste breakdown. Above roughly 570°F, the cement paste itself begins to degrade and lose strength; repeated fires cycle the material until it cracks and crumbles. Ordinary concrete is simply not a flame-contact material.
The fix is standard and cheap: line the fire chamber so flame and radiant heat never touch the structural concrete. Acceptable liners:
- Fire brick (refractory brick), $3–$6 each — rated to 2,000°F+, laid with refractory mortar. The premium, permanent liner; a 36-inch pit takes about 25–30 bricks (~$100–$180).
- Steel fire pit ring insert, $60–$200 — a heavy-gauge steel liner ring dropped inside the block ring. The fastest solution and what most paver-kit builds use.
- Refractory cement/castable, $30–$60 per pail — troweled or cast lining for cast-in-place pits and bowl shapes.
Add a few inches of air gap or gravel between liner and concrete where the design allows, and give any pit a drainage path (gravel base or weep holes) so the chamber never holds water.
Build 1: The Block Ring (Beginner, One Afternoon)
The classic build uses trapezoidal retaining-wall blocks, which curve naturally into a ring.
- Site it legally. Most US codes require wood-burning pits at least 10–25 feet from structures, fences, and overhanging branches (check your municipality and HOA; some require permits, some ban wood-burning outright). Never build under a covered patio roof or a pergola canopy — wood smoke and low clearances don’t mix; those spaces are for gas appliances with manufacturer-listed clearances.
- Base. Mark a circle (a 36–44 inch inner diameter seats 4–6 people well), excavate 6 inches, and compact 4–6 inches of 3/4-inch gravel dead level. On an existing patio slab, verify the slab itself — pits are heavy, and heat transmitted downward is another argument for the gravel-and-liner interior.
- Stack. Lay the first course of trapezoidal blocks in a ring, leveling each block both ways — course one determines everything. Stack courses two and three with staggered joints. Three courses (12–14 inches high) is the ergonomic sweet spot for a wood pit.
- Bond. Dry-stacked rings work, but a bead of high-temp construction adhesive between courses keeps kids and firewood-tossing guests from shifting blocks.
- Line. Drop in the steel ring insert (resting on the gravel, lip over the top course) or lay a fire-brick ring against the block interior. Fill the floor with 2–3 inches of gravel or lava rock for drainage and ember bed.
- Cap (optional). Adhered concrete cap units or a poured cap ring give a finished ledge for drinks and feet.
Cost: $150–$400 — about 36–48 wall blocks at $2.50–$5 each, gravel, adhesive, and the liner.
Build 2: Cast-in-Place (Modern Monolithic)
The smooth, board-formed or slick-troweled cube and bowl shapes in design magazines are site-cast concrete:
- Form. Build inner and outer forms from melamine or plywood — a square outer box with an inner box or Sonotube creating 4–6 inch thick walls. Chamfer strips at edges prevent chipped corners.
- Reinforce and mix. A light rebar or wire cage mid-wall controls cracking. Use a high-strength (5,000 psi) mix — countertop mixes with fiber work beautifully at this scale; the ordering and additive logic is in our concrete mix guide. Consider integral color; a charcoal pigmented pit hides soot elegantly (see colored concrete for pigment behavior).
- Pour and vibrate. Fill in lifts, tapping and vibrating the forms hard — surface voids are the difference between “cast concrete” and “DIY project.”
- Cure long, strip late. Keep it wet-cured a full 7 days. Then wait: cure at least 28 days before the first fire, longer in humid climates — internal moisture is the spalling hazard, and young concrete holds the most.
- Line it. Coat the chamber with castable refractory or set a steel insert. Even a 28-day-cured monolithic pit must not take direct flame on bare concrete.
Cost: $250–$600 in materials, one weekend of forming and one pour day — plus the patience of the cure. First fires should be small and short, stepping up over several sessions to drive off remaining moisture gradually.
Kits and Pre-Made Options
| Option | Price | Notes |
|---|---|---|
| Paver-brand block kits (Pavestone, Belgard, Nantucket) | $300–$700 | Palletized blocks + adhesive + steel ring; the block build with the guesswork removed |
| Kits with cap units and fascia stone | $600–$1,500 | Finished-masonry look, still DIY-stackable |
| GFRC (glass-fiber concrete) bowls and tables, wood | $500–$1,500 | Lightweight cast bowls, refractory-lined |
| GFRC gas fire tables/bowls | $800–$3,500 | Propane/NG burners; usable under more covers per listing |
| Custom mason-built stone/concrete pit | $1,500–$6,000 | Footed, mortared, permanent |
Kits are the right call if you want the block build’s durability without sourcing components; the steel ring is included and sized. Gas conversion is the other big fork: a burner kit ($150–$400) plus a plumber’s gas line turns any of these builds smokeless — and gas pits escape many municipal wood-burning restrictions.
Safety and Code Checklist
- 10–25 ft clearance from structures per local code; 21 ft is a common middle figure — verify yours.
- Never on wood decks without a listed, insulated appliance rated for it.
- Open-burning rules: many cities allow only “recreational fires” under 3 ft diameter with a screen; burn bans override everything.
- Keep a hose or extinguisher staged; extinguish fully — soaked and stirred — before walking away.
- Seal the exterior concrete (not the fire chamber) with a breathable penetrating sealer to shed rain; never film-forming sealer anywhere heat reaches.
Sizing and Layout Around the Pit
Get the whole zone right, not just the ring. Inner diameter of 36–44 inches suits a family; beyond 48 inches, wood consumption climbs fast and conversation has to shout across the flames. Around the pit, plan a non-combustible apron of at least 3 feet on all sides — gravel, pavers, or a concrete pad — both for ember safety and so chairs sit level. Total circle for pit plus seating: 15–18 feet in diameter, which is worth chalking out on the lawn before you commit. Prevailing wind matters more than people expect; site the seating’s prime side upwind so smoke drifts away from the bench, and leave one open walk-in gap in any surrounding seat wall. If you’re building a seat wall, 18–20 inches tall and 12+ inches deep from the same block line is the natural companion project, set 4–5 feet back from the pit’s inner edge.
FAQ
Will a concrete fire pit crack?
An unlined one, yes — guaranteed, eventually, and possibly dramatically. Lined with fire brick, castable refractory, or a steel ring, the structural concrete stays below damaging temperatures and lasts decades. Hairline shrinkage cracks in cast pits are cosmetic and normal.
Can I pour concrete and use the fire pit the same weekend?
No. Cast concrete needs 28+ days before first fire; even a dry-stacked block pit built from rain-soaked blocks should dry out for a few days. Moisture is the explosive-spalling ingredient.
What do I put in the bottom of a concrete fire pit?
2–3 inches of clean gravel or lava rock over a draining base. It protects the floor, drains rain, and gives embers an air path. Skip sand alone — it holds water against the concrete.
Are gas fire pits better than wood in a concrete build?
Different animals: gas lights instantly, produces no sparks or smoke, satisfies most burn ordinances, and is gentler on the structure; wood is cheaper to run and gives the real crackle. The same lined concrete body handles either — build the shell, then choose the flame.