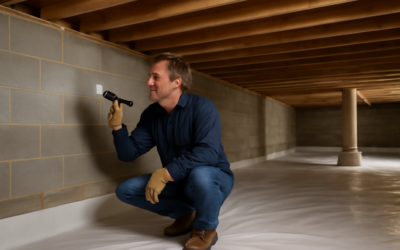
For decades, builders were told to vent crawl spaces so moisture could escape, and in most of the country that advice did the opposite. A conditioned crawl space flips the old logic: instead of letting humid outdoor air pour through foundation vents, you seal the space, insulate the walls, and treat it as a small part of the home’s conditioned envelope. The result is usually drier framing, warmer floors above, and ductwork that stops losing heat to a cold, damp cavity. If your hardwood is cupping, your bathroom floor feels icy in January, or the space under the house smells musty, this is the upgrade worth understanding first.
- What a Conditioned Crawl Space Actually Is
- Why Vented Crawl Spaces Fail in Humid Climates
- Code Requirements You Need to Meet
- What It Costs
- Step-by-Step: How the Work Gets Done
- Dehumidifier vs. Supply Air vs. Exhaust Fan
- How a Conditioned Crawl Space Helps the Floors Above
- Common Mistakes to Avoid
- Is It Right for Your Home?
- Frequently Asked Questions
What a Conditioned Crawl Space Actually Is
A conditioned crawl space is an enclosed area under the first floor that is air-sealed from the outdoors, insulated at the perimeter walls instead of the floor joists, covered with a continuous vapor retarder on the ground, and supplied with a small amount of conditioned air or dehumidification. The International Residential Code (IRC section R408.3) recognizes it as an alternative to a vented crawl space, provided a few specific conditions are met.
It helps to separate three terms that often get blurred together:
- Vented crawl space: open foundation vents, insulation between the floor joists, and bare or lightly covered dirt. This is the traditional approach.
- Encapsulated crawl space: a marketing term for a space lined with a heavy plastic liner, usually taped up the walls, with vents closed. It may or may not be fully conditioned.
- Conditioned crawl space: an encapsulated space that also meets code for moisture control, either through a supply air register, an exhaust fan, or a dedicated dehumidifier, with insulation on the walls.
In short, all conditioned crawl spaces are encapsulated, but not every encapsulated crawl space is truly conditioned.
Why Vented Crawl Spaces Fail in Humid Climates
Summer air in much of the U.S. carries a lot of water. On an 88°F July afternoon in Georgia with a dew point of 72°F, that air slides through foundation vents and meets joists, ducts, and subfloor that sit closer to ground temperature, often 65°F to 70°F. Any surface below the dew point collects condensation. Wood moisture content climbs from a healthy 10 to 12 percent into the high teens or low 20s, which is the range where mold grows and wood-destroying fungi get started.
You see the consequences upstairs. Solid hardwood cups as the bottom face absorbs moisture faster than the top. Fiberglass batts between joists soak up water, sag, and fall down. Air ducts sweat and drip. Building scientists have documented this pattern for over twenty years, and it is the main reason conditioned designs moved into code. Cold-climate homes see a related problem in winter: frigid air under the house chills plumbing lines and floors, forcing the furnace to work harder.
Code Requirements You Need to Meet
Local codes vary, but most jurisdictions follow the IRC. For an unvented, conditioned crawl space, expect these requirements:
- Ground vapor retarder: the exposed earth must be covered with a Class I vapor retarder (polyethylene or similar). Seams overlap at least 6 inches and are sealed or taped, and the edges extend at least 6 inches up the foundation walls, attached and sealed.
- Wall insulation: the perimeter walls are insulated to the level your climate zone requires, typically R-10 continuous or R-13 cavity in zones 3 and 4, and R-15 or higher in colder zones.
- One moisture-control method: a continuously operating mechanical exhaust of 1 cubic foot per minute (cfm) per 50 sq ft of floor area; a conditioned air supply at that same 1 cfm per 50 sq ft rate; or a dehumidifier sized at 70 pints per day per 1,000 sq ft (a provision added in the 2021 IRC).
- Termite inspection gap: in areas with heavy termite pressure, codes often require a 3-inch inspection strip at the top of the foundation wall left uncovered by foam.
- Ignition barrier: exposed foam plastic insulation usually needs an ignition barrier or must be a product rated for exposed use in crawl spaces.
Before you start, call your building department. Some counties want a permit for closing foundation vents or adding a supply duct, and a few jurisdictions in dry western climates discourage sealing altogether.
What It Costs
Pricing depends mostly on square footage, how much cleanup the space needs, and whether water is entering from outside. Typical ranges for a 1,500 sq ft footprint:
| Component | Typical Cost |
|---|---|
| Debris and old insulation removal | $1,000 to $3,000 |
| 12- to 20-mil liner, taped and fastened | $2 to $4 per sq ft |
| Rigid foam on walls and rim joist | $2,000 to $5,000 |
| Crawl space dehumidifier | $1,200 to $2,500 installed |
| Sump pump and drain tile (if needed) | $1,500 to $5,000 |
Most homeowners land between $5,000 and $15,000 total for a professional job. A handy DIYer with a clean, dry space can often finish the liner and foam work for $2,500 to $4,000 in materials, though working on your back in a 24-inch-tall crawl space for several weekends is not glamorous. Energy savings of 10 to 20 percent on heating and cooling are commonly reported, and the payback grows when ducts or an air handler live under the house.
Step-by-Step: How the Work Gets Done
1. Fix water problems first
Sealing a crawl space that floods is a recipe for a swimming pool under your kitchen. Walk the exterior and confirm gutters discharge at least 5 to 10 feet from the foundation and that soil slopes away at roughly 6 inches over the first 10 feet. If you see standing water, efflorescence, or high water marks on the block, add interior drain tile and a sump pump before anything else.
2. Clean out the space
Remove old fiberglass batts, wood scraps, and construction debris. Treat any active mold on joists with an EPA-registered fungicide and allow the framing to dry below about 16 percent moisture content, verified with a pin meter.
3. Seal the vents and penetrations
Block foundation vents with rigid foam cut to fit and sealed with canned foam, or install airtight vent covers. Seal gaps around plumbing, electrical, and dryer-vent penetrations. The rim joist, the band of lumber sitting on the foundation, is one of the leakiest areas in any house; cover it with 2 inches of closed-cell spray foam or cut-and-cobbled rigid foam sealed at the edges.
4. Insulate the walls
Fasten foil-faced polyiso or XPS foam boards to the foundation walls with mechanical fasteners and construction adhesive. Tape the seams. Leave the termite inspection strip where required.
5. Lay the ground liner
Roll out a reinforced polyethylene liner, ideally 12 to 20 mil, across the floor. Overlap seams by 12 inches and tape them, run the liner up the walls, and attach it with termination bar. Wrap piers and seal around them. A thicker liner resists tears from knees, tools, and future service visits.
6. Add moisture control
Install your chosen method: a crawl space dehumidifier with a condensate line routed to a sump or outside, a small supply register tapped off the HVAC trunk, or an exhaust fan. Many contractors pair a supply register with a dehumidifier for belt-and-suspenders control.
Dehumidifier vs. Supply Air vs. Exhaust Fan
Each moisture-control option has trade-offs. A dedicated dehumidifier (units like the Santa Fe Compact70 or AprilAire E070 are common choices) works year-round, controls humidity precisely, and runs regardless of whether your heat pump is cycling. Expect $15 to $30 a month in electricity during humid months. A supply air duct is inexpensive, often under $300, but only delivers dry air while the air handler runs, which can be limited in spring and fall. An exhaust fan depressurizes the crawl space and pulls air from the house into it, which is useful where radon or soil gases are a concern, yet it can draw humid outside air into the home in muggy regions. For most humid-climate homes, a dehumidifier set to 55 percent relative humidity delivers the most reliable results.
How a Conditioned Crawl Space Helps the Floors Above
This is where the investment shows up in daily life. With the space held around 50 to 55 percent humidity and within a few degrees of indoor temperature, the subfloor stabilizes at a moisture content close to the living space. That means solid hardwood is far less prone to cupping and gapping, engineered planks stay flat, and tile over a plywood subfloor is less likely to crack grout from seasonal wood movement.
Floor comfort improves too. In a vented crawl space, the underside of the subfloor may sit near 40°F on a winter night. Once the space is conditioned, floor surfaces often read 8°F to 12°F warmer by infrared thermometer. If you plan to install new flooring, schedule it after the crawl space work is finished and the subfloor has acclimated for at least two weeks. Hardwood installers typically want the subfloor within 2 to 4 percentage points of the new flooring’s moisture content.
Common Mistakes to Avoid
- Sealing without drainage: trapping water inside a sealed space causes faster damage than venting ever did.
- Leaving fiberglass in the joists: once walls are insulated, floor batts are redundant and tend to trap moisture. Remove them.
- Skipping the rim joist: leaving the band joist uninsulated leaves a major air leak and a cold spot.
- Thin liner: 6-mil plastic tears easily. Choose 12 mil or heavier if anyone will crawl on it.
- No monitoring: install a $20 wireless hygrometer so you can check humidity from inside the house.
- Ignoring combustion appliances: a gas furnace or water heater in the crawl space needs sealed combustion or dedicated combustion air once vents are closed. Have a licensed HVAC tech review it.
Is It Right for Your Home?
A conditioned crawl space makes the most sense in humid and mixed climates (roughly the Southeast, Mid-Atlantic, Midwest, and Gulf Coast), in homes with HVAC equipment or ducts under the floor, and anywhere you plan to install moisture-sensitive flooring such as solid hardwood. In very dry climates like Phoenix or Las Vegas, a well-built vented crawl space can perform acceptably, and the payoff is smaller. Homes in radon zones should combine the work with a sub-slab or sub-membrane depressurization system, which a conditioned design accommodates easily.
Get at least three bids, ask each contractor how they will meet IRC R408.3, and request the liner thickness, foam R-value, and dehumidifier model in writing. A good installer will also check your grading and gutters before quoting. Done right, the upgrade quietly protects everything built on top of it, from the joists to the floor you walk on every morning.
Frequently Asked Questions
Does a conditioned crawl space need a dehumidifier?
Not always. Code allows a supply air register or an exhaust fan instead. In humid climates, though, a dehumidifier is the most dependable way to hold humidity near 55 percent all year.
How long does a conditioned crawl space conversion take?
A professional crew typically finishes a 1,500 sq ft space in two to four days. Adding drain tile and a sump pump can extend the job by one or two days.
Will closing my foundation vents cause mold?
Closing vents alone can make things worse. Mold risk drops only when vents are sealed as part of a complete system with a ground liner, wall insulation, and active moisture control.
Can I still store items in a conditioned crawl space?
Yes, and many owners do. Keep items in plastic bins on the liner, avoid cardboard, and lay a scrap of plywood where you kneel to protect the liner from punctures.