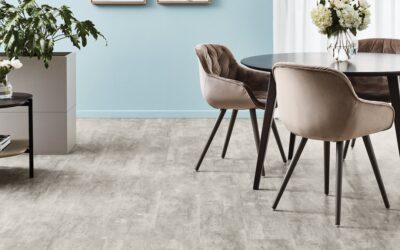
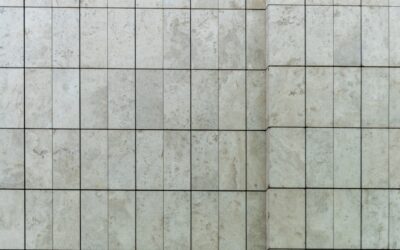
COREtec invented the rigid-core waterproof flooring category in 2012, and the brand still sets the bar for what luxury vinyl can be. Most homeowners know COREtec tile as the wood-look plank flooring, but the company also makes a tile-format version that mimics natural stone, ceramic, and concrete in 12×24 and 18×24 inch tiles. The result looks remarkably like real tile from standing height, costs about half as much, and lets you skip the thinset and grout work entirely.
Part of our Tile & Grout guide — explore the full guide →
This guide walks through how COREtec tile is built, the collections worth your attention, real-world performance, and where it fits versus actual ceramic or porcelain tile.
What Makes COREtec Tile Different
COREtec is part of the Shaw Industries family but operates as its own brand with proprietary construction. The flagship innovation is the rigid SPC (stone plastic composite) core, which is denser and more dimensionally stable than the WPC core that competitors used in early rigid LVT. The tile-format products use the same core technology but with stone-look and concrete-look visuals printed on the decorative layer.
A typical COREtec tile is built in five layers from top to bottom:
- Ceramic Bead 0.5mm wear layer (proprietary scratch-resistant coating)
- High-resolution stone or concrete-look print film
- SPC core, approximately 5mm thick, with click-lock edges
- Pre-attached cork backing, 1mm, for sound absorption and underfoot comfort
- Bevel-edged tile borders to mimic grout lines visually
Total thickness lands at 6.5-7mm depending on the line. The pre-attached cork is a meaningful upgrade — you do not buy or install separate underlayment, and the floor sounds and feels softer than competitor LVT under hard shoes.
Collections Worth Knowing
COREtec sells through dealers (LL Flooring, Carpet One, independent flooring stores) and the line-up shifts annually. The tile-format collections that have been steady performers:
- COREtec Stone — 18×24 inch porcelain-look tiles in marble, slate, and travertine visuals. Around $5-$7/sq ft material.
- COREtec Plus Enhanced Tile — 12×24 inch concrete and stone looks, ideal for kitchens and bathrooms. $4-$6/sq ft material.
- COREtec Pro Plus Enhanced — commercial-grade, thicker 0.7mm wear layer, suitable for retail and office. $5-$8/sq ft.
- COREtec Soft Step Tile — 24×24 inch large-format tiles with extra cushioning underlayment. Newer line, $6-$9/sq ft.
Dealer pricing varies — expect to pay $1-$2 per sq ft over published material cost at retail, plus install. Always ask about closeout deals on discontinued patterns; they run 30-50% off.
Where It Beats Real Tile
The case for COREtec tile over ceramic or porcelain comes down to four practical advantages:
Installation cost. Real tile install runs $7-$12 per sq ft labor. Floating COREtec installs at $2-$4 per sq ft. On a 400 sq ft kitchen, the labor savings alone hit $2,000.
Subfloor flexibility. Ceramic tile demands a perfectly flat, uncracked, structurally rigid substrate. Crack the slab or flex the subfloor and your tile cracks. COREtec floats over plywood, vinyl, old tile, even minor unevenness — the SPC core bridges small variations.
Underfoot comfort. Real tile is cold and unforgiving. The cork backing and resilient core of COREtec tile measure 5-10°F warmer than porcelain at the same room temperature, and dropped glasses sometimes survive.
DIY achievability. An average homeowner can install 200 sq ft of COREtec in a weekend. Real tile takes a week and a learned skill set with a wet saw, thinset, grout, and tile cutters.
Where Real Tile Still Wins
Be honest about the limits. COREtec tile is plastic that looks like stone. Up close, it does not have the depth, weight, or temperature of real ceramic. It cannot survive a steam mop on high heat. The wear layer eventually scratches if dragged with grit — porcelain does not. And resale value in luxury markets ($1M+ homes) still favors actual stone or porcelain in primary kitchens and baths.
For permanent, premium installations in rooms where you want the surface to last 50 years and the budget allows, real porcelain is the better answer. For everywhere else, COREtec tile delivers 90% of the look at half the cost.
Installation Walkthrough
COREtec tile installs as a floating click-lock floor — no glue, no nails. The process:
- Acclimate the boxes in the install room for 48 hours at 65-85°F
- Confirm subfloor flatness within 3/16 inch over 10 feet, fill low spots
- Leave 1/4 inch expansion gap at all walls, cabinets, and fixed obstacles
- Stagger end joints by at least 6 inches between rows
- For tile-format, alternate the long axis to mimic a stagger pattern
- Use a tapping block and pull bar at end-of-row tiles to seat the click joint
- Cover the expansion gap with quarter-round or shoe molding, never silicone
The cork backing means no separate underlayment unless you are over a concrete slab in a humid climate, where you add 6-mil polyethylene as a vapor barrier.
Warranty and Real-World Lifespan
COREtec carries a Lifetime Residential warranty and 10-15 year light commercial warranty depending on the line. The fine print covers manufacturing defects, not wear. In actual residential use, expect 15-25 years before the wear layer shows enough scuff to consider replacement. Pets with long nails are the leading cause of premature wear on the surface.
For most homeowners, COREtec tile is the right answer for kitchens, bathrooms, mudrooms, basements, and laundry rooms — anywhere you would otherwise install ceramic but want easier installation, more comfort, and a meaningful cost saving.
Prefer to explore on your own?
See how new flooring looks in your actual room in seconds — free, no signup.
Try the free Floor Studio →