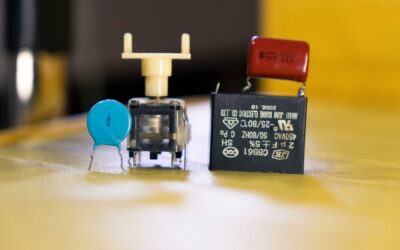
A dishwasher that suddenly goes dark, refuses to start, or leaves dishes cold and wet often has a failed safety part hiding under the tub. Dishwasher thermostat replacement is one of the most approachable appliance repairs a homeowner can take on: the parts usually cost $10 to $50, and the job takes about an hour with basic hand tools. The catch is that these parts rarely fail on their own.
Here is the short version. Most dishwashers use one or both of two heat-safety devices: a hi-limit thermostat that cuts power to the heating element if water or air gets too hot, and a thermal fuse that permanently opens if temperatures spike past a set point. Both live near the heating element or on the control board, and both can be checked for continuity with a multimeter once the dishwasher is disconnected from power.
- What a Dishwasher Thermostat Replacement Actually Involves
- Symptoms That Point to a Failed Thermostat or Fuse
- Tools and Parts You Will Need
- Step-by-Step: Testing and Replacing the Hi-Limit Thermostat and Thermal Fuse
- Why a Blown Fuse Points to a Deeper Fault
- Typical Costs: DIY vs. Professional
- Troubleshooting After the Swap
- When to Call a Pro
- Frequently Asked Questions
If either part tests open, replace it with the exact part number for your model. But before you button everything back up, find out why it tripped. A blown thermal fuse almost always points to a deeper fault, and skipping that step is how people end up replacing the same fuse three times.
What a Dishwasher Thermostat Replacement Actually Involves
The term “thermostat” covers a few different parts depending on your dishwasher’s age and design. Knowing which one you have saves you from ordering the wrong component.
Hi-limit thermostat
This is a small disc-shaped sensor, typically about the size of a quarter, clipped to the underside of the tub near the heating element. It has two spade terminals. When the tub temperature exceeds its rated limit, often somewhere in the 160°F to 200°F range depending on the model, it opens and cuts power to the heater. Many are self-resetting; some older designs have a manual reset button.
Cycling or operating thermostat
Older mechanical-timer dishwashers often have a second disc thermostat that tells the timer when the water has reached washing or drying temperature. If it fails, the dishwasher may pause indefinitely waiting for heat, or never heat at all. Newer models replace this with a thermistor, an electronic temperature sensor wired to the control board.
Thermal fuse
A thermal fuse is a one-time safety device. Once it opens, it does not reset, and it must be replaced. On some models it is a standalone part in the wiring near the heating element; on others it is built into the control board, which means a blown fuse requires a new board. Dishwasher fuse replacement is therefore either a quick fix or an expensive one depending on your brand.
Symptoms That Point to a Failed Thermostat or Fuse
- Completely dead dishwasher with no lights or sounds, even though the breaker and outlet are fine. This is the classic blown-thermal-fuse symptom on models where the fuse protects the control board.
- Dishes come out wet and cool because the heating element never energizes. An open hi-limit thermostat is a common cause.
- Cycle stalls partway through and never advances, typical of a failed cycling thermostat on mechanical-timer machines.
- Error codes referencing heating or temperature faults on electronic models.
- A burning smell or scorched wiring near the element, which indicates a serious fault that likely also tripped a safety device.
Tools and Parts You Will Need
- Multimeter with continuity or resistance (ohms) setting
- Non-contact voltage tester
- Phillips screwdriver and 1/4-inch and 5/16-inch nut drivers
- Needle-nose pliers for spade connectors
- Towels and a shallow pan for residual water
- Flashlight or headlamp
- Smartphone to photograph wire positions
- Replacement dishwasher thermal fuse or hi-limit thermostat matched to your model number
Your model number is usually printed on a sticker along the edge of the door or on the side of the tub opening. Enter it exactly when ordering. Temperature ratings and terminal styles vary, and a “close enough” part defeats the purpose of a safety device.
Step-by-Step: Testing and Replacing the Hi-Limit Thermostat and Thermal Fuse
Safety first: Unplug the dishwasher or switch off its breaker before removing any panel. For hardwired units, turn off the breaker and confirm power is off with a non-contact voltage tester at the junction box before touching any wiring. All tests below are continuity or resistance checks performed with power disconnected. Never test parts while the dishwasher is energized.
- Disconnect power and water. Switch off the breaker, verify with the voltage tester, and close the hot-water supply valve under the sink.
- Remove the lower access panel. The kick plate and the insulated panel behind it are held by two to four screws along the bottom of the door. Set the screws aside.
- Locate the parts. With a flashlight, look under the tub near the center, where the heating element terminals poke through. The hi-limit thermostat is usually clipped to the tub bottom nearby. A standalone thermal fuse is often inline in the heater wiring or mounted in a small bracket. On some models, you need to slide the dishwasher out of the cabinet to reach the parts from below or behind.
- Photograph the wiring. Take a clear picture of every wire connection before disconnecting anything.
- Disconnect and test. Pull the wires off the thermostat terminals with needle-nose pliers (grip the connector, not the wire). Set the multimeter to continuity or the lowest ohms range and touch one probe to each terminal. At room temperature, a good hi-limit thermostat and a good thermal fuse should both show continuity, reading near zero ohms. An open reading (no continuity) means the part has failed.
- Test the heating element while you are there. Disconnect its terminals and check resistance across them. Most elements read somewhere around 10 to 30 ohms; check your model’s service sheet for the exact range. An open reading means a failed element. Also check for continuity from each terminal to the metal tub; any continuity there means the element is shorted to ground.
- Remove the old part. Hi-limit thermostats typically unclip from a bracket or twist out of a retaining ring. Thermal fuses may be held by a screw, a clip, or crimp connectors.
- Install the new part. Seat it exactly where the old one sat, with full contact against the tub surface if it is a disc thermostat. Reconnect the wires according to your photo. Make sure spade connectors slide on snugly; loose terminals create heat and can blow the new part.
- Reassemble and restore power. Replace the access panel and kick plate, open the water valve, restore the breaker, and run a normal cycle. Check for leaks under the unit during the first fill.
Why a Blown Fuse Points to a Deeper Fault
Thermal fuses and hi-limit thermostats exist to stop something else from overheating. When one fails open, treat it like a smoke alarm going off: the alarm is not the problem. Before you consider the job finished, look for these root causes:
- Shorted or grounded heating element. An element that draws too much current or shorts to the tub can overheat the surrounding area fast. The continuity-to-ground test in step 6 catches this.
- Stuck heater relay on the control board. If the board keeps the element energized after it should shut off, temperatures climb until the safety device trips. Look for scorched spots or discolored relay components on the board.
- Heating with no water. A failed inlet valve, clogged fill screen, or faulty float switch can leave the element running in an empty or nearly empty tub. Watch a cycle and confirm the tub fills to just below the heating element level.
- Loose or burned wire connections. A corroded spade terminal generates its own heat. Replace any browned or brittle connectors.
- Circulation pump failure. Without water moving across the element, heat concentrates in one spot.
If you cannot find an obvious root cause and the new fuse blows again within a few cycles, stop. At that point, have a qualified appliance technician diagnose the control board and heating circuit.
Typical Costs: DIY vs. Professional
| Repair | DIY Parts Cost | Pro Repair (Typical Range) |
|---|---|---|
| Hi-limit thermostat | $10 to $40 | $120 to $250 |
| Standalone thermal fuse | $8 to $35 | $120 to $220 |
| Heating element | $30 to $90 | $150 to $300 |
| Control board (fuse built in) | $100 to $300 | $250 to $500 |
Prices vary widely by brand and region, so treat these as general ranges. If your dishwasher is more than 10 years old and needs a new control board plus an element, compare that total against the price of a new mid-range dishwasher before committing.
Troubleshooting After the Swap
Still dead after a new thermal fuse? Recheck the door latch switch, which prevents the machine from starting if the door does not register as closed, and confirm the outlet or junction box actually has power once the breaker is restored. If the unit runs but dishes stay wet, the new hi-limit may be fine while the element or heater relay is at fault. Rinse aid also matters on modern low-heat drying systems; an empty dispenser leaves dishes damp even with a perfectly healthy heater.
If the new part fails within days, you almost certainly missed the root cause. Revisit the element, board, and fill level checks above before buying another fuse.
When to Call a Pro
Call a licensed appliance technician if you see burned wiring or melted connectors, if the control board shows scorch marks, if your dishwasher is hardwired and you are not comfortable working at the junction box, or if the fuse is integrated into the board and the model requires programming after replacement. Also call if a new fuse or thermostat blows a second time. Repeated trips mean an overheating problem that deserves proper diagnosis.
Frequently Asked Questions
Where is the thermal fuse on a dishwasher?
On many models it sits under the tub near the heating element terminals, behind the lower kick plate and access panel. On others, it is mounted on or built into the electronic control board inside the door. Check your model’s parts diagram to confirm the exact location before you start.
Can I bypass a blown dishwasher thermal fuse?
No. The thermal fuse is a safety device designed to prevent overheating and fire. Bypassing it removes that protection and leaves the underlying fault unaddressed. Replace it with the correct part and find out why it blew.
How do I know if my dishwasher hi-limit thermostat is bad?
With the dishwasher unplugged or the breaker off, disconnect the thermostat’s wires and test across its terminals with a multimeter at room temperature. A good thermostat shows continuity. No continuity means it has failed open and needs replacement.
Is dishwasher fuse replacement a DIY job?
For most homeowners, yes, when the fuse is a standalone part. It typically takes under an hour with a screwdriver, nut driver, and multimeter. If the fuse is built into the control board, the fix becomes a board replacement, which costs more but is still a plug-and-play swap on many models.
Why does my dishwasher keep blowing thermal fuses?
Repeated failures almost always mean something is overheating: a shorted heating element, a stuck heater relay on the control board, low water fill, or a loose, burned wire connection. Fix the root cause first, or the replacement fuse will fail too.