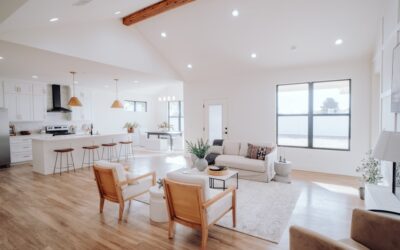
The difference between a cove that glows and one that looks like a strip of tape on the wall is about two inches of wood. DIY cove lighting works by mounting a shallow ledge or valance a few inches below the ceiling, setting an LED strip on top facing up, and letting the light wash across the ceiling while the lip of the ledge hides the strip from view. With standard trim stock, a miter saw, a plug-in or hardwired driver and a weekend, you can build a clean ceiling cove that looks custom.
Success rests on three numbers: how far the ledge sits below the ceiling, how tall its front lip is, and how far it projects from the wall. Get those right and you will never see a hot spot or a single LED dot from anywhere in the room.
Planning Your DIY Cove Lighting Profile
A good cove lighting detail starts on paper. Sketch a cross section of the wall and ceiling, then place the strip and the ledge on it. For most 8 to 9 foot ceilings, these dimensions work well:
- Gap from ceiling to strip: 8 to 12 inches. Less than about 6 inches creates a hard, bright band near the wall; more spreads the light softer and farther.
- Ledge depth (projection from wall): 4 to 6 inches, enough to hold the strip back from the lip and keep a smooth wash.
- Front lip height: at least 1/2 inch taller than the strip and its mounting channel, typically 2 to 3 inches total, so the LEDs are hidden from a seated or standing viewer.
- Strip position: set the strip near the back of the ledge, about 1 to 2 inches from the wall, aimed up or tilted slightly toward the room.
Check sightlines before cutting anything. Stand at the far side of the room, and sit on a couch, then hold a scrap board at the planned height. If you can see over the lip to the top of the ledge, raise the lip or move the strip back. That simple test is the heart of a reliable ceiling cove light detail.
Choosing the LED Strip and Driver
Cove lighting is a wash, so dot-free light matters. Choose a strip with high LED density (60 or more per foot) or a chip-on-board strip, a CRI of 90 or more, and a warm to neutral white between 2700K and 4000K. A tunable white or RGBWW strip lets you shift color temperature through the day. Plan on roughly 3 to 5 watts per foot for a soft ambient glow.
Most cove strips run on low-voltage 24V DC, which handles longer runs with less voltage drop than 12V. The driver (power supply) converts household line voltage (120V) to that low voltage. Pick a UL-listed driver sized to the total strip load with at least 20 percent headroom. A 30 foot cove at 4 watts per foot draws 120 watts, so a 150 watt driver is a sensible choice. If you want the cove on a wall dimmer, buy a dimmable driver rated for your dimmer type.
Tools and Materials
- Compound miter saw for accurate inside and outside corner cuts
- 1×6 or 1×4 poplar or primed pine for the shelf, plus 1×3 or crown-style trim for the lip
- Stud finder, level, chalk line and tape measure
- Wood glue, 2 1/2 inch trim or construction screws, brad nailer and 1 1/2 inch brads
- Small metal or wood brackets every 16 inches for long runs
- LED strip, aluminum channel, connectors and a properly sized UL-listed driver
- Wood filler, caulk, primer and paint
- Sturdy step ladder, safety glasses and dust mask
The compound miter saw is the tool that makes or breaks the look. Clean 45 degree miters on the lip at every corner keep the cove reading as one continuous line. Ceiling paint or a matte white inside the ledge reflects light better than wood tone.
Step-by-Step: Building the Cove Ledge
- Mark the line. Measure down from the ceiling to the bottom of the planned ledge at each corner, then snap a level chalk line around the room. Ceilings are rarely flat, so follow a level line rather than measuring from the ceiling everywhere.
- Locate studs along the line and mark them. Every ledge section should anchor into at least two studs.
- Build the ledge sections on the floor. Glue and screw a 1×2 or 1×3 cleat to the back edge of the shelf board, then glue and brad-nail the lip to the front edge so it stands up past the shelf by the height you planned.
- Cut corners on the compound miter saw. Miter the lip at 45 degrees for inside and outside corners, and butt the shelf boards for strength.
- Mount the sections by screwing the cleat into studs along the chalk line. Add brackets underneath every 16 inches on long spans so the shelf cannot sag.
- Drill a wire passage where the driver will connect, either through the shelf to a hidden supply or along the wall to an outlet.
- Finish. Fill nail holes, caulk the joints between ledge and wall, prime and paint. A matte white on top of the shelf and the back wall gives the brightest, most even glow.
- Install the strip. Mount it in an aluminum channel screwed to the shelf, tilted slightly toward the room if the cove is deep. Leave the strip flat and uncoiled, and keep connectors accessible.
- Connect and test. Wire the strip to the driver, plug it in or connect the hardwired circuit as described in the next section, and walk the room checking for hot spots and dark corners.
Where to Put the Driver
Drivers produce heat and occasionally fail, so they need ventilation and access. Good locations include a ventilated cabinet, a closet near the cove, or a junction box inside the ledge cavity if it is roomy enough and the driver is rated for enclosed use. Never bury a driver behind drywall or in insulation where you cannot reach it.
For long coves, run power to the middle of the strip or feed both ends to avoid dimming at the far end. A 24V system typically tolerates around 30 to 33 feet from one feed before color and brightness start to drift. Keep low-voltage wiring separate from line-voltage wiring, and use connectors rated for the strip.
Electrical, Fire and Ladder Safety
A plug-in driver into a nearby outlet is the simplest DIY route. Plug it directly into a wall outlet, not an extension cord or power strip. If you plan to hardwire the driver to a switch or junction box, turn off the breaker and confirm power is off with a non-contact voltage tester before touching anything, and never work on powered wires. Adding a new switch, outlet or circuit should be handled by a licensed electrician, and many towns require a permit.
For fire safety, never coil, bunch or cover the strip, and keep it and the driver away from heat sources such as recessed cans or attic hatches. Aluminum channels help pull heat away from the LEDs. Use only UL-listed drivers and strips.
Most of this job happens at the top of a ladder. Use a sturdy step ladder rated for your weight, keep three points of contact, never stand on the top cap, and move the ladder rather than leaning out. Have a helper hold long ledge sections in place while you drive the first screws. For two-story rooms or stairwells, hire a pro with scaffolding.
Troubleshooting a Cove That Looks Wrong
- Visible dots on the ceiling: the strip is too close to the ceiling or the LED density is too low. Lower the ledge, add a diffuser or switch to a denser strip.
- Bright band near the wall: tilt the channel toward the room or increase the ceiling gap.
- Dark corners: the strip stops short of the corners. Use corner connectors or overlap strips slightly.
- Dimming at the far end: add a second power feed or move the driver connection to the middle.
- You can see the strip from the couch: raise the lip or set the strip farther back on the shelf.
Cost Ranges and When to Hire a Pro
Lumber, trim and paint for a typical living room cove generally cost a few hundred dollars. A quality high-CRI strip, aluminum channel and properly sized driver often cost about the same again, so a full DIY project usually lands in the mid hundreds. Hiring a carpenter and electrician for the same room can run into the low thousands, more for drywall soffits or complex ceiling shapes.
Bring in a pro if you want the cove on a new wall switch or dimmer, if the ceiling is vaulted or above a stairwell, or if you would rather build the cove from drywall and framing than trim stock. For flat ceilings and a plug-in driver, diy cove lighting is one of the highest-impact lighting upgrades a careful homeowner can handle.
Frequently Asked Questions
How far below the ceiling should cove lighting be?
Mount the strip about 8 to 12 inches below the ceiling for a soft, even wash. Closer than 6 inches tends to create a hard bright band.
How tall should the lip of a cove ledge be?
Make the lip at least 1/2 inch taller than the strip and channel, usually 2 to 3 inches total, so the LEDs stay hidden from normal viewing positions.
Can I build cove lighting without hardwiring?
Yes. A plug-in driver connected to a nearby wall outlet, with a remote or smart controller, avoids any hardwiring. Route the low-voltage wire neatly along the wall or inside the ledge.
What color temperature is best for cove lighting?
Warm white between 2700K and 3000K suits living rooms and bedrooms. Neutral 3500K to 4000K works in kitchens and offices. Tunable white strips let you change it.
What wood is best for a cove ledge?
Poplar or primed finger-jointed pine is straight, easy to paint and inexpensive. MDF works for painted interiors but is heavier and should be well supported.