
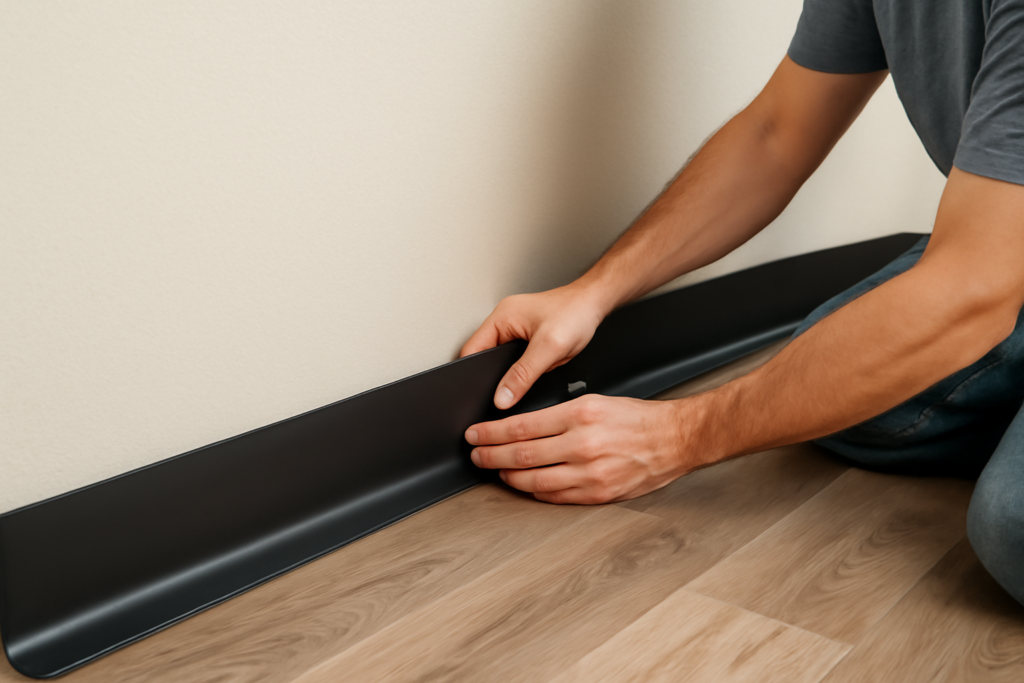
Walk into almost any school, office, or hospital and look at the bottom of the walls. That smooth, slightly curved strip running along the floor line is vinyl cove base, and it does far more than look tidy. This flexible wall base protects drywall from mops, vacuums, and scuffs while sealing the gap between wall and floor against dirt and moisture. It is affordable, durable, and well within reach for a DIYer. This guide covers the types, materials, and a clean installation process.
What Vinyl Cove Base Is
Cove base is a strip of flexible material, usually 4 to 6 inches tall, installed at the base of a wall where it meets the floor. Commercial vinyl base comes in two main forms: thermoplastic rubber (TP) and true vinyl (PVC). Both are tough, washable, and resistant to the daily abuse of a busy space. The term cove specifically refers to the profile with a curved lip at the bottom, designed to sit over the flooring and ease the transition. A straight or toeless profile sits flat for carpet and other installations.
Cove vs. Straight Base Profiles
Choosing the right profile depends on your flooring type.
- Cove (toe) base has a small flared lip at the bottom that rests on hard flooring like vinyl, tile, or sealed concrete. The toe helps direct water away from the wall and bridges minor gaps.
- Straight (toeless) base sits flush to the floor with no lip, which is the right choice over carpet so the base meets the carpet edge cleanly.
Pick cove for hard surfaces and straight for carpet, and your finished edge will look correct.
Sizes, Colors, and Formats
Standard heights are 2.5, 4, and 6 inches, with 4 inches being the most common in homes and 6 inches popular in commercial settings. You can buy cove base two ways:
- 4-foot sections, which are rigid, easy to handle, and good for walls with many seams
- Coil rolls of 50 to 120 feet, which reduce seams on long, straight runs
Colors run the full neutral range plus accents, so you can match or contrast with the floor. Expect to pay roughly $0.75 to $2 per linear foot depending on height and material, making it one of the most economical trim options available.
Tools and Adhesive You Will Need
This is a low-tool project, which is part of its appeal. Gather the following:
- Cove base adhesive in a tube or trowel-grade in a tub
- A notched trowel or a caulking gun
- A sharp utility knife and straightedge
- A miter or coping technique for inside and outside corners
- A base roller or a wallpaper seam roller to seat the strip
Cove base adhesive is formulated to grip without sliding, so do not substitute general construction adhesive.
How to Install Vinyl Cove Base
Work in manageable sections so the adhesive does not skin over before you place the base.
- Clean the wall. The bottom few inches must be free of dust, drywall mud crumbs, and grease. Adhesion fails on dirty surfaces.
- Cut to length. Measure each wall and cut the base, leaving corners for last so you can fit them precisely.
- Apply adhesive. Spread a uniform layer on the back of the base, keeping it about 1/4 inch from the top and bottom edges so it does not squeeze out.
- Press into place. Set the base against the wall with the toe resting on the floor, then press firmly from one end to the other.
- Roll the strip. Run a roller across the full length, paying extra attention to the top edge and the toe, to ensure complete contact.
Handling Corners Cleanly
Corners are where amateur jobs show. For inside corners, you can butt two pieces together, but a cleaner method is to cope the toe so it folds neatly into the corner without gapping. For outside corners, gently warm the vinyl with a heat gun on low and bend it around the corner in one continuous piece. Pre-formed corner pieces are also available and remove the guesswork entirely. Whichever method you use, keep the top edge tight to the wall so no shadow line appears.
Where Vinyl Cove Base Works Best
Cove base earns its place anywhere durability and easy cleaning matter more than the warmth of wood trim. It is a natural fit in:
- Basements, where moisture would warp wood baseboard
- Laundry rooms and mudrooms that see water, dirt, and heavy traffic
- Kitchens and bathrooms, where the sealed transition resists spills
- Garages and workshops that need a scuff-proof, wipeable base
- Rental units, where low cost and durability pay off
In living rooms and bedrooms, many homeowners still prefer painted wood trim for its traditional look, but for utility and high-moisture spaces, vinyl base is the practical winner.
Estimating How Much You Need
Calculating quantity is simple but easy to underestimate. Measure the total linear footage along every wall that will receive base, including closets and behind where appliances sit if visible. Subtract door openings, since base does not cross them, but do not subtract too aggressively, because corners and trim cuts consume extra material. Add roughly 10 percent for waste, miters, and the occasional bad cut. Decide between 4-foot sections and coil rolls based on your wall layout: long, straight runs favor coil to minimize seams, while choppy rooms with many short walls are easier with cut sections.
Care and Why It Lasts
Once installed, vinyl cove base needs almost no maintenance. Wipe it down when you clean the floor, and scrub off scuffs with a damp melamine sponge. Because it is washable and impact-resistant, it shrugs off the daily contact that would dent or scuff painted baseboard. For kitchens, basements, laundry rooms, garages, and any commercial space, vinyl cove base delivers a durable, clean finish at a fraction of the cost of wood trim.
If you are tackling this as a weekend project, work methodically one wall at a time, keep your adhesive fresh, and save the corners for last so you can dial them in. The learning curve is short, and by the second or third wall most homeowners have the rhythm down. The result is a tidy, professional-looking transition that protects your walls for years and wipes clean in seconds, which is exactly why vinyl cove base remains a fixture in both commercial buildings and practical home spaces alike.
Prefer to explore on your own?
See how new flooring looks in your actual room in seconds — free, no signup.
Try the free Floor Studio →

