
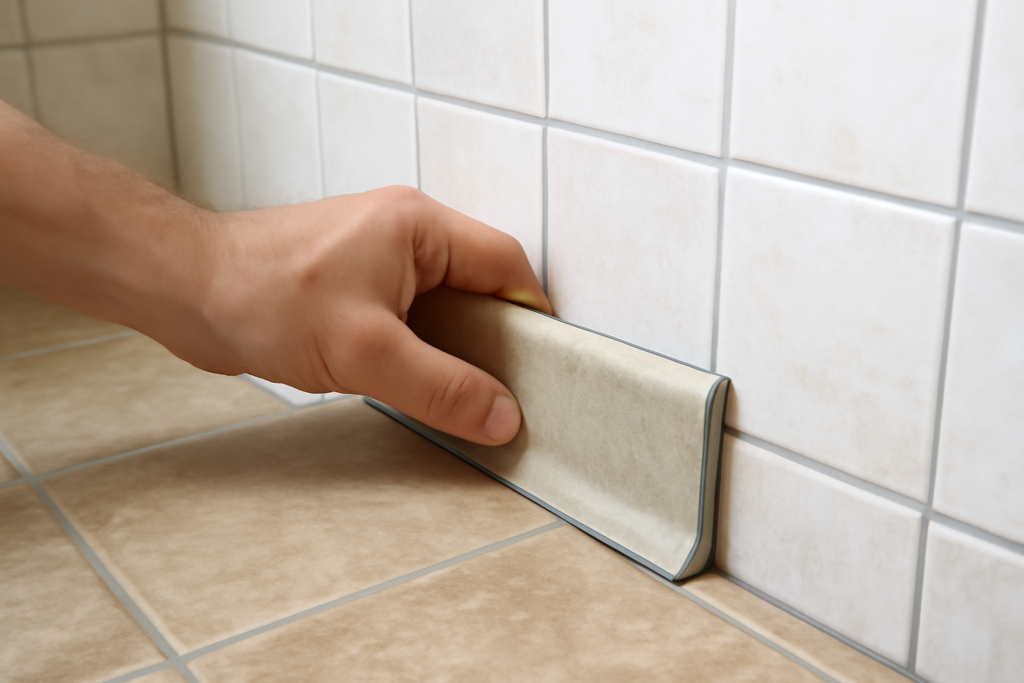
Tile cove base is a specially shaped tile trim that creates a smooth, curved transition where the floor meets the wall, eliminating the sharp 90-degree corner that traps dirt and moisture. Common in commercial kitchens, bathrooms, hospitals, and increasingly in residential spaces, cove base makes cleaning easier, improves sanitation, and gives a tiled room a finished, professional look. Understanding how it works and how to install it helps you decide whether it belongs in your project.
Part of our Tile & Grout guide — explore the full guide →
This guide covers what tile cove base is, the different types available, where it works best, how to install it, and how to keep it clean for years of service.
What Tile Cove Base Is
Cove base is a tile or trim piece with a concave curve along its bottom edge. Instead of meeting the wall at a hard right angle, the floor sweeps up into the wall in a gentle curve. This rounded junction has no tight corner for grime, water, or bacteria to collect, which is why it is a fixture in spaces where cleanliness is paramount.
The concept comes from commercial and institutional design, where floors must be washed down and kept sanitary. In a home, tile cove base brings those same benefits to bathrooms, mudrooms, and kitchens, while also providing a durable, water-resistant baseboard that outlasts wood or vinyl trim in wet areas.
Types of Tile Cove Base
Cove base comes in several forms, and the right choice depends on your tile and the look you want.
- One-piece cove base tile is a single tile with the curve built into its bottom, installed against the wall to sweep into the floor.
- Cove base trim pieces are separate curved strips set at the floor-to-wall joint, often matching the field tile.
- Sanitary cove with matching field tile uses coordinating tile so the base blends seamlessly into the wall above.
- Bullnose-topped cove finishes the top edge cleanly where the base meets a painted or different surface.
Many tile lines offer matching cove base pieces, including inside and outside corner pieces that wrap around the room neatly. Choosing trim that coordinates with your floor or wall tile gives the most cohesive result.
Where Tile Cove Base Works Best
Cove base earns its keep anywhere cleanliness, moisture resistance, and durability matter. The curved joint is the star feature in these spaces.
- Bathrooms, where water at the floor edge can damage ordinary baseboards and the curve keeps the corner sanitary.
- Kitchens and pantries, where spills and frequent cleaning benefit from a seamless, washable base.
- Mudrooms and laundry rooms, where dirt, moisture, and heavy traffic are constant.
- Basements and utility areas, where water resistance and durability are priorities.
In any space you mop or hose down, cove base prevents water from seeping into the wall-floor joint and makes the corner far easier to keep clean. It is also a smart upgrade in homes where allergy or hygiene concerns make a dirt-trapping corner undesirable.
Tools and Materials You Will Need
Gathering everything before you begin keeps the installation moving and the thinset from drying out mid-job.
- Cove base tile or trim pieces, plus inside and outside corner pieces as needed.
- Appropriate thinset mortar for your tile and substrate.
- A notched trowel sized for the tile.
- Tile spacers, a level, and a wet tile saw for cuts.
- Grout, a grout float, sponge, and bucket.
- Caulk for the joint where the cove meets the floor or top edge.
Order about 10 percent extra material to cover cuts, breakage, and future repairs. Make sure your thinset and grout suit the tile type and the wet conditions of the room.
How to Install Tile Cove Base
Installation follows the same fundamentals as wall tile, with attention to the curved joint. Prepare a clean, sound substrate before you begin.
- Dry-fit the cove base pieces around the room, planning corner pieces and cuts so the layout looks balanced.
- Mix thinset to a peanut-butter consistency and comb it onto the wall with a notched trowel.
- Press each cove base piece into place, seating the curved bottom against the floor and using spacers for even joints.
- Check alignment with a level as you go, and cut pieces with a wet saw where needed.
- Let the thinset cure per the label, then grout the joints between pieces.
- Caulk the joint where the cove meets the floor and the top edge, using a flexible sealant that allows for movement.
The caulked joint at the floor is important, since a rigid grout line there can crack as the building settles. A flexible, color-matched caulk keeps the seal watertight.
Safety and Best Practices
Working with thinset, grout, and a wet saw calls for basic precautions. Wear a NIOSH-approved silica dust mask when mixing dry thinset or grout powder, gloves to protect against the alkaline cement, and eye protection throughout. When cutting tile, use the wet saw’s water reservoir to control silica dust, keep the blade guard in place, feed tile slowly, and wear safety glasses and hearing protection.
Work in a ventilated space and follow every manufacturer instruction for the materials you use. For complex installations, large commercial-style spaces, or critical wet areas like showers, hiring a certified tile installer is a wise investment.
Caring for Tile Cove Base
One of the biggest payoffs of cove base is easy maintenance, but a little care keeps it looking and performing its best. Clean with a mild, pH-neutral cleaner and a mop or cloth, taking advantage of the curved joint that has no corner to scrub. Avoid harsh acidic cleaners that can erode grout and damage natural stone.
Inspect the caulked joint at the floor periodically and reapply caulk if it cracks or pulls away, since that seal is your defense against water intrusion. Keep the grout sealed if your product requires it. With routine cleaning and an eye on the caulk line, tile cove base provides a durable, sanitary, and attractive transition that holds up for decades in even the busiest rooms.
Prefer to explore on your own?
See how new flooring looks in your actual room in seconds — free, no signup.
Try the free Floor Studio →

