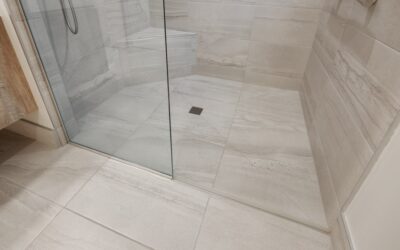
Most leaking tile showers fail at the floor, not the walls, and a tile ready shower base installation removes the riskiest part of the job: building a sloped mortar bed by hand. A prefab foam base arrives already pitched toward the drain, already waterproof across its surface, and light enough for one person to carry up a flight of stairs. You set it in a bed of thinset, connect it to the drain, seal the seams where it meets the walls, and tile right over it.
Part of our Bathroom Remodeling & Flooring guide — explore the full guide →
The trade-off is flexibility. A traditional mortar-bed pan can be shaped to any footprint, while a foam base comes in fixed sizes, although many can be trimmed along the edges. If your shower is a standard rectangle such as 32 by 60 inches, 36 by 48, or 48 by 48, a tileable foam base is usually faster, lighter, and more forgiving for a careful DIYer. If the layout is odd, curved, or oversized, a site-built pan may still make more sense.
This guide walks through the whole process from bare subfloor to first row of tile, including the details that decide whether the floor stays dry for twenty years or starts wicking water into the joists in two.
What a Tile Ready Shower Base Installation Involves
A tile-ready base, sometimes sold as a tile ready shower pan kit, is a rigid pan made from extruded or expanded polystyrene with a bonded waterproof or cement-compatible facing. It typically comes with a matching drain body, a grate or tile-insert cover, and in many kits a separate foam curb and waterproofing tape or membrane strips for the seams. The slope is molded in at roughly 1/4 inch per foot, which is the standard pitch plumbing codes expect for shower floors.
Compared with a mortar-bed shower pan installation, the foam approach skips the pre-slope, the liner, the weep-hole protection, and the final mortar layer. For most bathrooms, a tile ready shower base installation cuts a two-day job with long cure times down to a few hours of setting plus overnight cure. It also eliminates the most common DIY mistakes: a flat spot that puddles, a liner nicked by a stray screw, or clogged weep holes that trap water under the tile.
Installing a tile-ready pan still demands precision, though. The base only performs if the floor beneath it is flat, the thinset bed is full, the drain connection is tight, and every seam is sealed with the system’s compatible materials.
Tools and Materials
- Tileable foam shower base sized to your opening, with its drain assembly
- Foam curb (if not integrated) and waterproofing seam tape or banding
- Modified or unmodified thinset, as the base manufacturer specifies
- Square-notch trowel, typically 1/4 x 3/8 inch or 1/2 inch for the bed
- 4-foot level, straightedge, and tape measure
- Drill with mixing paddle, buckets, and sponge
- Utility knife or fine-tooth saw for trimming foam
- Hole saw or jigsaw for drain openings in the subfloor if needed
- PVC or ABS primer and cement (match your drain pipe material)
- Floor leveling compound or shims for low spots
- Gloves, eye protection, and a respirator rated for the solvents you use
Step-by-Step Installation
1. Check the subfloor and framing
Start with a structurally sound floor. Plywood or OSB subfloor should be at least 3/4 inch thick and fastened well enough that it does not bounce when you rock your weight across it. Concrete slabs should be clean and free of old adhesive. Check flatness with a straightedge: most foam bases tolerate no more than about 1/8 inch of variation over 10 feet. High spots get ground down; low spots get filled with leveling compound and allowed to cure fully before the base goes in.
2. Dry-fit the base and locate the drain
Set the base in the opening without thinset. It should sit against the wall studs or backer board with no rocking. Mark the drain location on the subfloor, then confirm the waste line is centered under that mark. A center drain is typical, but many bases come in offset or linear-drain versions, so verify the drain position before you order. If the existing pipe is off by more than an inch or two, relocate it now rather than forcing a connection later.
3. Trim to fit if needed
Many foam bases can be trimmed along the outer edges to fit a slightly smaller opening. Cut equal amounts from opposite sides when possible so the slope stays symmetrical around the drain. Never trim so much that the drain ends up off-center relative to the pitch, and never cut into the sloped field itself unless the instructions explicitly allow it.
4. Prepare the drain connection
Turn off the water supply to the bathroom before you disturb any plumbing. Dry-fit the drain body through the base and into the waste pipe. Depending on the system, the drain either glues onto the pipe with solvent cement or uses a compression gasket. Measure the pipe height carefully so the drain flange sits flush with the base surface once the base is bedded in thinset, which usually adds about 1/8 to 3/16 inch of height.
5. Spread the thinset bed
Mix thinset to a creamy, peanut-butter consistency. Trowel it across the entire footprint with a large square notch, combing the ridges in one direction. Full, even coverage matters more here than anywhere else, because hollow spots under the foam create flex points that can crack grout and tile later.
6. Set the base and connect the drain
Lower the base into the wet thinset, aligning the drain opening over the pipe. Press down firmly and walk on it evenly, or set weighted buckets across the surface, to collapse the ridges and achieve full contact. Check level along each edge; the perimeter must be level even though the field slopes. Complete the drain connection as the kit directs, then let the thinset cure per the bag, often overnight, before loading the base further.
7. Install the curb
Set a separate foam curb in thinset directly on the subfloor, butted tight to the front edge of the base. Some curbs are also bonded to the base with thinset or a compatible sealant along the joint. Keep the curb level along its length but sloped slightly inward on top, about 1/8 inch, so water on the curb drains back into the shower.
8. Waterproof every seam
This is where most failures begin. Embed waterproofing tape or banding in thinset or the specified sealant along every joint: base to wall board, base to curb, wall corners, and around the drain flange if the system calls for a collar. Overlap seams at least 2 inches. Pre-formed inside and outside corners seal far better than folded tape. Let the waterproofing cure fully and flood test the pan for at least 24 hours with the drain plugged before tiling.
9. Tile over the base
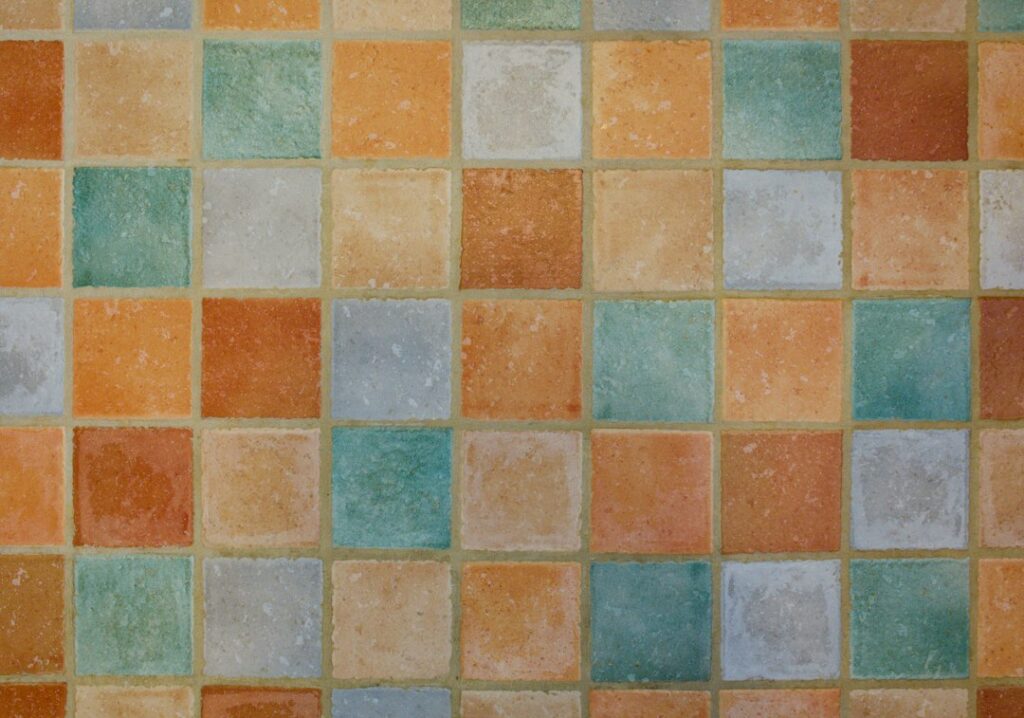
Once the flood test passes, tile directly over the base with the recommended thinset. Small mosaics, around 2 by 2 inches, follow the four-way slope easily. Large-format tile works best with a linear-drain base, which slopes in a single plane. Keep grout joints clean around the drain grate, and set the drain grate or tile insert flush with the finished surface.
Troubleshooting Common Problems
- Base rocks after dry-fit: The subfloor is not flat. Fix it with leveling compound; thinset alone should not be used to fill large dips.
- Drain sits proud of the base: The pipe was cut too tall. Trim it before gluing; once cemented, the fitting has to be cut out.
- Water pools near the curb: The base was set out of level or the curb top slopes outward. Check with a level before tiling, not after.
- Flood test drops: Look first at the drain flange and inside corners. Mark the water line, find the leak, and rebuild that seam before any tile goes down.
- Cracked grout on the shower floor within months: Usually hollow spots in the thinset bed or a subfloor that deflects. Both require tearing out the floor to fix properly.
Chemical Safety and Moisture Control
Solvent cements, primers, and some liquid waterproofing products give off strong vapors. Open windows, run the bathroom exhaust fan, and wear a respirator as the product label directs, along with chemical-resistant gloves and eye protection. Keep flammable primers and cements away from pilot lights, space heaters, and anything that sparks. Never mix different chemical products together to stretch them or speed curing.
Moisture discipline matters just as much. If you tore out an old shower and found stained or soft framing, find and fix the source of that water before building new. Replace rotted studs or subfloor, let everything dry completely, and waterproof the new assembly continuously from floor to wall. If you find mold covering more than about 10 square feet, bring in a mold remediation professional rather than scrubbing and covering it.
Cost Ranges
A tileable foam base kit generally runs from a few hundred dollars for a standard 36 by 48 inch base with center drain to well over a thousand for large bases with linear drains, integrated curbs, and full waterproofing accessories. Thinset, tape, and leveling compound add a modest amount. Professional installation of the base alone typically adds several hundred dollars, and a full tiled shower installed by a contractor commonly lands in the several-thousand-dollar range depending on tile choice and region. Compared with a mortar-bed pan, the foam base usually costs more in materials but saves labor and cure time.
When to Call a Professional
Hire a licensed plumber if the drain needs to be moved, the trap needs replacing, or you are unsure about local plumbing code for shower drains. Many jurisdictions require a permit and an inspection for shower replacements, especially when drain lines change. A structural issue, such as sagging joists or a subfloor that flexes no matter how many screws you add, calls for a contractor before any shower goes in. A pro can usually complete a tile ready shower base installation in a single day, then return to tile once the flood test passes. And if the flood test keeps failing after two attempts, an experienced tile setter can often spot the problem in minutes.
Frequently Asked Questions
Can you install a foam shower base directly on plywood?
Yes, most tile-ready foam bases are designed to go directly over a flat, solid plywood or OSB subfloor in a full bed of thinset. Check the instructions, since some systems ask for a primer or specific thinset on wood.
Do you need a mortar bed under a tile ready shower base?
No. The foam base replaces the sloped mortar bed. A layer of thinset under the base provides full support, but no mortar pre-slope or liner is needed.
How long should the base cure before tiling?
Let the setting thinset cure overnight, then allow the seam waterproofing to cure as the label directs, and flood test for at least 24 hours before setting tile.
Can a foam shower base be cut to size?
Many can be trimmed along the edges, ideally equally on opposite sides to keep the drain centered in the slope. Never cut into the sloped field unless the manufacturer allows it.
What tile works best on a foam shower pan?
Small mosaics follow a four-way slope easily. Large-format tile is best paired with a linear-drain base that slopes in one direction.
Prefer to explore on your own?
See how new flooring looks in your actual room in seconds — free, no signup.
Try the free Floor Studio →