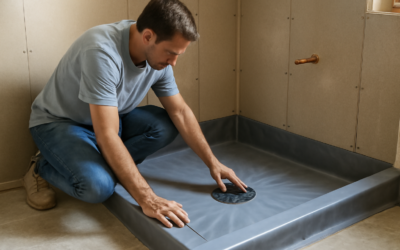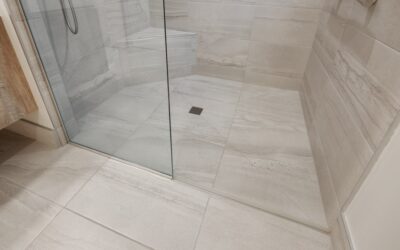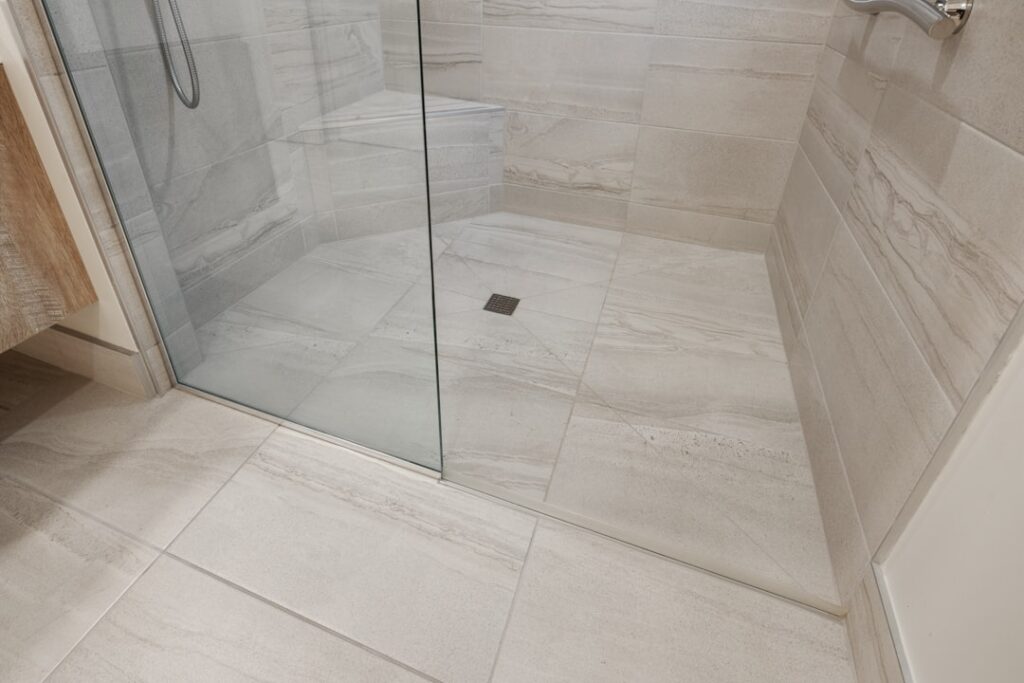
Let’s clear up the terminology first, because this question means two different things depending on who’s asking. When people search how to tile a shower floor without a pan, they usually mean without a prefabricated acrylic or fiberglass pan — they want a real tiled floor instead of a plastic tray. That’s not just possible; it’s how every custom tiled shower is built. What you can never skip is the pan’s function: a sloped, waterproof assembly under the tile that delivers every drop to the drain. Tile and grout are not waterproof, so laying tile straight onto subfloor or level concrete isn’t a shortcut — it’s a rot generator. Here’s how I build tiled shower floors professionally, both the traditional mortar-bed way and the modern foam-tray way, plus the flat-entry (curbless) variant everyone’s asking for.
Part of our Bathroom Remodeling & Flooring guide — explore the full guide →
What Replaces the Pan: The Three Legitimate Assemblies
- Bonded mortar bed + surface membrane (the modern classic): hand-float a sloped bed of deck mud, then waterproof its surface with a liquid membrane (RedGard, Hydro Ban) or a bonded sheet (Schluter Kerdi) tied into a bonding-flange drain. Tile goes directly on the membrane. This is today’s best-practice custom pan.
- Presloped foam tray (the DIY-friendly modern option): a factory-sloped waterproof foam pan (Schluter Kerdi-Shower-ST, Wedi Fundo, GoBoard pan — $300–$700) thin-set to the subfloor, seams banded, drain integrated. You’re still “tiling without a pan” in the acrylic sense — the tray disappears under your tile.
- Traditional liner mud pan (old-school): pre-slope, PVC/CPE liner, clamping drain with weep holes, top mud bed, then tile. Still code-legal, but the buried liner keeps the mortar above it perpetually damp, and it’s the assembly I demo most. I’ll describe the better methods and leave this one to the old-timers.
Ground Rules Before You Build
Whichever assembly you pick, how to tile a shower floor without a pan starts with the same non-negotiables:
- Slope: 1/4 inch per foot from the perimeter to the drain — code minimum and functional ideal. Measure your farthest corner-to-drain distance; a 48×36 shower with a centered drain needs roughly 1/2 to 5/8 inch of fall.
- Structure: the subfloor must be solid — 3/4-inch plywood over joists 16 inches on center, no flex, no rot. Mortar beds add 20–30 pounds per square foot; fix bounce first.
- Drain choice decides the system: a bonding-flange drain (Kerdi-Drain, Laticrete Hydro Ban drain — $60–$150) pairs with surface membranes; a linear drain against one wall ($200–$600) enables single-plane slopes and large-format floor tile.
- Tile size: a center-drain floor slopes in four directions, so tile must be small enough to follow the compound curves — 2×2 mosaics are the standard, anything up to about 4 inches works, and 6-inch-plus tile on a four-way slope will rock and lip. Linear-drain floors slope in one flat plane and happily take 12x24s.
- Flood test is mandatory whichever route you take. Plug the drain, fill, mark, wait 24 hours, before any tile.
Method 1: The Bonded Mortar Bed, Step by Step
- Set the drain. Install the bonding-flange drain body at the correct height — its flange should end up flush with the top of your planned mud bed. Dry-fit and measure twice; this elevation controls everything.
- Mix deck mud. Deck mud (dry-pack) is 5:1 sand to Portland cement with just enough water that a squeezed handful holds its shape like sandcastle sand — not soupy. Bagged “sand topping mix” ($6–$10 a bag) with a shovel of extra sand gets you close; a 3×4 pan takes 4–6 bags.
- Screed the slope. Mark your perimeter height line (drain flange height + 1/4 inch per foot of run) on the walls, pack mud hard around the drain, build the perimeter to the line, then screed straight lines from perimeter to drain with a wood float and a straightedge. Compact firmly as you go — density is strength. This is craft, and your first one will take three hours. That’s normal.
- Cure overnight, then check for humps and dips with a straightedge; shave or fill minor flaws.
- Waterproof the surface. Liquid: two verified-thickness coats rolled over bed, corners pre-treated with fabric, lapped up the walls 6+ inches to tie into the wall membrane. Sheet: cut Kerdi to fit, thinset it to the bed, band the seams and corners, and seal the sheet into the drain flange. Either way, the waterproof layer is now on top, bonded, and pitched — no damp sponge below it, ever.
- Flood test 24 hours. Then tile.
Method 2: The Foam Tray Route
If floating mud doesn’t appeal, the foam tray gets you the same result in two hours instead of a day: check subfloor flatness (flatten humps over 1/8 inch), dry-fit the tray around the drain location (trays cut with a handsaw to fit odd sizes), trowel thinset onto the subfloor, bed the tray, and weight it while it cures. Band the tray-to-wall joints with the system’s waterproof tape or sealant, connect the integrated drain, flood test, tile. The premium over mud is $250–$500; what it buys is a guaranteed-correct slope and a forgiving install. This is what I recommend for every first-timer, without hesitation.
Tiling the Floor Itself
- Layout: dry-lay a sheet path from the entry sightline, center the field on the visible axis, and plan cuts to hide at the walls. With mosaic sheets, stagger sheet edges so the sheet grid doesn’t telegraph.
- Mortar: polymer-modified thinset (unmodified over Kerdi, per Schluter), combed with a 1/4×1/4 notch for mosaics. Skim the back of mosaic sheets lightly for full contact.
- Set and beat in: lay sheets, then tap them flat with a grout float or beating block so every chip follows the slope plane without individual chips diving. Pull a sheet early to verify 95% coverage.
- Perimeter and drain cuts: nippers and a rub stone handle mosaic curves at the drain; keep a clean 1/8-inch gap at the walls and around the drain flange.
- Cure 24 hours, grout. Shower floors deserve the good stuff — epoxy grout ($60–$120) or at least a high-performance cement grout, sealed. This is the most abused grout in the house.
- Silicone the perimeter where floor meets wall — movement joint, never grout — and wait 72 hours before the first shower.
The Curbless Question
Half the people asking how to tile a shower floor without a pan really want a flat-entry, curbless shower. The tiled part is identical to everything above; the difference is elevation — the sloped assembly must sit recessed so its perimeter lands flush with the bathroom floor. That means dropping the subfloor between joists (a framing job: sistering and headering, $500–$1,500 if hired), using an ultra-thin linear-drain system, or building the bathroom floor up to meet the shower. Waterproofing then extends 2–4 feet beyond the shower zone into the room. It’s absolutely buildable — I do several a year for aging-in-place clients — but the recess work is the real project, so budget and plan around the framing, not the tile.
Cost Summary
| Assembly | Materials (3×4 shower) | Skill Level | Time to Tile-Ready |
|---|---|---|---|
| Bonded mud bed + liquid membrane | $200–$400 | Advanced (screeding) | 2–3 days incl. cure + flood test |
| Bonded mud bed + Kerdi sheet | $300–$550 | Advanced | 2–3 days |
| Presloped foam tray system | $450–$900 | Beginner-friendly | 1–2 days |
| Curbless (any of the above + recess framing) | +$500–$1,500 | Advanced / partial pro | +2–4 days |
Budget one more small line item whichever method you choose: a bag of extra deck mud or a tube of the system sealant kept on hand for the inevitable adjustment. Nearly every first pan needs a touch-up — a low corner shaved, a seam re-banded after the flood test finds a slow weep — and having the material on the shelf turns a discouraging setback into a twenty-minute fix.
The mindset that keeps this project safe: you’re building a waterproof, sloped funnel, and then decorating it. Every decision — drain height, mud density, membrane thickness, mosaic size — serves the funnel first and the beauty second. Skip the acrylic pan proudly; skip the pan’s function and you’ll meet someone like me in five years, holding a demolition hammer and pointing at your subfloor. Float it or foam it, slope it at 1/4 inch per foot, waterproof the surface, flood test overnight, and the tiled floor you wanted will still be shedding water perfectly when the tile itself goes out of style.
Prefer to explore on your own?
See how new flooring looks in your actual room in seconds — free, no signup.
Try the free Floor Studio →