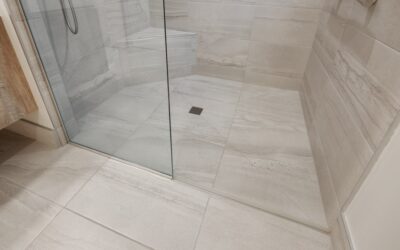
Building a traditional mud-bed shower pan is the single most failure-prone task in bathroom remodeling, which is why an entire product category now exists to skip it. A tile ready shower base is a factory-made pan, pre-sloped to the drain and inherently waterproof, that you set on the subfloor and tile directly over. No mixing deck mud, no hand-troweling slopes, no liability if your slope math is off by a quarter inch. Brands like Tile Redi, KBRS, and Schluter have made these trays the default choice for DIY showers and a growing share of pro installs. Here is how they work, what they honestly cost, and when the old-school mud pan still wins.
Part of our Bathroom Remodeling & Flooring guide — explore the full guide →
What a Tile-Ready Base Actually Is
Traditional shower construction builds the pan on site: a sloped mortar pre-pitch, a vinyl or hot-mop liner, a second mud layer, then tile. Every layer is a chance for error, and a failed liner means demolition. A tile-ready base collapses all of that into one engineered part. The tray arrives with the correct 1/4-inch-per-foot slope molded in, an integrated (or integrated-bonding) drain, and a surface formulated for thinset adhesion. Set it level, waterproof the seams where it meets the walls, and you are tiling the same day.
Two main constructions dominate the category:
- Molded polyurethane or composite pans (Tile Redi Redi Base, KBRS ShowerSlope): rigid one-piece units, many with the drain body already built in and integrated curbs and even splash walls on some models. Tile Redi pans famously pour epoxy around the drain during tiling to lock everything together.
- Expanded polystyrene (EPS) foam trays (Schluter KERDI-Shower-Tray, Wedi Fundo, Laticrete Hydro Ban board trays): lightweight sloped foam panels that pair with the brand’s bonded waterproofing membrane and flange drain. These cut easily with a utility knife for custom footprints and are the backbone of full-system foam showers.
The Honest Pros
- Waterproofing is engineered in. The slope and the water barrier come from a factory, not from a tile setter’s Tuesday. This is the big one: pan failures cause the majority of catastrophic shower leaks, and a monolithic tray removes the highest-risk site work.
- Speed. A mud pan is typically a two-day process with cure time. A tray installs in two to four hours, and most systems accept tile immediately.
- DIY-achievable. Setting a tray level in a bed of mortar is within a careful amateur’s skills; floating a perfectly sloped mud pan is not, usually, on the first try.
- Predictable drainage. Molded slope means no bird baths, the shallow puddle spots that plague hand-built pans.
- System warranties. Stay inside one brand’s system (tray, membrane, drain, sealant) and you get a single warranty covering the assembly, commonly 10 years to lifetime limited.
The Honest Cons
- Price per part is high. A quality tray costs several times the raw materials of a mud pan. You are paying for engineering and insurance.
- Fixed sizes and drain locations. Trays come in standard footprints (32×32 up to 48×72 and beyond) with center or offset drains. If your drain sits somewhere odd, you either move plumbing, buy a custom tray (KBRS and Tile Redi both make them, at a premium), or use a cuttable foam tray.
- Large-format tile limits on some pans. The molded slope means floor tile must accommodate the pitch; mosaic and tiles under about 4 inches conform best. Some trays specifically restrict tile over a certain size on the pan floor.
- Wall integration is still on you. The tray waterproofs the floor. The wall-to-tray joint and the walls themselves still need banding, membrane, or foam board done correctly, and this seam is where lazy installs fail.
- Hollow feel complaints. Cheaper thin pans can flex or sound hollow if not fully bedded in mortar. Always set trays in the bedding the manufacturer specifies.
What the Major Systems Cost in 2026
Street prices for common sizes, tray only unless noted:
- Schluter KERDI-Shower-Tray: about $150 to $350 depending on size; add the KERDI drain ($80 to $150) and membrane/banding, with full floor kits around $400 to $700.
- Tile Redi: roughly $400 to $900 for standard sizes with the drain integrated; barrier-free and curbless models and custom sizes run $700 to $1,500 or more.
- KBRS: composite ShowerSlope pans about $300 to $700, with custom sizes and complete waterproofing kits in the $500 to $1,200 range.
- Wedi Fundo: premium foam trays typically $500 to $900, drain included in many kits.
A site-built mud pan, by contrast, costs $100 to $250 in materials (deck mud, liner, drain, lath) but 6 to 10 hours of skilled labor across two days. Hire that labor and the mud pan bill lands at $800 to $2,000, which is why trays are often the cheaper finished number even at higher part cost. DIYers save the most: tray route totals commonly beat pro mud pans by half.
Installation Overview
- Verify the subfloor is flat, sound, and level, and that the drain rough-in matches the tray’s drain location within the allowed tolerance.
- Dry-fit the tray and mark its footprint.
- Trowel out the specified bedding, usually modified thinset or a mortar bed, and set the tray, checking level in both directions. Perimeter shims are not a substitute for full bedding.
- Connect the drain per the system: clamping flange, bonding flange, or Tile Redi’s tile-time epoxy pour.
- Waterproof the tray-to-wall joints with the system’s banding or sealant, and complete wall waterproofing (foam board or membrane over cement board).
- Flood test if the system allows it, cheap insurance before tile.
- Tile the pan with appropriately sized tile and unmodified or modified thinset as the manufacturer directs.
Mistakes That Void the Whole Advantage
Tray failures in the field trace back to a short list of shortcuts. Setting the tray on shims or dabs of mortar instead of a full bed leaves hollow spots that crack tile and flex the drain connection. Mixing systems, a Schluter tray with generic banding, an off-brand drain in a Tile Redi pan, breaks both the waterproofing logic and the warranty; buy the seam materials the tray maker specifies even when the home center substitute is half the price. Skipping the flood test to save a day is the classic false economy, since finding a drain leak after tile means demolition. And on wood-framed floors, check deflection: a bouncy subfloor that was marginal for a mud pan is just as marginal for a tray, and no pan product fixes framing. Ten extra minutes of reading the actual installation manual, not the YouTube summary, is the cheapest insurance in this entire product category.
Tray or Mud Pan: How to Decide
Choose a tile ready shower base when you are doing the labor yourself, when the schedule is tight, when the footprint matches a stock size, or when you want a single-brand warranty over the whole wet area. Stay with a traditional mud pan when the shower is an unusual shape or size that custom trays would price into the stratosphere, when the drain cannot move and no stock tray fits, or when you have a tile setter whose mud work you trust; a well-built mud pan remains an excellent shower. For most homeowners weighing risk against cost, though, the factory-sloped tray is the rare remodeling product that is simultaneously easier, faster, and safer than the craft it replaced, and worth every dollar of its premium.
Prefer to explore on your own?
See how new flooring looks in your actual room in seconds — free, no signup.
Try the free Floor Studio →