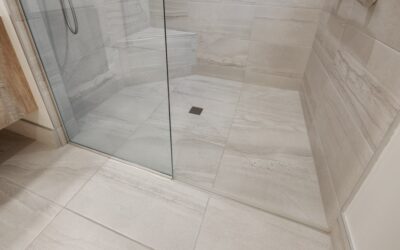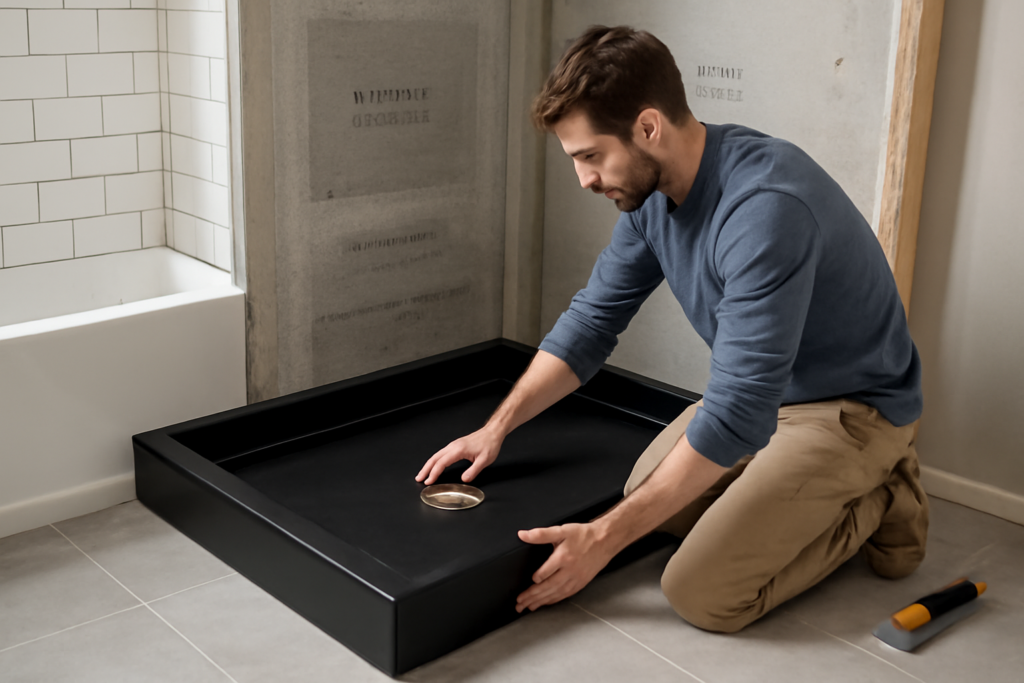
Building a tiled shower floor used to mean hand-packing a mortar bed, sloping it precisely toward the drain, and hoping your angles were right. Tile Redi set out to simplify that with factory-built, pre-sloped shower pans that arrive ready to tile. The brand makes integrated shower bases with the slope, waterproofing, and drain already engineered in, removing one of the trickiest parts of a custom shower. For homeowners and contractors who want a tileable shower without mudding a pan from scratch, the system is a popular shortcut.
Part of our Tile & Grout guide — explore the full guide →
What Tile Redi Makes
Tile Redi produces molded shower pans designed to be covered with the tile of your choice. Unlike a fiberglass or acrylic base that you see in the finished shower, a Tile Redi pan becomes the hidden, waterproof, pre-sloped foundation. The pre-formed slope directs water to the drain, and the integrated drain assembly is built into the pan. You bond and tile over the surface so the finished floor looks fully custom while the structure underneath does the engineering work.
How the Pre-Sloped System Works
The core benefit is the factory slope. A code-compliant shower floor must pitch toward the drain, typically about a quarter inch per foot, so water drains rather than pools. Achieving that consistently by hand takes skill. Tile Redi pans are molded with that slope already built in, so the pan sits level on the subfloor while its surface carries the correct pitch. You bond thin tile directly to the pan with the recommended adhesive, and the water finds the drain as designed.
Drain Options
One of the brand’s signature features is its drain placement and style choices:
- Center drains — the traditional layout with slope from all sides.
- Off-center and back-wall drains — useful for fitting existing plumbing.
- Linear trench drains — a long channel, often at a wall or curb, for a sleek modern look and single-direction slope.
Linear and back-wall drains have become especially popular because they allow larger floor tiles and barrier-reduced designs. Choose the drain location to match your plumbing rough-in when possible to avoid moving the drain line.
Sizes and Configurations
Tile Redi offers pans in a wide range of standard dimensions plus made-to-order sizes, including single-curb, double-curb, and barrier-free or low-curb designs for accessibility. There are corner pans, alcove pans, and neo-angle shapes. Because the curb and drain placement are engineered into the unit, it is important to confirm the exact size and drain position against your bathroom layout and plumbing before ordering. Verify current product specifications and dimensions directly with the manufacturer or retailer for your specific model.
Installation Basics
While the system simplifies the slope, proper installation still matters:
- Confirm the subfloor is solid, level, and structurally sound where the pan will sit.
- Position the pan and align it with the drain plumbing rough-in.
- Set the pan in the recommended bonding material per the manufacturer’s instructions.
- Connect and seal the drain assembly according to the included directions.
- Address the curb, walls, and seams with the brand’s recommended waterproofing details.
- Once set, bond and tile the floor with a thin-set suited to the pan surface and your tile.
Follow the manufacturer’s documented procedure closely, since the waterproofing warranty depends on installing the system as specified. Many homeowners hire a tile professional for the wall waterproofing and tile work even when the pan saves time.
Who It Suits Best
A Tile Redi pan is a strong fit for anyone who wants a fully tiled, custom-looking shower floor without hand-building a sloped mortar bed. It appeals to DIYers comfortable with tile but unsure about sloping a pan, to contractors looking to save labor, and to projects that benefit from linear or barrier-free drain layouts. If you want a quick acrylic shower base you never tile over, a standard molded base may be simpler. But for a tiled floor, the pre-sloped pan removes real risk.
Pros and Cons
Weigh the trade-offs honestly:
- Pros: factory-correct slope, integrated drain, time savings, flexible drain locations, and custom sizes.
- Cons: higher material cost than hand-built mortar, the need to match drain placement to plumbing, and reliance on following the system’s exact installation details for the warranty.
How It Compares to a Traditional Mortar Bed
The traditional method of building a tiled shower floor involves layering a mortar pre-slope, a waterproof liner, and a second mortar bed, all sloped by hand toward a clamping drain. It is time-tested and inexpensive in materials, but it relies entirely on the installer’s skill. Errors in slope or liner detailing can cause leaks that are expensive to find and fix. A pre-sloped pan trades higher material cost for consistency and speed, putting the slope and drain engineering in the factory rather than on the bathroom floor. For a confident DIYer or a contractor pricing labor, the time saved and reduced risk often justify the added material expense.
Pairing the Pan With Wall Waterproofing
A shower is a complete waterproof system, and the pan is only the floor portion. To get a leak-free result, the pan must integrate properly with the wall waterproofing. That usually means tying the pan into a waterproof wall membrane or backer board system so water running down the walls is directed onto the pan and into the drain, never behind it. Pay close attention to the corners and the curb, which are common failure points. Following the manufacturer’s recommended details for connecting the pan to the walls is essential, and many homeowners bring in a tile professional specifically for this stage even when they handle the rest themselves.
Final Thoughts
Tile Redi addresses one of the most failure-prone parts of a custom shower by delivering the slope and drain from the factory. Choose the right size and drain location for your layout, confirm dimensions with the manufacturer, and follow the installation instructions precisely to protect the waterproofing. Integrate the pan correctly with the wall system, and pay attention to the corners and curb. For homeowners who want the look of a fully tiled shower floor without the gamble of hand-packing a sloped pan, it is a practical, proven solution.
Prefer to explore on your own?
See how new flooring looks in your actual room in seconds — free, no signup.
Try the free Floor Studio →