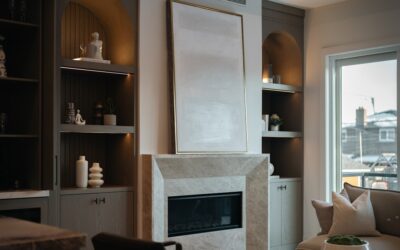
A retail Murphy bed runs $1,800 to $4,000 installed. A homemade version using the exact same gas-strut hardware costs $400 to $700 and a weekend of garage time. DIY Murphy bed plans are not as intimidating as they look; the hardware kit does the engineering work and you essentially build a plywood box around it. This guide covers hardware selection, materials, and the three trickiest steps that trip up first-time builders.
Why DIY Beats Retail
The expensive part of any Murphy bed is the lift mechanism, which has to safely raise and lower a mattress weighing 50 to 90 pounds. Retail prices include cabinetry markup of 200 to 400 percent on top of the hardware. When you buy the hardware kit directly and supply your own plywood and trim, you cut costs dramatically without sacrificing any function.
The build is also customizable. Retail beds force you into stock dimensions, while a DIY build lets you match an existing closet alcove, integrate side bookshelves, or finish the cabinet to coordinate with existing furniture.
Choosing the Right Hardware Kit
Three brands dominate the DIY market.
- Create-A-Bed: $300-$400, mechanical spring or piston system, US-made; comes with detailed plans
- Lori Wall Beds: $250-$350; sells full hardware kits or complete cabinet kits
- Murphy Bed USA: $300-$500; piston-lift design, twin through king sizes
- Häfele Mechanism: $200-$400; European-style gas spring; commonly sold by cabinet supply houses
For first-time builders, Create-A-Bed kits include the most complete plans, plus a how-to video. Lori kits are simplest if you want a complete cabinet shipped to your door.
Tools and Materials Checklist
Most builds need:
- Two sheets of 3/4-inch plywood (birch or maple veneer recommended)
- One sheet of 1/4-inch plywood for the back panel
- Iron-on edge banding or hardwood edging
- 2-1/2-inch wood screws and pocket-hole jig
- Wood glue, sandpaper (120, 220 grit), and finish (poly, paint, or stain)
- Circular saw or table saw, drill, level, and clamps
- Murphy bed hardware kit
- Standard mattress sized for the kit (twin, full, or queen)
A pocket-hole jig like the Kreg K5 saves hours and produces strong joinery without complicated mortising. If you do not own one, the $130 investment pays back on this project alone.
Mattress Considerations
This is where most first-timers go wrong. Murphy beds need a mattress under 12 inches thick and ideally with a foam or hybrid core. Innerspring mattresses sag against the slat support during long vertical storage. Memory foam, latex, or hybrid foam mattresses 8 to 11 inches thick are ideal.
The mattress also needs to be secured, either with the cargo strap that comes with most kits or a custom fabric mattress retainer. Without it, the mattress slides off the platform when you lift the bed.
Build Steps in Order
- Cut the cabinet panels: two sides, top, bottom, and back panel. Use a circular saw with a straightedge guide for accurate long cuts.
- Assemble the cabinet box: glue and screw with pocket holes; clamp until square. Verify diagonals are equal.
- Build the bed frame and headboard panel: follow your hardware kit’s exact dimensions; this varies by brand.
- Mount the lift mechanism: attach to the cabinet sides per kit instructions. Most kits use lag bolts into the side panels.
- Attach the bed frame to the mechanism: usually a bolt-on connection at the pivot points.
- Secure the cabinet to the wall: through wall studs with at least four 3-inch lag screws. Murphy beds tip forward when raised if not anchored.
- Add face frame, doors, or trim: finish details that turn it into a piece of furniture.
- Test the lift cycle 10 times before adding the mattress: verify smooth operation.
The wall anchoring step is non-negotiable. Even a balanced piston system can tip a cabinet if pushed against, and an unanchored Murphy bed has caused serious injuries.
Three Mistakes to Avoid
First, do not use particleboard or MDF for the cabinet sides. They cannot reliably hold lag bolts under repeated cyclic loading. Stick with plywood or solid wood.
Second, do not skip the floor plate. Most kits include a cleat that bolts to the floor and prevents the cabinet base from kicking out when you pull the bed down. It is mandatory.
Third, do not paint or finish the bed frame components inside the cabinet. The lift hardware needs metal-on-wood or metal-on-metal contact for friction tolerances; thick paint changes the geometry.
Cost Breakdown for a Queen-Size Build
- Hardware kit: $350
- Plywood (3 sheets): $180
- Edge banding, screws, glue: $40
- Finish (stain or paint): $50
- Mattress (separate): $400-$1,200
Total cabinet build: roughly $620 plus mattress. The same configuration retail runs $2,800 minimum.
Customization Ideas
Add side cabinets for a built-in look that doubles as bookshelves. Integrate a fold-down desk on the bed face that becomes usable when the bed is up. Use shaker-style face frames and beadboard backs for a farmhouse feel, or full-overlay slab doors with hidden hinges for a modern aesthetic. The cabinet shell is the same; the trim package transforms the look.
Frequently Asked Questions
How long does it take to build a Murphy bed?
For a first-time DIYer, plan 20 to 30 hours spread across two weekends. Experienced woodworkers can complete a queen build in 12 to 16 hours.
What size mattress fits a DIY Murphy bed?
Standard twin, full, and queen mattresses all fit available kits. The mattress must be under 12 inches thick. King-size kits exist but require additional structural reinforcement.
Do I need to bolt the bed to the wall?
Yes, always. Murphy beds tip forward when raised if not anchored. Use at least four 3-inch lag screws into wall studs.
Can I install a Murphy bed on hardwood floors?
Yes, but use the floor plate that comes with the kit and place a strip of felt or rubber under it to prevent scratching. Some builders skip the floor plate and rely solely on wall anchoring; this is not recommended.