Using the wrong wire size on an electric dryer circuit is a fire risk, a code violation, and an inspection failure all in one. Too small and the conductor overheats under load; too large and you waste money without gaining safety. Knowing the correct dryer wire size means matching the breaker to the wire, the wire to the outlet, and the outlet to the dryer’s nameplate rating. The rules are straightforward once you understand the three variables, and most residential installations use the same wire regardless of brand.
- The Standard Answer: 10 AWG for 30-Amp Circuits
- When to Use 8 AWG Instead
- Three-Wire Versus Four-Wire Circuits
- Matching the Outlet to the Wire
- Breaker and Circuit Requirements
- Cable Types and Installation Methods
- Grounding Requirements
- Voltage Drop Calculations
- Common Mistakes and How to Avoid Them
- When to Call an Electrician
- Final Thoughts on Dryer Wire Size
The Standard Answer: 10 AWG for 30-Amp Circuits
Nearly every residential electric clothes dryer in North America runs on a 240V/30A dedicated circuit. The National Electrical Code requires 10 AWG copper conductors for 30-amp circuits at standard residential installation conditions. A 10/3 with ground cable (three 10 AWG conductors plus a 10 AWG ground) is the near-universal choice for dryer installations.
10 AWG copper has an ampacity of 30 amps at 60°C insulation rating, which matches the 30-amp breaker exactly. Modern NM-B (Romex) uses 90°C insulation but is still derated to the 60°C column for residential circuits. The math works out the same in practice.
When to Use 8 AWG Instead
If the dryer is farther than about 50 feet from the panel, or if the installation runs through an unconditioned space that raises ambient temperature, voltage drop and derating may push the required size to 8 AWG. Voltage drop over long runs drops performance and can trip heat-sensor circuits in newer dryers.
The rule of thumb is to upsize to 8 AWG if the one-way run exceeds 50 feet, if the conductor spends significant distance in an uninsulated attic above 86°F, or if more than three current-carrying conductors share a raceway. When in doubt, 8 AWG is never wrong on a 30-amp circuit; it just costs more.
Three-Wire Versus Four-Wire Circuits
Older homes built before 1996 often have three-wire dryer circuits: two hots and a combined neutral-ground. The NEC now requires four-wire circuits for all new installations: two hots, a separate neutral, and a separate ground. This means 10/3 with ground cable, not 10/2 with ground.
If you are replacing an old three-wire outlet with a new four-wire, you must also add a ground conductor or run new cable. Simply changing the cord on the dryer from three-prong to four-prong without proper grounding creates a shock hazard. Newer dryers ship without cords precisely because the installer must match the configuration at the house.
Matching the Outlet to the Wire
A 30-amp dryer circuit uses a NEMA 14-30R outlet on four-wire installations and the older NEMA 10-30R on three-wire setups. The 14-30R has an L-shaped neutral slot at the top, two angled hot slots, and a round ground. Match the cord on the dryer to the outlet in the wall. Never use adapters or modify plug blades.
Outlet cost is minimal: $12 to $25 for a quality 14-30R at any hardware store. Install in a deep 4-inch square box with a single-gang mud ring, and ensure strain relief on the cable entering the box.
Breaker and Circuit Requirements
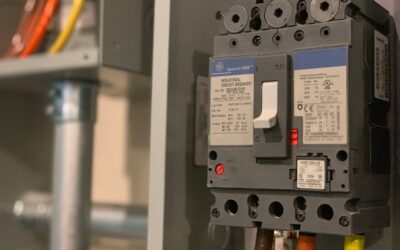
A 30-amp dryer circuit uses a 30-amp double-pole breaker in the service panel, matching the 240V supply. The breaker should be labeled “dryer” on the panel schedule. Gas dryers are different and use a 120V/15A or 20A circuit with 14 AWG or 12 AWG wire respectively; consult the dryer manual for specifics.
Do not oversize the breaker on the assumption that bigger is safer. A 40-amp breaker on 10 AWG wire lets the wire overheat before the breaker trips, defeating the entire purpose of overcurrent protection. Match breaker to wire ampacity or go smaller, never larger.
Cable Types and Installation Methods
Inside walls and attics, NM-B (Romex) cable is standard. For underground runs or conduit, THHN or XHHW individual conductors pulled through PVC or EMT are the usual choice. In either case, 10 AWG copper is the baseline for a 30-amp dryer circuit.
Aluminum wire is sometimes offered as a cheaper alternative. Use 8 AWG aluminum to carry the same ampacity as 10 AWG copper because aluminum has about 61 percent of copper’s conductivity. Aluminum also requires anti-oxidant paste at terminations and connectors rated for aluminum. Most electricians stick with copper for residential circuits because of these extra requirements.
Grounding Requirements
The ground conductor in a 10/3 with ground NM-B cable is a 10 AWG bare copper wire. It connects to the ground lug on the outlet and ultimately to the service panel ground bus. On a four-wire dryer, the ground conductor inside the cord attaches to the green grounding terminal on the dryer’s terminal block.
The key rule on four-wire installations: neutral and ground are separate all the way from the panel to the dryer. The bonding strap that came installed from the factory must be removed on a four-wire cord. Leaving it in place creates a parallel path that can energize the dryer chassis under fault conditions.
Voltage Drop Calculations
For a typical 30-amp dryer drawing around 24 amps running at 240V, 10 AWG copper in a 50-foot one-way run produces about 2.5 percent voltage drop, which is within the 3 percent NEC recommendation. At 75 feet, drop climbs to 3.75 percent and 8 AWG becomes the smarter choice.
Voltage drop matters more for electronic dryer controls than for the heating element. Below 220V actual delivered voltage, some dryers throw error codes or fail to reach the set drying temperature.
Common Mistakes and How to Avoid Them
The most common mistakes: using 12 AWG wire on a 30-amp circuit (undersized and illegal), leaving the factory bonding strap in place on a four-wire install (shock hazard), and reusing an old three-prong plug on a new four-prong dryer via a shortcut adapter (also illegal and dangerous).
Pull a permit if your jurisdiction requires one and have the work inspected. Permit fees are $50 to $150 and the peace of mind plus insurance documentation is worth it.
When to Call an Electrician
If the panel does not have space for a new 30-amp double-pole breaker, if the existing circuit is aluminum or has a questionable splice, or if the home predates modern grounding standards, hire a licensed electrician. A standard dryer circuit install runs $300 to $700 depending on wire length and difficulty. Upgrading an old three-wire outlet to a four-wire with new cable typically costs $250 to $450.
Final Thoughts on Dryer Wire Size
For a standard 30-amp residential electric dryer circuit, 10/3 with ground copper cable, a NEMA 14-30R outlet, and a 30-amp double-pole breaker is the correct combination. Upsize to 8 AWG for long runs or warm conductor paths. Always use four-wire configurations on new installs and keep neutral and ground separate. Follow these rules and the installation passes inspection the first time.