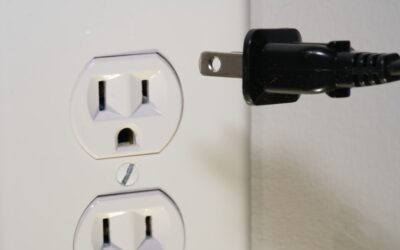
Every drywaller has a story about the sheet that got hung over a forgotten outlet — and the exploratory carving that followed. A drywall outlet marker solves the oldest layout problem in the trade: transferring the exact position of an electrical box onto the back-set sheet that is about to cover it. The tool category runs from $12 magnet pairs to $40 rare-earth locator kits, alongside field tricks like the lipstick method that cost nothing. Whichever route you choose, the payoff is identical — holes that land within 1/8 inch, cutouts the cover plate actually hides, and sheets that never get split, patched, or scrapped over a missed box.
Part of our Paint & Walls guide — explore the full guide →
Why Outlet Marking Goes Wrong
The traditional method is a tape measure and arithmetic: measure from the adjacent sheet or floor to the box edges, transfer those numbers to the sheet face, and cut before hanging. It works — until it does not. The failure modes are predictable: measuring to the wrong box edge, forgetting the sheet hangs 1/2 inch off the floor, flipping a measurement when the sheet gets rotated, and cumulative error when measuring across a run of sheets. Since a duplex box cover plate offers only about 3/8 inch of forgiveness around the box, a half-inch error means a visible gap or a hole the plate cannot cover. Repairs cost real time — setting a patch, taping, three coats, sanding — which is why a dedicated marker earns its price on the first prevented mistake. The deeper reason to mark accurately: code (NEC 314.21) allows a maximum 1/8-inch gap between the box and the drywall edge on noncombustible surfaces, so oversized “safety margin” cuts are technically violations that also need filling.
Magnetic Locators: The Modern Standard
Magnetic markers are the category leader for good reason. The system is two parts: a target magnet that sits inside the electrical box (clipped to the box or placed against the back), and a locator that sweeps the hung sheet’s face until it snaps to the target through the drywall. The Calculated Industries Blind Mark kit (about $15 to $25 for two targets and a locator) is the ubiquitous version: drop targets into the boxes, hang the sheet with just a few tack screws, sweep the face with the locator until it clunks onto center, then trace the locator’s outline — sized to a single-gang box — and cut. Rare-earth versions locate through 5/8-inch drywall and even double layers without hesitation. Strengths: no arithmetic, works after the sheet is up (eliminating rotation and transfer errors entirely), and targets are reusable indefinitely. Limits: the standard tracing template is single-gang, so two-gang and round boxes require locating the center and then measuring the actual box outline; and the magnets cannot tell you the box’s rotation if it was mounted crooked, so eyeball the trace against the clunk position.
Zero-Cost Field Methods That Still Work
Three tricks predate every product in this category and remain in every finisher’s back pocket. The lipstick method: rub lipstick, chalk, or a builder’s crayon around the box’s front rim, press the sheet into place against it, pull the sheet back, and the box has stamped its own outline on the back of the drywall — cut from the back and hang. The kicker method for outlets near the floor: hang the sheet loose, press gently over the box location so the box telegraphs a faint bulge, and mark the bulge. And reference sticks: before hanging, hold a scrap stick vertically and horizontally against the box and mark box edges onto floor and adjacent stud faces, then project those marks onto the hung sheet with a level. All three are free and accurate; their cost is workflow — each requires an extra press-and-pull or pre-marking step per box, which is fine for a room and tedious for a house.
Roto-Zip Cutouts: How Production Crews Do It
Commercial hangers skip pre-cutting entirely. They mark only the box’s approximate center on the sheet face (or note its measurements), hang the sheet with screws kept away from the box zone, then cut the opening in place with a spiral saw — a RotoZip or a drill with a drywall guide-point bit ($60 to $120 for the tool, $4 per bit). The guide-point bit plunges near the marked center, moves outward until it touches the inside of the box wall, hops the bit to the outside, and traces the box perimeter riding against it. Thirty seconds per box, and the fit is perfect by definition because the box itself was the template. Two cautions for DIYers adopting the method: push wires deep into the box before cutting (spiral bits eat sheathing instantly — and always cut with power to the circuit off), and run the bit counterclockwise around the box exterior so the bit’s rotation pulls it against the box wall instead of wandering away. A magnetic marker plus a guide-point bit is arguably the ideal DIY combination: the magnet finds dead center, the bit makes the box trace itself.
Choosing by Project Size
- One room or a repair: lipstick method or a Blind Mark kit ($15 to $25) — nothing more needed.
- Basement or whole-house DIY: magnetic kit plus a spiral saw with guide-point bits; the combination pays for itself in un-scrapped sheets and unpatched misses.
- Ceiling boxes: magnets shine here — measuring ceilings across a room compounds error, while a locator finds a fan box through 5/8-inch board in seconds.
- Metal boxes: note that magnetic locators are designed around plastic boxes; a steel box grabs the locator itself and blurs the center. Use the lipstick or measurement method on metal.
Cutting the Hole Cleanly
Marking is half the job; the cut finishes it. For pre-cut holes, drill a 1/2-inch starter hole inside the outline and cut to the line with a jab saw, angling the blade slightly inward so the hole’s back is a hair larger than its face — the bevel makes fitting over the box forgiving without enlarging the visible opening. Test-fit before carrying the sheet to the wall. For in-place spiral cuts, let the bit finish its full loop before withdrawing, and vacuum the box afterward; gypsum dust in a receptacle box is an irritant to the next electrician and a poor bed for devices. If a cut lands slightly proud and the gap exceeds 1/8 inch, fill it with setting compound before plates go on — both for the code point above and because air sealing around boxes is a cheap energy win.
Old-Work Boxes: Marking the Opposite Problem
Remodel work flips the task: the drywall is already up and the box does not exist yet. Old-work (cut-in) boxes clamp to the drywall itself with swing-out ears, and their cutouts are even less forgiving, because the box flange must seat flat on intact board. Every old-work box sold includes its own template — trace it, do not freehand the box outline, since the cutout must clear the box body while leaving solid bearing for the ears. Before cutting, verify what is behind the spot three ways: a stud finder sweep for framing, a strong-magnet sweep for screw lines that betray a stud, and a bent-coathanger probe through a small pilot hole to feel for insulation, blocking, or pipes. Cut with a jab saw at a slight inward bevel, test-fit the box before pulling cable, and if the hole ends up a shade large, a pair of $2 drywall repair clips or an oversized “goof ring” plate rescues it without patching.
Height consistency is the finishing touch pros are judged on: receptacles at 12 inches to center and switches at 48 inches are common conventions, but matching the existing boxes in the room beats any standard. A laser level transferred from the nearest existing outlet marks the new box at exactly the height the eye will compare it against.
The Bottom Line
Outlet marking is a solved problem, several times over. The magnetic locator turned it into a no-math operation for $20; the guide-point spiral bit turned the box into its own template; and the lipstick trick still rescues anyone standing in a room with no tools and one sheet to hang. Pick the method that matches your project’s box count, keep the cover-plate forgiveness margin in mind, and the outlet holes become the easiest cuts of the whole job — which, given how many war stories start with a buried box, is exactly how it should be.