Walk into a garage with a flaking, peeling floor and you are almost always looking at the same mistake: someone rolled epoxy over a dirty or unground slab. Epoxy floor covering is one of the toughest, most chemical-resistant finishes you can put on concrete, but its bond is only as good as the prep beneath it. As someone who has coated dozens of garage and workshop floors, I can promise the application is the easy half. This guide covers how epoxy works, where it belongs, and how to get a coating that lasts a decade instead of peeling in a year.
Part of our Epoxy, Concrete & Garage Floors guide — explore the full guide →
What Epoxy Flooring Actually Is
Epoxy is a thermosetting resin that arrives as two parts, a resin and a hardener, which you mix just before applying. The chemical reaction between them cures into a hard, dense plastic film bonded to the concrete. This is fundamentally different from paint, which simply dries. The cured epoxy forms a continuous, non-porous surface that resists chemicals, abrasion, and moisture.
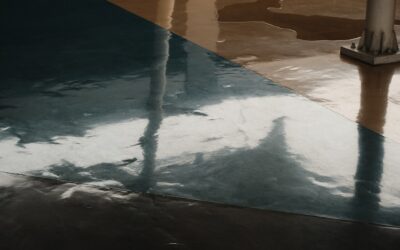
That seamless quality is the whole point. Bare concrete is porous and dusts constantly, soaking up oil and stains. A proper epoxy coating seals it into a glossy, wipeable surface that shrugs off the things that ruin raw concrete.
Where Epoxy Coatings Shine
The material was built for hard-working floors:
- Garages: The classic application, resisting oil, road salt, and hot tire pickup
- Basements: A clean, sealed surface over a slab, paired with proper moisture control
- Workshops and utility rooms: Chemical and impact resistance for tough use
- Laundry and mudrooms: Easy-clean surfaces that handle spills
Decorative flake or metallic systems extend epoxy into living spaces and showrooms, but the most common homeowner use remains the garage, where durability matters more than style.
The Prep Work That Determines Everything
If you remember one thing, make it this: epoxy bonds to clean, profiled concrete and fails on everything else. Surface preparation is the single biggest factor in how long the coating lasts. Done properly, it involves several non-negotiable steps:
- Test for moisture. Tape a plastic sheet to the slab overnight. Condensation underneath means the slab is too wet to coat without addressing the moisture source.
- Clean thoroughly. Degrease oil stains and scrub away dirt. Any contaminant left behind becomes a weak spot.
- Profile the surface. Grind the concrete with a diamond grinder or use an acid etch to open the pores so epoxy can grip. A glassy, smooth slab will not hold.
- Repair cracks and pits. Fill defects with a patching compound before coating.
Skipping the grinding or etching step is the cause of nearly every peeling floor I am ever called to fix. Spend your effort here.
Application Step by Step
Once the slab is clean, profiled, and bone dry, application moves quickly because epoxy has a limited working time once mixed. Plan your steps before you open the cans.
- Mix the two parts in the exact ratio for the full time the instructions state, scraping the sides so it cures uniformly.
- Cut in the edges with a brush, then roll the main field with a wide nap roller, working in manageable sections.
- Broadcast decorative flakes into the wet coat immediately if you are using them.
- Apply a clear topcoat after the base cures, for added thickness and a tougher wear layer.
Watch the temperature and humidity. Most epoxies want a surface and air temperature in a moderate range, often around 60 to 85°F, and they cure poorly in cold or damp conditions. Read the product’s window and respect it.
Cure Time and First Use
Patience pays off. You can usually walk on the floor within a day, but parking a car or placing heavy loads typically requires waiting several days for a full cure. Rushing the cure leaves the coating soft and prone to scuffing and tire marks. The exact figures come from the product data, so follow them rather than guessing.
What It Costs
DIY kits for a typical two-car garage often run $150 to $600 in materials, depending on whether you use a single-coat product or a full multi-coat system with flakes and topcoat. Professional installation of a high-build system runs significantly more, commonly $3 to $12 per square foot, reflecting the labor of mechanical grinding and multiple coats.
The cheapest big-box paint-style kits are tempting, but they are thinner and less durable than true high-solids epoxy. For a garage that sees real use, investing in a thicker system and proper prep pays off in years of added life.
Durability and Maintenance
A well-installed epoxy floor is remarkably tough, resisting chemicals, abrasion, and impact for many years. Maintenance is minimal: sweep or dust mop regularly, and damp mop with a mild cleaner. Wipe spills promptly, and place mats under areas prone to hot tire contact in garages.
Over time, high-traffic paths may dull or the topcoat may wear thin. Recoating with a fresh clear coat restores the finish without redoing the whole floor. Treated this way, an epoxy floor covering turns a dusty, stain-prone slab into a clean, durable surface that looks sharp and cleans in minutes for the better part of a decade.