
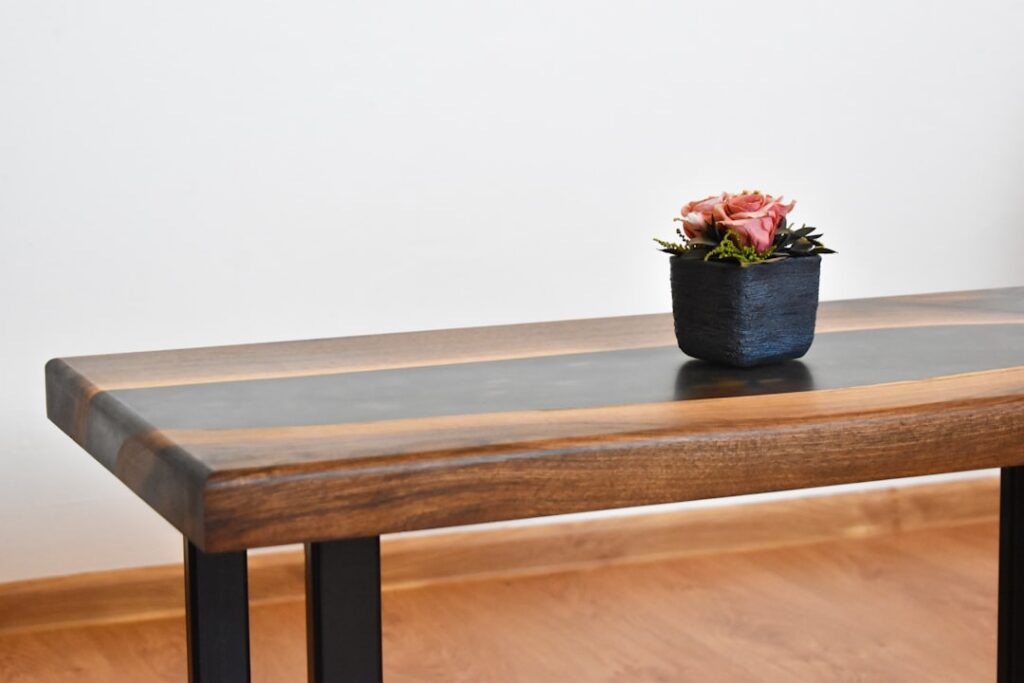
An epoxy resin table top turns a slab of wood or a plain surface into a glossy, glass-like centerpiece that draws attention in any room. River tables, live-edge bar tops, and crystal-clear coatings over wood have made resin one of the most popular DIY furniture projects around. But epoxy is a chemistry project as much as a craft project, and it demands respect for the working time, the heat it generates as it cures, and the ventilation it requires. Approach it with the right products and safety habits and you can create heirloom-quality pieces at home.
Part of our Epoxy, Concrete & Garage Floors guide — explore the full guide →
This guide covers resin types, the critical safety considerations, the pour process, and how to finish your table to a flawless shine.
Understanding Epoxy Resin Types
Not all epoxy is the same, and using the wrong type is a common beginner mistake. The two main categories serve different purposes.
- Coating or table-top epoxy: Designed for thin layers, typically up to about an eighth of an inch per pour. It self-levels well and is ideal for sealing and coating surfaces.
- Deep-pour or casting epoxy: Formulated for thick pours like river tables, sometimes two inches or more at once. It cures slowly to manage heat buildup.
Using coating epoxy for a thick pour is dangerous, because it can overheat. Always match the resin to the thickness you intend to pour and follow the manufacturer’s maximum pour depth.
The Exotherm: Heat Safety You Cannot Ignore
As epoxy cures, the chemical reaction releases heat, a process called the exotherm. The more resin in a given mass, the more heat it generates. Pour too thick with the wrong resin and the mass can get extremely hot, smoke, crack, yellow, or even pose a fire risk.
To stay safe, never exceed the manufacturer’s recommended pour depth, and pour deep projects in layers if needed, letting each layer cool and partially cure before the next. Work in a stable room temperature, since heat and cold both affect curing. If a pour ever begins smoking or smells acrid, move it outdoors and ventilate; do not ignore signs of overheating.
Ventilation and Personal Protection
Epoxy fumes and uncured resin can irritate skin, eyes, and lungs, and some people develop sensitization with repeated exposure. Treat safety gear as mandatory, not optional.
Work in a well-ventilated space, ideally with cross ventilation or a fan moving air out a window, and consider a respirator rated for organic vapors for larger pours. Wear nitrile gloves, since cured epoxy bonds to skin and uncured resin is an irritant. Protect your eyes with safety glasses, cover your work area with plastic, and keep the resin off your clothing. Read and follow the safety data sheet for the specific product you use.
Preparing for the Pour
Preparation determines whether your table comes out flawless or full of trapped bubbles and uneven spots. Rushing the prep is the top cause of disappointing results.
Build a sturdy, sealed mold or form for river tables, using melamine and sealing the seams with caulk so resin cannot leak out. Seal the wood with a thin coat of epoxy first to prevent air from escaping the grain and forming bubbles in the main pour. Level your work surface precisely, since resin self-levels and will reveal any tilt. Have your mixing containers, stir sticks, gloves, and a heat gun or torch for popping bubbles all ready before you mix.
The Pour Process
Measure the resin and hardener by the exact ratio the manufacturer specifies, since epoxy is unforgiving about mixing ratios. Stir slowly and thoroughly, scraping the sides and bottom of the container, for the full recommended time.
Pour into the mold and, for deep pours, respect the maximum depth and layering guidance. Pass a heat gun or torch lightly over the surface to release trapped air bubbles, keeping it moving so you do not scorch the resin. Cover the project to keep dust off while it cures, and resist touching or moving it until it has fully hardened, which can take 24 to 72 hours depending on the product and thickness.
Finishing and Cost
Once fully cured, a thick pour usually needs sanding and polishing to reach a glass-clear finish. Sand progressively through finer grits, then polish with a compound or apply a final flood coat of coating epoxy for a mirror surface.
Costs vary with size and resin type. Deep-pour casting resin is the biggest expense, often $50 to $100 or more per gallon, and a substantial river table can consume several gallons. Add the cost of the wood slab, mold materials, and safety gear. A statement river table can run anywhere from a couple hundred to over a thousand dollars in materials, still far less than buying one finished.
Avoiding Common Epoxy Problems
Most epoxy failures trace back to a handful of avoidable mistakes. Improper mixing ratios are the top cause of soft, sticky, or never-curing resin, so measure precisely and stir thoroughly, scraping the sides and bottom of your container.
Bubbles are another frequent frustration, usually from pouring too fast, mixing too vigorously, or skipping the seal coat on porous wood. Cloudiness can result from moisture contamination or pouring in cold conditions. Dust nibs and lint settle into the surface if the project is left uncovered while curing. Yellowing over time often comes from UV exposure, so choose a resin with UV inhibitors for pieces near windows. Working clean, measuring carefully, sealing the wood, popping bubbles with controlled heat, and covering the cure are the habits that prevent nearly all of these issues.
Caring for a Finished Epoxy Table
Once your table is cured and polished, a little routine care keeps it looking glassy for years. Wipe it with a soft cloth and mild soap and water, avoiding abrasive cleaners and scrubbing pads that can scratch the glossy surface.
Use coasters and trivets, since cured epoxy can soften or mar under very hot items like pots and mugs straight off the stove. Protect the table from prolonged direct sunlight to slow any yellowing, and address scratches by buffing with polish or, for deeper marks, sanding and applying a fresh thin coat. With gentle handling, an epoxy resin table top stays a striking centerpiece that holds up to everyday use while showing off the wood and color you sealed inside it.
Final Thoughts
An epoxy resin table top is one of the most rewarding DIY projects you can take on, blending woodworking with a bit of chemistry. The keys to success are matching the resin to your pour depth, respecting the exotherm by never over-pouring, ventilating well, and wearing proper protection. Prepare meticulously, pour patiently, and finish carefully, and you will end up with a striking, durable piece that looks like it came from a custom furniture studio.


