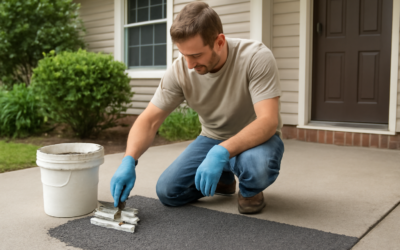
The first time most contractors see epoxy rubber flooring in a high-end home gym, they assume it costs three times what it actually does. This hybrid system combines recycled rubber granules with a clear or pigmented epoxy binder, poured in place to create a seamless, cushioned surface. After installing it in dozens of gyms, garages, and animal kennels, I have a clear sense of where the system shines and where you should pick a different floor.
Part of our Epoxy, Concrete & Garage Floors guide — explore the full guide →
What Epoxy Rubber Flooring Actually Is
The mix is roughly 80 percent SBR or EPDM rubber crumb and 20 percent two-part urethane or epoxy binder by volume. Crews trowel or screed it across a primed concrete or plywood subfloor, usually 3/8 to 1 inch thick. Once cured for 24 to 72 hours, the floor is dense enough to roll equipment over but soft enough to absorb a dropped 45-pound dumbbell without cracking the slab below.
Two flavors dominate the market. EPDM rubber gives you bright color choices and UV stability, while SBR uses recycled tire crumb in black, brown, or speckled tones at lower cost. The binder choice matters too; aliphatic urethane outlasts standard MDI epoxy outdoors by five to ten years.
Where Epoxy Rubber Flooring Works Best
Three settings consistently make sense for this material. Home and commercial gyms because of the impact absorption. Animal facilities and kennels because the seamless surface flushes clean. Multi-purpose recreation rooms in basements and garages where comfort underfoot beats hardness.
I would not specify it for a working garage where you change oil or weld. Solvents and hot slag both damage the binder. Tile or polyaspartic make more sense in those environments.
Cost Per Square Foot Installed
Plan on $7 to $14 per sq ft installed for a 3/8-inch black SBR system on prepped concrete. Color EPDM blends and 1/2-inch builds push the price to $12 to $20. Custom logos and inlays add $50 to $200 per square foot for the logo area depending on color count and detail.
For a 600 sq ft home gym, expect to spend $4,200 to $8,400 turnkey. DIY rubber-and-epoxy kits like the FloorAde or American Floor Coverings systems cost $4 to $7 per sq ft in materials and require a partner, a screed gauge, and a willingness to work fast. Pot life on most binders is 30 to 45 minutes once mixed.
Substrate Preparation Requirements
Concrete must be diamond ground to a CSP 2 to 3 profile and primed with a moisture-tolerant epoxy primer. Skip the prep step and the rubber layer eventually delaminates in patches that look like flat tire impressions. Plywood subfloors need 3/4-inch tongue and groove material, screwed every 6 inches, with a urethane primer to lock the surface.
Moisture testing is non-negotiable on any slab below grade. Calcium chloride or RH probes per ASTM F2170 should read under 5 lbs per 1,000 sq ft per 24 hours or 80 percent RH. Higher numbers require a vapor mitigation primer at $1.50 to $3 per sq ft before the rubber goes down.
Pros of Epoxy Rubber Flooring
- Seamless cleaning: No grout joints or seams to harbor odor, urine, or chemicals
- Impact absorption: Up to 30 percent shock reduction compared to bare concrete at 1/2-inch thickness
- Sound dampening: Drops impact noise by 8 to 15 STC points in finished basements
- Long service life: 15 to 20 years indoors, 8 to 12 years on a covered patio
- Custom color and graphics: Logos, lane stripes, color zones available with EPDM
Cons and Real-World Drawbacks
The texture traps dust. Vacuuming weekly is mandatory in a residence; otherwise lint and pet hair embed in the surface and look dingy within a year. A hose-down works in commercial settings but not in a finished home gym.
The smell during install is strong. Plan on 24 to 48 hours of off-gassing where the space is unusable, and run fans for the first week. Some sensitive clients react to the urethane VOCs even after cure, so ask for a low-VOC binder spec if anyone in the household has chemical sensitivity.
Repairs are visible. Patching a worn or torn area requires grinding out a clean square, priming, and pouring fresh material. The new patch almost always shows because the old surface has darkened slightly with age. Plan repairs in full-tile sections from the start if patches are a concern.
Comparing Alternatives
Interlocking rubber tiles like the Greatmat 1-inch puzzle pieces cost $3 to $5 per sq ft and install in two hours. They are the right call when you might move the gym in five years. Vulcanized rubber rolls give you 4-foot continuous runs at $4 to $7 per sq ft installed but show seams.
Pure poured polyurethane sport surfaces cost $9 to $18 per sq ft and feel firmer but cleaner. Choose poured polyurethane for indoor sport courts and epoxy rubber flooring for free weight gyms and animal facilities.
Maintenance and Long-Term Care
Wash monthly with a pH-neutral cleaner like Bona PowerPlus or a dilute Simple Green solution. Avoid solvents, citrus cleaners, and anything containing acetone; all of them attack the urethane binder. Reseal the surface every 5 to 7 years with a fresh coat of clear urethane at $1 to $2 per sq ft.
Spot-treat scuffs with a Magic Eraser or a soft scrub pad. Heavy black rubber marks from weight plates lift easily with the same products used to clean rubber-soled shoes. Done right, an epoxy rubber flooring system stays in service for two decades and looks premium the entire time.
Choosing the Right Installer
Vet contractors carefully. Ask for three recent local installs you can visit in person, photos of the substrate prep, and the manufacturer’s certified applicator ID. Quality installers walk every project before quoting, test the slab moisture, and provide a written scope that lists primer brand, broadcast rate, and binder ratio.
Avoid bidding contests with installers who pull up to your driveway in a passenger car. Proper application requires a planetary grinder, a gauge rake, dedicated mixing tools, and at least two skilled hands. The cheapest quote almost always means thinner film build, weaker prep, or both.
Prefer to explore on your own?
See how new flooring looks in your actual room in seconds — free, no signup.
Try the free Floor Studio →