Firestop caulk is one of the few products in the sealant aisle where using the wrong tube isn’t a cosmetic mistake, it’s a life-safety and inspection failure. Fire-rated sealants exist to reseal the holes we cut through fire-resistance-rated walls, floors, and draft barriers for pipes, wires, and ducts, so that a fire stays compartmentalized long enough for people to get out. I deal with firestopping on every basement finish, service upgrade, and multifamily punch list, and the two most common problems I see are the same everywhere: regular caulk or canned foam stuffed where a rated product belongs, and rated product applied outside its listed system so it doesn’t actually achieve the rating. This guide covers where code requires firestopping, the product types, and how to apply it so it passes inspection and, more importantly, works.
Part of our Paint & Walls guide — explore the full guide →
What Firestop Caulk Actually Is
Fire-rated sealants come in two working types:
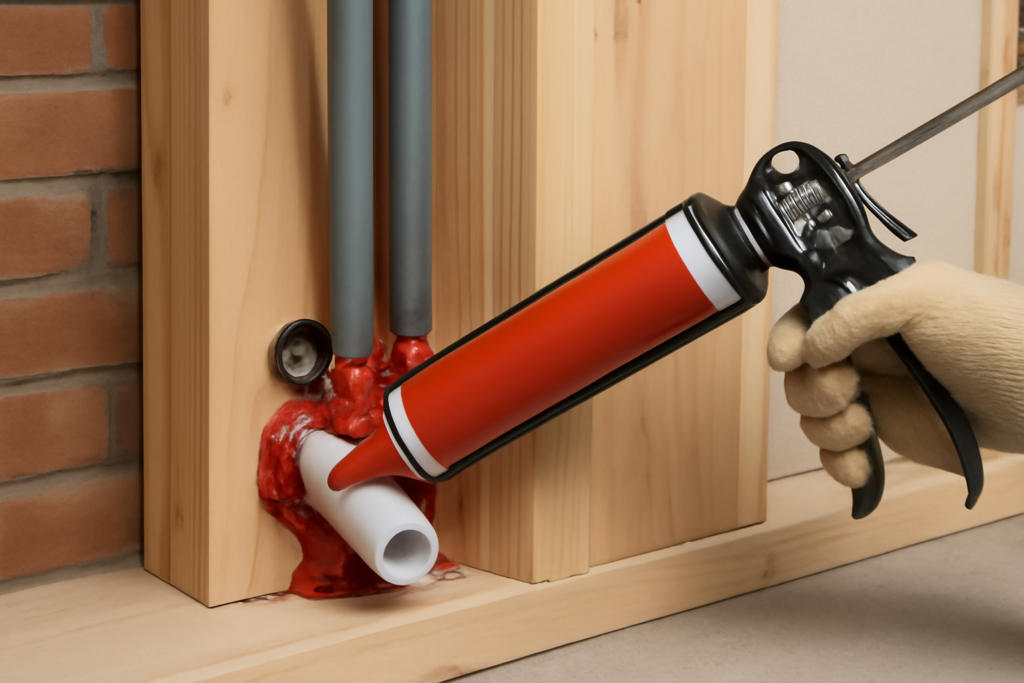
- Intumescent sealants expand 3 to 10 times their volume when heated past roughly 250 to 350°F, forming an insulating char that squeezes shut the hole as plastics melt away. They’re required around combustible penetrants: PVC and ABS pipe, PEX, insulated cables, because when the plastic pipe melts and drops out, the intumescent char fills the void it leaves.
- Non-intumescent (endothermic or elastomeric) firestop, typically latex- or silicone-based, doesn’t expand; it resists flame passage and releases bound water to absorb heat. It’s appropriate for noncombustible penetrants like copper, steel pipe, and EMT, and for construction joints.
Common products: 3M FB-136 and CP 25WB+, Hilti FS-One Max and CP 606, STI SpecSeal LCI, Everbuild and DAP fire-rated lines. Expect $12 to $30 per 10.1-ounce tube, two to four times ordinary caulk, and worth every cent. Ratings are established by testing to ASTM E814/UL 1479 for penetrations and ASTM E1966/UL 2079 for joints, expressed as F-ratings (flame, in hours) and T-ratings (temperature rise).
The Concept Inspectors Care About: Listed Systems
Here’s the part most DIYers and plenty of tradespeople miss. A tube of firestop caulk does not “have” a 2-hour rating by itself. The rating belongs to a tested assembly, called a listed system: a specific wall or floor construction, a specific penetrant type and size, a specific annular gap, a specific sealant depth, and sometimes mineral wool backing. UL and manufacturers publish these system details (3M, Hilti, and STI all have free selector tools), and a commercial inspector will ask which system number you installed to. Match your real-world condition to a listed system and follow its dimensions, and you’re done; freelance the depth or backing and the red tag is legitimate, because the assembly was never tested the way you built it.
Where Code Requires Firestopping
Requirements come from the International Building Code and International Residential Code as adopted locally; always confirm with your jurisdiction. The recurring locations:
- Penetrations of rated assemblies. Any pipe, conduit, cable, or duct passing through a fire-resistance-rated wall or floor: the house-to-garage separation wall and ceiling, walls between dwelling units (duplexes, townhomes, condos), corridor walls in multifamily, shaft walls, and rated floor/ceiling assemblies. IRC dwellings’ garage separation must resist fire spread, and penetrations there must be sealed with an approved material.
- Draftstopping and fireblocking in concealed spaces (IRC R302.11). Single-family homes have few rated walls, but code requires fireblocking at the top and bottom plates where wires and pipes pass between floors, at soffit and dropped-ceiling connections, behind tub/shower units on framed chases, and every 10 feet in concealed stud channels. Fire-rated caulk or approved fireblock foam is the standard way to seal the small gaps around penetrations at plates.
- Electrical boxes and recessed fixtures in rated walls, where box gaps exceed allowances or boxes are back-to-back closer than 24 inches, addressed with putty pads or listed sealant per the system.
- Construction joints in rated assemblies: head-of-wall gaps between rated walls and decks in commercial work.
- Fuel-fired equipment rooms and other separations your local code flags.
A practical homeowner translation: if you drill through the ceiling into the attic, through a floor plate between stories, or through the garage wall or ceiling, the hole around that pipe or wire should be sealed with fireblock-rated material, not painter’s caulk and not ordinary orange gap-filler foam, which burns readily. Fireblock-rated foam exists (it’s the orange-red can labeled Fireblock) and is acceptable for IRC fireblocking, but true rated penetrations of fire-resistance-rated assemblies want tested firestop sealant per a listed system.
Choosing the Right Product
| Condition | Product type |
|---|---|
| PVC/ABS/PEX through rated wall or floor | Intumescent sealant (or collar/wrap strip above ~1.5–2″ pipe per system) |
| Copper, steel, EMT through rated assembly | Elastomeric/latex firestop sealant |
| Wires/cables at top/bottom plates (fireblocking) | Fireblock sealant or fireblock foam |
| Large openings, cable bundles | Firestop pillows or mortar (beyond caulk) |
| Head-of-wall / joints with movement | Firestop sealant rated for joint movement (silicone-based) |
| Around flues/chimneys | High-temp sealant per flue listing — different product class |
Note the last row: ordinary firestop caulk is not chimney or flue sealant. Gaps at metal flues get sheet-metal collars and high-temperature sealant per the flue manufacturer’s listing.
How to Apply It
- Size the annular space. Listed systems specify minimum and maximum gaps, commonly 0 to 1 inch around the penetrant. Oversized holes need mineral wool packed as backing or a different system; you can’t bridge a 3-inch void with caulk.
- Clean the opening. Dust and drywall crumbs kill adhesion. Vacuum and wipe.
- Pack backing where the system calls for it. Mineral wool (never fiberglass unless listed) compressed into the opening leaves the specified sealant depth, typically 1/2 inch to 5/8 inch flush with each face.
- Gun the sealant to full required depth, pushing it into the annular space so it wets both the penetrant and the assembly. On floor penetrations, seal the top; many systems require both faces on walls.
- Tool flush and label it. Pros leave the bead slightly proud and tooled; on commercial work, photograph and tag each location with the system number. On your own house, a sharpie note on the plate is a gift to the next tradesperson and your inspector.
- Respect cure and paint rules. Most latex firestops are paintable and clean up with water; silicones are not paintable. Curing is not the rating; the rating exists once installed per system, but keep water off latex products for 24 hours.
The Mistakes That Fail Inspection
- Great Stuff around a plumbing stack in the garage ceiling. Standard polyurethane foam is fuel, not firestop. Cut it out; do it right.
- Rated caulk skim-coated 1/8 inch deep over a big gap. Depth is part of the tested system; a cosmetic smear earns a red tag.
- Intumescent needed, elastomeric installed around plastic pipe. When the pipe melts in a fire, nothing closes the hole.
- Fiberglass batt stuffed as backing. It melts; mineral wool is the listed material.
- No documentation on commercial work. If you can’t cite the system, the inspector can’t approve it.
Cost and Effort Reality Check
Firestopping a typical single-family basement finish, sealing plate penetrations, the garage-wall penetrations, and a few chases, takes one to three tubes ($15 to $75) and an afternoon. A whole-house fireblocking pass during a remodel rarely exceeds $150 in materials. Compare that with what the product buys: tested assemblies hold back fire and smoke for 1 to 2 rated hours, and in real fires, compartmentalization is the difference between a room-of-origin loss and a total one. There is no cheaper life-safety upgrade in the building.
My closing advice is simple: walk your basement and garage with a flashlight and a mirror, find every hole where a pipe or wire passes through a plate, the garage separation, or a floor, and seal each one with a labeled fireblock or firestop product appropriate to the penetrant, intumescent where plastic passes through. Keep the tube’s datasheet with your remodel records, and when an inspector or a future buyer’s inspector shines a light up that wall, the bright red bead tells them someone built this house carefully. It’s an afternoon of unglamorous work that quietly protects everything else you’ve built.