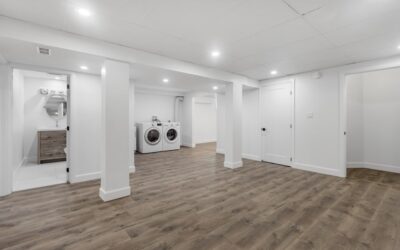
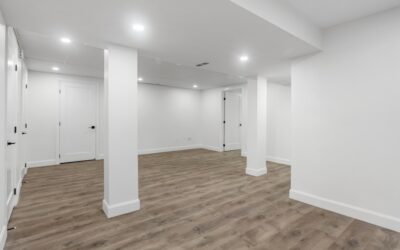
On expansive clay soils, a basement slab can rise an inch or more over the years as the ground absorbs moisture, and a rigidly framed partition wall has nowhere to go but up into the floor above. Floating basement walls solve that problem with a slip joint: part of the wall is anchored to the slab, part is hung from the floor joists, and a gap between them lets the slab move without cracking drywall, jamming doors, or lifting the house framing. In many areas with swelling soils, especially parts of the Rocky Mountain and Plains states and Texas, local codes or inspectors require this detail on interior basement walls.
This guide explains when you need floating walls, how the two common connection methods work, how to size the gap, and how to finish drywall, trim, and doors so the wall can actually move.
Why Floating Basement Walls Matter
Floating basement walls exist because many basement slabs are “floating” too. In homes built on expansive soils, the slab is often poured separately from the foundation walls and footings and isn’t structurally tied to them. When clay beneath it gets wet, it swells and pushes the slab upward. When it dries, the slab can settle back. The foundation walls and the floor system above, meanwhile, stay put because they bear on footings or piers.
A standard partition, with its bottom plate nailed to the slab and top plate nailed to the joists, becomes a rigid post between two surfaces that are moving relative to each other. As the slab heaves, that wall can push up on joists, crack drywall and ceilings upstairs, bind doors, and even pop nails or shift beams. A slip joint breaks that load path.
When Code or Inspectors Require It
Requirements are set locally. Building departments in areas with known expansive soils often mandate a floating detail for non-bearing basement partitions and specify a minimum gap. Your soils report, if the house has one, may call for a specific amount of allowed movement. If you’re unsure, ask the building department before pulling your basement finishing permit. Even where it isn’t required, a slip joint costs little and protects your finishes if the slab has any history of cracking or movement.
One critical distinction: floating walls are for non-load-bearing partitions only. Posts and bearing walls that support beams must bear on proper footings, often with adjustable steel columns designed for heave. Never convert a bearing wall into a floating wall.
How Basement Floating Wall Framing Works
The most common arrangement uses two bottom plates:
- A pressure-treated sole plate fastened to the concrete slab. It moves with the slab.
- A floating bottom plate nailed to the bottom of the studs, held above the sole plate by the planned gap, typically 1-1/2 inches.
- A top plate fastened to the floor joists or to blocking between them. The studs hang from this plate.
The two bottom plates are connected in a way that keeps the wall aligned sideways while allowing vertical sliding. Some builders place the gap at the top of the wall instead, using a double top plate with the slip joint between them; the principle is the same. Follow whichever detail your inspector expects.
Spike Method
With the spike method, you drill oversized holes through the floating plate, then drive long spikes, often 60d nails or 10-inch-plus spikes, through those holes and into the sole plate below. Space them roughly every 24 to 32 inches and near each end. Because the holes are larger than the spikes, the floating plate can slide down the spikes as the slab rises. Use a spacer, such as a 1-1/2-inch block, to hold the gap while you drive them, then remove the spacers.
Slotted-Clip Method
Manufactured metal slip clips have a slotted leg that fastens to the stud or floating plate and a fixed leg that fastens to the sole plate. Special shouldered nails or screws sit in the slot so they can travel up and down. Clips are faster, more consistent, and easier for an inspector to verify. They typically go on every other stud or at the spacing the maker specifies. Follow the fastener instructions exactly; driving the nail tight at the bottom of the slot defeats the purpose.
Tools and Materials
- Pressure-treated 2×4 or 2×6 for the sole plate; standard framing lumber for studs and plates.
- Powder-actuated nailer or concrete screws and a hammer drill for fastening the sole plate.
- 60d spikes or slotted slip clips with their specified fasteners.
- Sill-seal foam or a capillary break under the treated plate.
- Laser level or plumb bob, chalk line, framing nailer or hammer, speed square, and 1-1/2-inch spacer blocks.
- Eye and hearing protection, gloves, and a dust mask.
A powder-actuated nailer is the fastest way to fasten plates to concrete. It fires a hardened pin with a small powder load, so treat it like a firearm: read the manual, wear eye and hearing protection, use the correct load strength for your concrete, keep your hand clear of the muzzle, and never fire near the slab edge or into cracked or brittle concrete. Many tool rental shops can show you how to use one safely.
Step-by-Step: Framing a Floating Wall
- Lay out the wall. Snap a chalk line on the slab and use a laser or plumb bob to transfer it to the joists above. Where the wall runs parallel to joists, install blocking between them to catch the top plate.
- Fasten the sole plate. Set treated lumber on sill seal and fasten it to the slab about every 24 to 32 inches and within a few inches of each end, per your local requirement.
- Install the top plate. Nail or screw it to each joist or blocking along the line.
- Measure stud length. Measure from the underside of the top plate to the top of the sole plate at several points, subtract the thickness of the floating plate and the gap. The slab is rarely flat, so measure every few feet.
- Build the stud assembly. Nail studs to the floating bottom plate at 16 inches on center, then lift the assembly into place and nail the stud tops to the top plate.
- Set the gap. Place spacers under the floating plate, then drive spikes through the oversized holes or install slip clips.
- Remove spacers and check. Confirm a clear gap along the entire length with nothing bridging it.
Drywall, Trim, and Door Details
The framing is only half the job; finishes can lock the wall solid if you’re careless. Hang drywall so it attaches only to the floating studs and plate, and stop it above the sole plate so it never touches the slab-anchored lumber. The lower edge of the sheet should hang over the gap without being fastened into the sole plate.
Baseboard is the clever part. Nail it to the sole plate only, so it moves with the floor and slides over the face of the drywall. Don’t nail or glue it into the drywall or studs. Caulk the top edge sparingly or not at all, since a caulk bead can crack as the parts move.
Doors need their own slip allowance. Leave a gap above the header, or frame the rough opening so the door frame is tied to the floating wall while the threshold area can move independently. Casing can be attached to the jamb but not bridged into the sole plate. Talk with your inspector about local details, because a jammed door is the first sign that a floating wall isn’t floating.
Plumbing and electrical runs also need slack. Leave loops in cable where it passes from the wall to the ceiling, and use flexible connections where supply lines cross between the moving and fixed parts. Before any electrical work, turn off the breaker and confirm power is off with a non-contact voltage tester; new circuits are best left to a licensed electrician.
Troubleshooting Common Mistakes
Gap closed after a few years. Heave exceeded the gap. Cut the spikes or clips, trim the stud assembly, and reset a larger gap; ask a soils professional whether ongoing movement needs attention.
Drywall cracking at the ceiling. Drywall may be fastened into the ceiling joists and the wall studs rigidly at an inside corner while the wall moves. Some detailing allows the ceiling board to float or uses a flexible corner treatment.
Baseboard pulling away. Usually nailed into the studs instead of the sole plate. Renail into the plate only.
Stair stringers or built-ins jammed. Anything tying the slab to the floor above, including stair stringers, cabinets, and furnace platforms, needs its own slip detail.
General Cost Considerations
Floating wall framing adds only modest cost over standard framing: a treated sole plate, spikes or clips, and some extra labor for measuring and spacing. Slip clips are inexpensive individually, and a typical basement uses a few boxes. Professional framing of a finished basement is usually priced per linear foot of wall or as part of an overall finishing contract; expect floating details to add a small percentage rather than a major line item. Fixing a rigid wall after heave damage, by contrast, can mean redoing drywall, doors, and ceilings upstairs.
When to Call a Licensed Professional
Hire a structural engineer if you see active cracking, sloping floors upstairs, or a load-bearing post resting on the slab. Bearing walls and beam supports on expansive soils need engineered solutions, not floating partitions. Pull the required permit, have framing inspected before insulation and drywall, and use licensed trades for electrical, plumbing, and HVAC work that crosses the slip joint.
Frequently Asked Questions
How big should the gap be in a floating wall?
A 1-1/2-inch gap is common, but some jurisdictions or soils reports call for 2 or 3 inches. Use whatever your local building department or engineer specifies.
Do I need floating basement walls everywhere?
They are generally required only where expansive soils cause slab movement. Check with your local building department before finishing your basement.
Can a load-bearing wall be a floating wall?
No. Floating walls are for non-bearing partitions. Bearing walls and posts must sit on proper footings designed by an engineer.
Should I use spikes or slip clips?
Both work when installed correctly. Clips are faster and more consistent, while spikes use common materials. Some inspectors prefer one method, so ask first.
How do I attach baseboard to a floating wall?
Nail baseboard only into the slab-anchored sole plate so it slides past the drywall as the slab moves, and avoid gluing or nailing it into the studs.