Understanding the steps to finishing a basement helps you turn a cold, unused space into valuable living area while avoiding costly mistakes. Finishing a basement adds usable square footage and can boost home value, but the order of operations matters. This guide walks through each phase in the right sequence, from moisture control to final finishes.
- Step 1: Address Moisture First
- Step 2: Check Codes and Pull Permits
- Step 3: Plan the Layout
- Step 4: Insulate and Address the Walls
- Step 5: Frame the Walls
- Step 6: Rough-In Electrical, Plumbing, and HVAC
- Step 7: Pass Rough Inspections
- Step 8: Hang Drywall and Finish the Ceiling
- Step 9: Install Flooring
- Step 10: Paint, Trim, and Final Touches
- Step 11: Final Inspection
- Estimating the Cost
- Planning for Adequate Lighting
- Heating, Cooling, and Ventilation
- Soundproofing Considerations
- Choosing Between DIY and a Contractor
- Common Mistakes to Avoid
- Final Thoughts
Step 1: Address Moisture First
Before anything else, make sure the basement is dry. Finishing over a damp foundation traps moisture behind walls and invites mold. Run a simple moisture test by taping a two-foot square of plastic to the concrete for a couple of days; condensation underneath means you have a moisture problem to solve first. Fix any leaks, seal cracks, improve exterior grading, and add a sump pump or dehumidifier as needed before construction begins.
Step 2: Check Codes and Pull Permits
Finishing a basement almost always requires permits, and skipping them can cause trouble when you sell. Building codes govern ceiling height, egress windows, smoke detectors, and electrical work. Most codes require a finished basement to have at least a 7-foot ceiling height and a legal egress window or door in any bedroom for fire escape. Contact your local building department early to understand the rules and secure the necessary permits.
Step 3: Plan the Layout
Sketch how you want to use the space before you build. Decide where a bathroom, bedroom, media area, or storage will go, keeping plumbing and existing utilities in mind. Locate the furnace, water heater, and electrical panel, which need clearance and access. A thoughtful layout that works around fixed obstacles like support columns and ductwork saves rework later.
- Map out rooms, doors, and traffic flow on paper first.
- Keep required clearances around the furnace and electrical panel.
- Plan plumbing runs near existing drains to reduce cost.
- Include an egress window in any bedroom.
Step 4: Insulate and Address the Walls
Basement walls need insulation for comfort and energy efficiency. Rigid foam board applied to the foundation walls provides a moisture-resistant thermal barrier and is preferred over fiberglass directly against concrete, which can trap moisture. Aim for the R-value your climate zone requires, often R-10 to R-15 for basement walls. A vapor barrier strategy appropriate to your region prevents condensation problems.
Step 5: Frame the Walls
With insulation planned, frame your interior walls using pressure-treated lumber for the bottom plate that contacts concrete, since it resists rot. Build stud walls slightly away from the foundation to allow for insulation and prevent direct contact. Frame around obstacles like columns and ducts, and rough in door openings. Keep walls plumb and square to make drywall and trim easier later.
Step 6: Rough-In Electrical, Plumbing, and HVAC
Before closing up the walls, complete all the mechanical rough-ins. Licensed electricians and plumbers should handle wiring, outlets, and any new plumbing to meet code. Plan for adequate outlets, lighting circuits, and heating or cooling. Extending your HVAC system or adding a mini-split keeps the basement comfortable. This is also the time to run any low-voltage wiring for internet or a media room.
Electrical and gas work carry real safety risks, so hire licensed pros and schedule the required inspections before covering anything.
Step 7: Pass Rough Inspections
Your building department will inspect the framing, electrical, plumbing, and insulation before you cover them with drywall. Do not install drywall until these rough inspections pass, because inspectors need to see the work inside the walls. Passing inspection confirms the work is safe and to code, protecting you and future owners.
Step 8: Hang Drywall and Finish the Ceiling
Once inspections pass, hang drywall on the walls and ceiling, or install a drop ceiling if you want access to overhead pipes and ducts. Tape, mud, and sand the seams for a smooth finish, which typically takes several coats with drying time between them. A drop ceiling is popular in basements because it keeps utilities reachable, while drywall gives a more finished, traditional look.
Step 9: Install Flooring
Basement flooring must tolerate the possibility of moisture. Good choices include luxury vinyl plank, tile, engineered flooring rated for below grade, or carpet tiles that can be replaced individually if damaged. Avoid solid hardwood, which can warp with humidity. Consider a subfloor system with a moisture barrier and slight elevation off the concrete for warmth and protection. Acclimate flooring materials before installing.
Step 10: Paint, Trim, and Final Touches
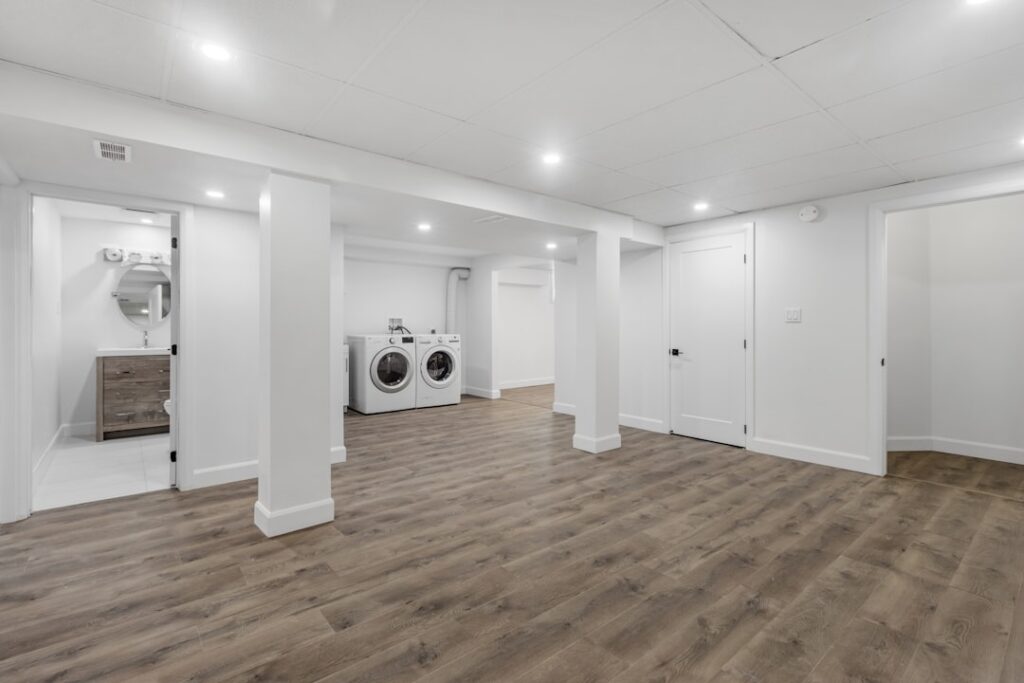
With walls and floors in, prime and paint, using light colors to brighten a space that lacks natural light. Install baseboards, door and window trim, interior doors, and any built-ins. Add outlet and switch plates, and mount light fixtures. These finishing touches transform the raw construction into a comfortable, polished room.
Step 11: Final Inspection
A final building inspection confirms the completed space meets code, including smoke and carbon monoxide detectors, egress, and electrical safety. Passing the final inspection makes the finished square footage official, which matters for insurance and resale. Keep your permit and inspection records with your home documents.
Estimating the Cost
Finishing a basement typically costs between about $30 and $75 per square foot depending on finishes, so a 1,000-square-foot basement often runs from roughly $30,000 to $75,000. Adding a bathroom, wet bar, or high-end finishes raises the total. Doing some work yourself, like painting and flooring, can reduce costs, while structural, electrical, and plumbing tasks are best left to licensed pros.
Planning for Adequate Lighting
Basements lack natural light, so a strong lighting plan is essential for a space that feels welcoming rather than dungeon-like. Recessed can lights spread even illumination without eating into the already limited ceiling height, which is a real advantage below grade. Layer in task lighting over work areas and accent or lamp lighting for ambiance. Using multiple switched circuits and dimmers lets you adjust the mood, and light paint colors bounce the available light to brighten the whole room.
Heating, Cooling, and Ventilation
Comfort depends on climate control. You can extend your existing HVAC system into the basement, add dedicated supply and return ducts, or install a ductless mini-split for independent heating and cooling. Because basements can be humid, plan for a dehumidifier or ensure your HVAC keeps humidity in check. Proper ventilation, including any required bathroom exhaust fans vented to the outside, prevents stale air and moisture buildup that could undermine all your finishing work.
Soundproofing Considerations
If your basement will be a media room, gym, or bedroom, soundproofing improves comfort for everyone in the house. Adding insulation in the ceiling joists dampens noise traveling between the basement and the floor above. Resilient channel, acoustic caulk around penetrations, and solid-core doors further reduce sound transfer. Deciding on soundproofing before you close up the ceiling is far easier and cheaper than retrofitting it later, so plan for it during the framing and rough-in phases.
Choosing Between DIY and a Contractor
Some homeowners tackle basement finishing themselves to save money, while others hire a general contractor to manage the whole project. Tasks like painting, trim, and flooring are DIY-friendly, but framing, electrical, plumbing, and HVAC require skill and often licensed professionals to meet code. A hybrid approach, hiring pros for the technical work and doing finishes yourself, balances cost and quality. Whatever you choose, ensure all permitted work is inspected and documented.
Common Mistakes to Avoid
- Finishing over an unresolved moisture problem.
- Skipping permits and inspections to save time.
- Using materials that cannot handle below-grade humidity.
- Forgetting an egress window in a basement bedroom.
- Blocking access to the furnace, panel, or shutoff valves.
Final Thoughts
Following the right steps to finishing a basement, starting with moisture control and permits, then framing, mechanicals, inspections, drywall, flooring, and finishes, ensures a safe, durable, and valuable addition to your home. Take the phases in order, hire licensed professionals for electrical and plumbing, and choose moisture-tolerant materials. Done methodically, a finished basement becomes one of the most rewarding home improvements you can make.