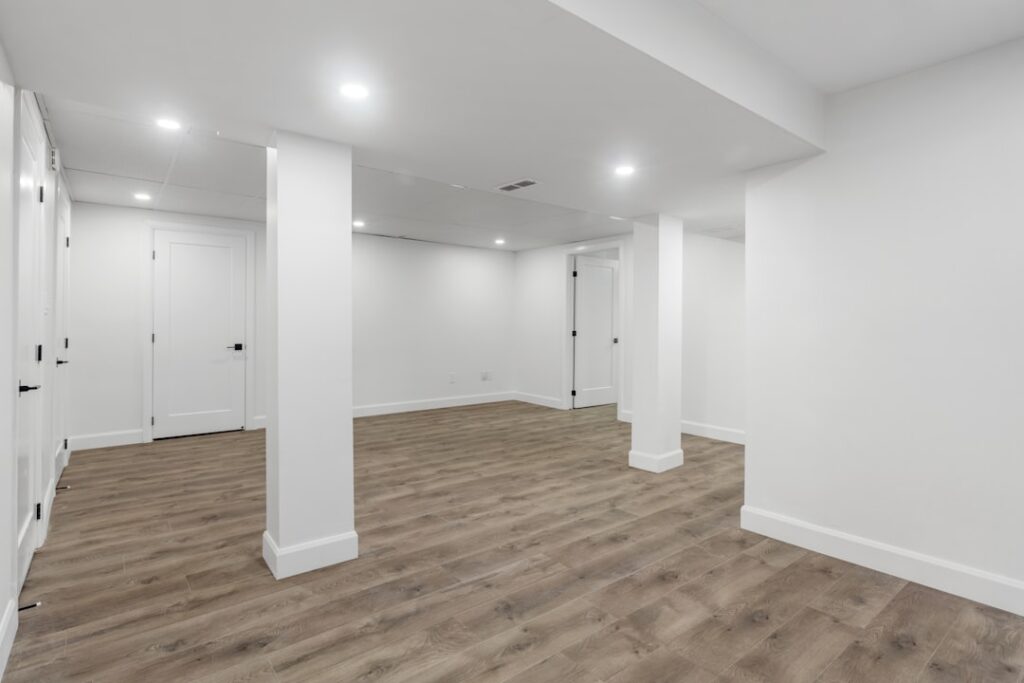
Finishing an unused basement adds around 70% of the project cost back in home value, which makes it one of the strongest ROI renovations most homeowners ever tackle. Learning how to renovate a basement properly — in the right order, with the right moisture control — is what separates a dry, warm extra room from a mildew-smelling disaster in two winters. This guide walks the full sequence, from water testing before demo to the final trim, with realistic budgets at each stage.
- Step 1: Moisture and Radon Testing
- Step 2: Permit Check and Egress Planning
- Step 3: Waterproofing and Drainage
- Step 4: Framing the Walls
- Step 5: Insulation
- Step 6: Rough Electrical, Plumbing, and HVAC
- Step 7: Drywall and Ceiling
- Step 8: Flooring
- Step 9: Paint, Trim, and Fixtures
- Realistic Budget and Timeline
Step 1: Moisture and Radon Testing
Do not buy a single 2×4 before you know the basement is dry. Tape a 2-foot square of plastic sheeting to the floor and wall. Leave it 48 hours. Condensation under the plastic means the slab or wall is wet from the outside — you need waterproofing before framing. A $20 radon test kit from Home Depot sent to a lab tells you if you need a mitigation system ($800 to $1,500) before you close up the space.
Step 2: Permit Check and Egress Planning
Finished basements in most US jurisdictions require a permit, and any sleeping room must have an egress window — a window at least 5.7 sq ft of opening, with the sill no higher than 44 inches off the floor. Cutting a new egress and installing a window well typically runs $3,000 to $5,500. Skip this at your peril; unpermitted basement bedrooms don’t count in appraisals and can derail a sale.
Step 3: Waterproofing and Drainage
If the plastic test showed moisture, fix it now. Options range from simple to serious:
- Interior drain tile + sump pump: $3,500 to $9,000, handles most wet basements
- Exterior excavation + membrane: $15,000 to $30,000, for severe water intrusion
- Crack injection for poured walls: $400 to $800 per crack, fast fix
- Regrading + downspout extensions: under $500 DIY, often solves the problem at the source
Check gutters and grading first — half of “wet basement” calls are solved by fixing a downspout that dumps against the foundation.
Step 4: Framing the Walls
Two common methods, both work if done right. Furring strips (2x2s or 1x3s attached directly to the foundation wall) save 2 inches of floor space but leave no room for insulation beyond 1.5 inches. Standard 2×4 framing built an inch off the foundation wall gives you a full insulation cavity and a better thermal break.
Use pressure-treated bottom plates in contact with concrete, and put a capillary break (sill gasket or strip of closed-cell foam) under the plate to stop moisture wicking up. Frame around any bulkheads, beams, and mechanicals — don’t box them in so tight you can’t service them later.
Step 5: Insulation
Basement walls need to breathe toward the inside, not the outside, which makes basement insulation different from above-grade walls. The gold standard is 2 inches of closed-cell spray foam against the foundation, then fiberglass or mineral wool in the stud cavity. A cheaper DIY alternative: 1 to 2 inches of rigid XPS foam board (Owens Corning Foamular) sealed to the foundation with spray foam around the edges, then framed and insulated normally.
Do not put a plastic vapor barrier on the warm side — in a basement, that traps moisture. Check local code; climate zones 4A, 5, and 6 all have specific basement assembly details.
Step 6: Rough Electrical, Plumbing, and HVAC
Stub in everything before drywall. A typical basement rewire includes:
- One 20-amp circuit for every 500 sq ft of living area
- GFCI protection on any circuit within 6 feet of a sink or unfinished space
- Separate circuits for a bathroom, kitchenette, or home office
- Smoke and CO detectors hardwired and interconnected
If you’re adding a bathroom, plan the drain locations now — most basements need a sewage ejector pump ($700 to $1,500 installed) because the drain line is below the main sewer pipe. Route HVAC supply and return ducts before drywall goes up. Basements need dedicated return air paths, not just doors undercut for airflow.
Step 7: Drywall and Ceiling
Hang 1/2-inch drywall on the walls and either drywall or a drop ceiling overhead. Drop ceilings cost more per square foot ($3 to $5 installed vs. $2.50 for drywall) but give you permanent access to plumbing, wiring, and ductwork. For rooms with low headroom, drywall paired with strategic access panels over key shut-offs is the better call. Finished basement ceilings should be at least 7 feet; most US code allows 6 feet 8 inches under beams and ducts.
Step 8: Flooring
Never install solid hardwood in a basement — seasonal humidity changes will cup or gap every plank. Good basement flooring options include:
- Luxury vinyl plank (LVP): $2 to $5/sq ft, waterproof, warm underfoot with a pad
- Engineered hardwood: $4 to $9/sq ft, floats over a moisture-resistant underlayment
- Tile: $5 to $15/sq ft installed, bulletproof against water, cold without in-floor heat
- Carpet on a DriCore subfloor: $3 to $7/sq ft, warm and soft but risky if water ever floods
A subfloor panel system like DriCore or Barricade lifts the finish flooring 7/8 inch off the slab, adds a thermal break, and lets air flow under any future moisture. Worth the $1.50 to $2 per square foot on any serious basement build.
Step 9: Paint, Trim, and Fixtures
Prime drywall with a high-solids primer before the topcoat. In climates with any summer humidity, use a paint with mildewcide. Baseboard, door casing, and crown go on after painting. Install light fixtures, outlets, and switches, and pressure-test any new plumbing before final inspection.
Realistic Budget and Timeline
A DIY-forward basement renovation for 800 sq ft runs $15,000 to $30,000 and takes 3 to 5 months working weekends. A contractor-built finish averages $35 to $75 per square foot — $28,000 to $60,000 for the same space — and takes 6 to 10 weeks of active work. Add $8,000 to $20,000 for a bathroom, $5,000 to $12,000 for a kitchenette, and keep a 15% contingency for surprises behind old walls.