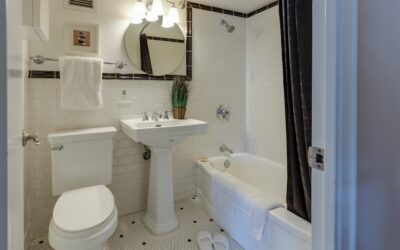
A standard basement bathroom from a general contractor runs $15,000 to $25,000. That number is enough to make most homeowners abandon the project — but it should not. The cheapest way to put bathroom in basement spaces involves smart layout decisions, choosing an upflush system over breaking the slab, doing your own demolition and finishing, and buying fixtures from the right retailers. Done right, a half-bath comes in under $2,500, a three-quarter bath under $4,500, and a full bath under $6,000. Here is the playbook contractors charge thousands to explain.
Part of our Bathroom Remodeling & Flooring guide — explore the full guide →
Decision One: Rough-In or Upflush
The single biggest cost driver is how waste reaches the main sewer line. You have two options.
If your basement was built with a bathroom rough-in — a capped drain stub and vent already in the slab — you are halfway there. Look for a 4-inch cap in the floor and a smaller 2-inch stub near a wall. Roughly 60 percent of homes built after 1980 have them. Connecting fixtures to an existing rough-in costs $500 to $1,000 in materials.
If you do not have a rough-in, the cheap path is an upflush macerator system like Saniflo SaniBest Pro or Liberty Pumps Ascent II. These grind waste and pump it up to the main sewer line through a 3/4-inch discharge pipe. A complete Saniflo unit with toilet runs $1,100 to $1,500. The alternative — breaking up the concrete slab, trenching for drain lines, and re-pouring — costs $3,000 to $6,000 in labor alone before you install a single fixture.
Cheapest Layout: Tuck It Under the Stairs
The layout that saves the most money packs the toilet, sink, and optional shower into the smallest legal footprint near existing plumbing. Building codes generally require a 30-inch wide by 60-inch deep minimum for a half-bath and 5 by 8 feet for a three-quarter bath.
Position your new bathroom against the wall that holds the main vertical waste stack. Every foot closer to the stack saves roughly $25 in pipe and labor. Tucking under existing stairs uses space you could not finish anyway, which means the walls you build also serve as stair enclosure — a 2-for-1 framing job.
Where to Source Fixtures Cheaply
Stock fixtures from big-box retailers cost a fraction of designer lines.
- Toilet: Glacier Bay 1.28 GPF round-front at Home Depot, $98 — performs as well as Kohler models triple the price
- Vanity: Glacier Bay 24-inch with cultured marble top, $189
- Faucet: Pfister Pfirst Series, $42 — lifetime warranty and matches most decor
- Shower stall: Aquatic Composites 32×32 corner unit, $389 — pre-formed acrylic, two-piece for basement maneuvering
- Exhaust fan: Broan AE80B 80 CFM, $59
- Door: Hollow-core 24-inch pre-hung, $79
Watch Facebook Marketplace and Habitat for Humanity ReStores. New-in-box toilets often appear for $40, vanities for $50 to $100, and complete shower kits half off retail. A half day of patient hunting can shave $500 off the fixture budget alone.
Realistic DIY Budget Breakdown
Here is what a three-quarter basement bath costs when the homeowner does the work and uses an upflush system.
- Upflush system with toilet — $1,400
- Shower stall and pan — $400
- Vanity, faucet, mirror — $260
- Framing lumber and drywall — $250
- PEX plumbing for water supply — $90
- Electrical wire, GFCI outlets, fan, vanity light — $180
- Tile, thinset, grout for shower walls — $300
- Door, hardware, paint, caulk — $180
- Permit and inspection — $200 to $400
Total: about $3,260 to $3,460. Adding a contractor for the plumbing inspection alone tacks on $500. Skipping permits saves money up front but voids insurance claims and complicates resale.
Electrical and Ventilation Code Basics
Even the cheapest basement bathroom must meet code on three fronts. First, every bathroom outlet must be GFCI-protected. Second, the room requires an exhaust fan vented to the exterior — not into the joist bay — sized at 1 CFM per square foot, minimum 50 CFM. Third, the vanity light fixture must be rated for damp locations.
Run the exhaust duct in 4-inch insulated flex to a wall cap. Use foil-faced tape, not cloth duct tape, on every joint. Skipping the insulated jacket lets condensation drip back into the fan, killing it within two seasons.
Waterproofing the Shower on a Budget
If you are tiling a shower, do not skip waterproofing. Schluter Kerdi membrane is the gold standard but adds $150 to the build. The budget alternative is RedGard, a roll-on waterproofer that costs $55 a gallon and covers a 32 by 60-inch shower with two coats. Apply over standard 1/2-inch cement backer board, let cure 90 minutes between coats, then tile directly over.
For the pan, use the acrylic stall from the fixtures list rather than building a custom tile shower base. Mud-set pans require skill and add $300 to $500 in time and materials.
Permit Strategy and Inspections
Pull the permit yourself. Most jurisdictions issue homeowner permits for owner-occupied work without requiring a licensed contractor. Fees range from $150 to $400. Schedule three inspections: rough plumbing, rough electrical, and final.
Inspectors are generally helpful to DIY homeowners who ask good questions. A 10-minute visit before you cover walls catches problems while they are cheap to fix. The single most common failure is venting — every fixture needs proper venting to prevent siphoning and sewer-gas backup. Plan vent paths before you frame.
What to Splurge On
Two upgrades pay you back. Spend an extra $40 for a comfort-height toilet over a standard height — your knees will thank you in 20 years. And spend $60 more on a quality exhaust fan like the Panasonic WhisperCeiling FV-08VKS3, which actually moves rated airflow at a whisper and lasts 15 years rather than 5. Everywhere else, the budget choices perform fine.