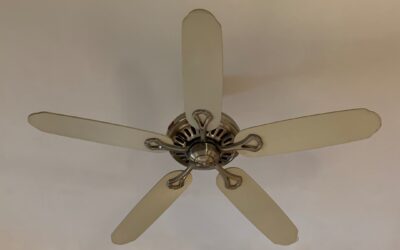
If your ceiling sits below 8 feet, a standard downrod fan will eat clearance you cannot spare and put spinning blades uncomfortably close to head height. A flush ceiling fan solves that by bolting the motor housing directly to the mounting bracket, leaving only 6 to 10 inches between the ceiling and the blades. Also called a hugger or low-profile fan, this style keeps a room safe and open without giving up meaningful air movement. Choosing the right one comes down to blade span, motor type, and how much airflow you actually need.
What Makes a Fan “Flush Mount”
Traditional fans hang from a downrod, a metal pipe that drops the motor 3 to 6 inches or more below the ceiling. A flush fan skips the rod entirely. The canopy and motor become one compact assembly that hugs the ceiling, which is why hardware makers often print “hugger” right on the box. Building codes generally want at least 7 feet of clearance from the floor to the blades, so on an 8-foot ceiling a flush mount gives you the breathing room to hit that number comfortably.
The tradeoff is airflow. Blades that sit closer to the ceiling pull air from a tighter pocket, so a flush fan usually moves 5 to 15 percent less air than the same-size downrod model. For most bedrooms, offices, and kitchens that difference is barely noticeable. In a tall great room you would feel it, but a flush fan is the wrong tool for a tall room anyway.
Sizing a Flush Ceiling Fan to Your Room
Blade span is the single most important spec. Measure your room’s square footage and match it to the sweep:
- Up to 75 sq ft (bathrooms, breakfast nooks): 29 to 36 inch span
- 76 to 144 sq ft (bedrooms, offices): 42 to 48 inch span
- 145 to 225 sq ft (living rooms, large bedrooms): 52 inch span
- 225 to 400 sq ft (family rooms, open kitchens): 56 to 60 inch span
Airflow itself is measured in CFM, or cubic feet per minute. A quality 52-inch fan pushes roughly 5,000 to 6,500 CFM on high. Anything above 6,000 CFM is genuinely strong. Efficiency is reported as CFM per watt, and Energy Star fans clear about 100 CFM per watt, meaning more cooling for less power draw.
Motor Types: DC vs AC
Two motor technologies dominate the market. AC motors are the older, cheaper standard, usually offering three fixed speeds and costing $60 to $150. DC motors run on direct current through a small converter, draw up to 70 percent less electricity, and typically deliver six speeds plus reverse from a handheld remote. Expect to pay $150 to $400 for a DC flush fan.
For a fan that runs eight hours a day through summer, the DC premium usually pays back within two to three seasons through lower energy bills. DC motors also start and stop more smoothly and run noticeably quieter, which matters in a bedroom where a droning AC motor can keep light sleepers awake.
Blades, Light Kits, and Finishes
Most flush fans ship with four or five blades, though blade count affects style far more than performance. A well-engineered three-blade fan moves as much air as a five-blade model. Pick the look you like. Reversible blades, often walnut on one side and white on the other, let you change the room’s feel without buying a new fan.
Because flush fans live in rooms with low ceilings, an integrated LED light kit is popular. Look for one rated 1,000 to 1,600 lumens with adjustable color temperature between 2,700K warm white and 5,000K daylight. Slim, low-profile light covers keep the whole assembly tight to the ceiling. Common finishes include matte black, brushed nickel, oil-rubbed bronze, and white.
Installing a Flush Ceiling Fan
Installation is a manageable DIY job for anyone comfortable turning off a breaker and joining wires, but two rules are non-negotiable. First, the fan must hang from a fan-rated electrical box, not a standard light box. A fan-rated box is stamped for the load and braced to the joists. Second, always kill power at the panel and confirm with a voltage tester before touching a single wire.
- Shut off the circuit breaker and verify the wires are dead.
- Remove the old fixture and confirm the box is fan-rated; if not, install a saddle-brace fan box.
- Screw the mounting bracket to the box, then hang the motor’s slotted keyhole on the bracket to free your hands.
- Connect black to black (hot), white to white (neutral), and the green or bare copper to ground. Cap every connection with a wire nut.
- Push the motor flush to the ceiling, secure the canopy screws, attach the blades, then add the light kit.
- Restore power and test all speeds plus reverse.
Budget 60 to 90 minutes for a first-timer. If you are replacing a light with no existing fan box, or the wiring looks brittle, a licensed electrician will handle it for $100 to $250.
Common Problems and Fixes
A wobbling fan is almost always a balance issue, not a defect. Use the small stick-on weights from the included balance kit, or tighten every blade screw first since one loose blade throws off the whole sweep. Clicking or humming usually traces back to a loose canopy or blade arm. If the light works but the fan will not spin, check that the reverse switch has not stalled between positions.
Chosen and installed correctly, a flush ceiling fan delivers real comfort in a room where a hanging fan simply will not fit, keeping clearance safe while quietly trimming your cooling costs all season long.