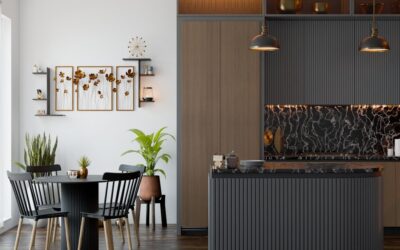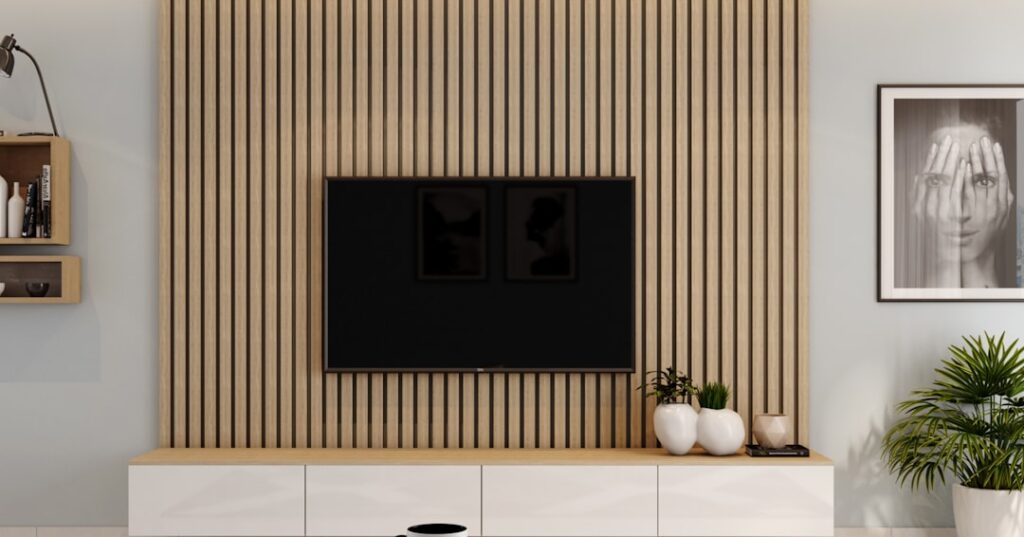
Flat drywall walls read as builder-grade the moment you walk in. A fluted accent wall fixes that with vertical grooves that catch light and cast soft shadows, turning a plain surface into the room’s focal point. The look has exploded on home feeds because it delivers a high-end, paneled effect for a fraction of what millwork used to cost. Done right, it reads as architectural. Done wrong, it looks like corduroy wallpaper. Here is how to land on the right side of that line.
What Fluting Actually Is
Fluting is a series of parallel concave or half-round grooves running vertically across a surface. The term comes from classical column design, where flutes ran up the shaft to add depth and rhythm. On a modern wall you get the same effect: repeating ridges that play with shadow and make the plane feel deliberate and warm rather than blank.
The reason it works so well is light. A flat wall reflects light evenly and looks static. A fluted surface creates a gradient of highlight and shadow that shifts as the sun moves across the room. That subtle movement is what gives the feature its premium feel and why designers reach for it in bedrooms, entryways, and behind media units.
Choosing Your Material
You have three main paths, and they differ sharply in cost and effort.
- Pre-made fluted panels: MDF or PVC sheets with the grooves already milled, sold in 4-foot or 8-foot sections. The fastest route, running $30 to $70 per panel covering roughly 6 square feet.
- Half-round dowels or trim: Individual wood strips glued vertically to create your own flute spacing. More labor, more control, and about $2 to $4 per linear foot.
- Slat wall kits: Peel-and-stick or nail-up wood slats, technically reeded rather than fluted, but they scratch the same design itch.
MDF panels give the smoothest paint finish because the material has no grain. Real wood dowels look richer under a stain and hold up better in high-traffic spots. PVC resists moisture, making it the pick for a bathroom or a wall near an exterior door.
Planning the Layout
Measure the wall’s width and height before you buy anything. The most common mistake is starting installation from one corner and discovering a sliver-width flute at the far end, which looks amateurish. Instead, lay the panels out dry on the floor and calculate how to center the pattern so both edges end on a full or half flute.
Decide on height, too. A full floor-to-ceiling treatment feels bold and modern. A wainscot-height version, capped at 40 to 48 inches with a chair rail, reads more traditional and uses less material. For a rental or a first attempt, the half-height option lowers both the cost and the risk.
Handling Outlets and Switches
Fluted walls complicate electrical boxes because the grooved surface sits proud of the drywall. You will need box extenders, which are cheap plastic collars that bring the receptacle flush with the new surface. Buy a handful before you start, cut your panel openings carefully with a jab saw or oscillating tool, and test-fit the cover plate before committing glue.
Step-by-Step Installation
Assuming you chose MDF panels, here is the workflow most weekend installers follow.
- Prep the wall. Remove baseboards and outlet covers. Find the studs with a magnetic or electronic finder and mark them with painter’s tape near the ceiling so the marks survive.
- Cut to height. Measure ceiling height at several points since older homes are rarely square. Cut panels a hair short so they slide in without binding, then hide the gap with trim.
- Apply adhesive. Run construction adhesive in a zigzag on the panel back. A tube of heavy-duty grab adhesive costs about $8 and covers two to three panels.
- Set and nail. Press the panel to the wall, then drive 18-gauge brad nails into the studs through the valley of a flute where the holes will disappear.
- Repeat and align. Butt each panel tight to the last, keeping the flute spacing consistent across the seam. A slight dab of wood filler hides the joint.
Finishing for a Seamless Look
The finish separates a custom-looking wall from a DIY-looking one. Fill every nail hole and seam with lightweight spackle, let it dry, and sand flush. Then caulk the top, bottom, and side edges where the panels meet the ceiling and adjacent walls. That thin bead of caulk is the single biggest visual upgrade because it erases the line between panel and structure.
Prime with a bonding primer, especially over MDF, which drinks up paint at the cut edges. Two coats of primer on exposed edges prevent the fuzzy, swollen look MDF gets when it absorbs moisture. Finish with a satin or eggshell paint. High-gloss exaggerates every imperfection; flat kills the shadow play that makes fluting worth doing. Satin hits the sweet spot.
Cost and Time Expectations
A typical 10-foot by 9-foot accent wall breaks down roughly like this:
- Fluted panels: $250 to $500
- Adhesive, brads, filler, caulk: $60 to $90
- Primer and paint: $50 to $80
- Trim and cap molding: $40 to $70
All in, most homeowners spend $400 to $700 in materials and one full weekend of work. A contractor doing the same wall charges $1,200 to $2,500 depending on ceiling height and finish complexity, so the DIY savings are real if you have basic tools and patience.
Color and Styling That Sells the Look
Monochrome makes fluting sing. Painting the wall, panels, and trim the same color lets the shadows do the work instead of competing with a contrasting hue. Deep saturated tones like charcoal, forest green, and warm terracotta photograph beautifully because the grooves read as texture, not clutter. If you want lighter and airier, a warm off-white still shows plenty of dimension in raking light.
Stage the wall with intent. In a bedroom, center the headboard on the panel and flank it with sconces. Behind a console, add a single large piece of art or a round mirror so the vertical lines contrast with a soft curve. Avoid crowding the surface; the texture is the decoration, and busy shelving fights it.
Where to Put a Fluted Wall
Not every wall suits this treatment, so choose the location with intent. The best candidates are walls the eye lands on first: the wall behind a bed, the surface a media console sits against, an entryway that greets guests, or the wall behind a dining table. These are spots where a texture pays off because people spend time looking at them.
Bathrooms and powder rooms are surprisingly good candidates too, provided you use moisture-resistant PVC panels rather than raw MDF. A fluted wall behind a floating vanity reads as spa-like and hides the busy plumbing wall behind rhythm and shadow. Avoid putting fluting on a wall broken up by too many doors, vents, and switches, since the interruptions fight the clean vertical lines and undercut the whole effect.
Maintenance and Durability
A finished fluted wall asks little of you, but the grooves do collect dust along their length. A quick pass with a dry microfiber cloth or a soft brush vacuum attachment every couple of weeks keeps them clean; run the tool vertically along the flutes rather than across them. Painted MDF wipes down easily with a damp cloth for the occasional scuff.
Durability depends on the material you chose. MDF panels dent if struck hard, so a busy hallway with kids and pets may show wear over time, while a bedroom feature wall stays pristine for years. If a section ever gets damaged, the panel format works in your favor: you can often pop off and replace a single panel rather than redoing the whole wall, then touch up the paint to blend the repair.
Final Thoughts Before You Start
A fluted accent wall rewards planning more than raw skill. Nail the layout math, center the pattern, and take your time with caulk and paint, and even a first-timer can produce a feature that looks like custom millwork. Start with a single focal wall rather than an entire room, use quality primer on MDF, and pick a color you love, because this is a look that stays put for years and anchors everything else in the space.