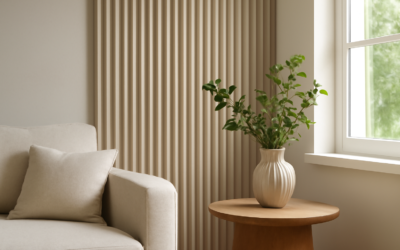
Flat cabinet fronts have ruled kitchens for a decade, but the pendulum is swinging hard toward texture, and nothing captures that shift like a fluted kitchen island. Those slender vertical grooves — borrowed from classical columns and mid-century furniture — catch light and shadow across the day, turning a plain island base into a sculptural focal point. It is one of the fastest-growing design trends because it adds richness without loud color or busy patterns.
Part of our Kitchen Remodeling guide — explore the full guide →
If you are considering fluting for your island, this guide covers the material options, how the grooves are made, color and countertop pairings, realistic costs, and the practical care details that keep those channels looking crisp.
What Fluting Actually Is
Fluting refers to a series of evenly spaced, rounded vertical grooves running across a surface. On a kitchen island the effect wraps the sides and often the seating end, creating a rhythm of light and shadow that gives the whole piece depth. It reads as tactile and custom even from across the room.
Its cousin is reeding, which is essentially the reverse — raised convex ridges instead of carved concave channels. Both deliver the ribbed look; fluting is the more common term homeowners use, and the two are frequently mixed up. Groove width and spacing set the mood: narrow, tight flutes feel refined and traditional, while wide, chunky ridges look bold and contemporary.
Material Options for a Fluted Island
How you achieve the fluted look drives both the price and the durability. There are several routes, from full custom to affordable DIY.
- Solid wood: The premium option, with flutes milled into real oak, walnut, or maple. Warm, durable, and stainable, but the most expensive.
- MDF with routed flutes: Paint-grade medium-density fiberboard machined and painted; the most popular balance of cost and clean lines.
- Fluted trim panels / slats: Pre-made ribbed panels or half-round dowels applied over a flat base — the DIY-friendly path.
- Tambour: Flexible ribbed sheets that wrap curved island ends for a seamless look.
For most homeowners, painted MDF fluting offers the crispest grooves at a reasonable price, while solid walnut fluting is the splurge that shows real wood grain running through the channels.
The DIY Route With Fluted Panels
You do not need a cabinet shop to get the look. A confident DIYer can clad an existing flat island with fluted panels or evenly spaced half-round trim over a weekend. The core steps are straightforward.
- Measure and plan spacing: Decide groove width and lay out the ridges so full flutes land at the corners, not awkward partial pieces.
- Cut panels or dowels to height with a table or miter saw.
- Adhere to the base: Use construction adhesive plus a few brad nails to fix panels or half-round molding to the flat island sides.
- Fill and caulk: Fill nail holes and caulk the top and bottom edges for a seamless transition.
- Prime and paint: Two coats of a durable cabinet-grade paint in a satin or semi-gloss finish.
Expect to spend $150 to $500 in materials for a DIY fluted wrap, versus thousands for a fully custom fabricated island — a compelling reason to try it yourself if the island structure is already sound.
Color and Countertop Pairings
Fluting adds texture, so the color can afford to be either quietly sophisticated or dramatically dark. Both directions photograph beautifully in real kitchens.
- Warm neutrals: Greige, mushroom, and soft white let the shadow lines do the talking; timeless and bright.
- Deep moody tones: Forest green, navy, and charcoal make the flutes read as luxurious and architectural.
- Natural wood: Stained oak or walnut fluting brings organic warmth, especially against white perimeter cabinets.
For the countertop, a waterfall edge in white or veined quartz caps a fluted base cleanly and lets the texture below take center stage. A thick 2- to 3-inch mitered edge amplifies the substantial, custom feel. Warm brass or matte black hardware and stool frames complete the look without competing with the grooves.
What It Costs
Price spans a wide range depending on material and whether you hire out. These figures give a planning baseline.
- DIY panel wrap: $150 to $500 in materials over an existing island.
- Semi-custom fluted island cabinetry: $2,000 to $5,000 depending on size and material.
- Fully custom solid-wood fluted island: $5,000 to $12,000-plus with premium species and stone.
Countertop, seating, and any electrical or plumbing added to the island are separate line items on top of the base cost. Fluting itself typically adds a modest premium over a flat-front island of the same size, and it is often the single detail that makes a kitchen feel designer rather than builder-grade.
Keeping the Grooves Clean
The one honest downside of fluting is that the channels collect dust and kitchen grease, especially on the cooking side. Care is simple but a bit more involved than wiping a flat panel.
Dust the grooves regularly with a soft brush or the brush attachment on a vacuum, and wipe the whole surface with a barely damp microfiber cloth, running along the flutes rather than across them. For grease near a cooktop, a soft toothbrush and a mild degreaser clear the channels. Choosing a satin or semi-gloss paint rather than flat makes cleanup far easier, since flat paint holds grime in the recesses. Keep the fluting on the seating and display sides of the island and leave the busy prep side smoother if easy cleaning is a priority.
Fluting vs. Other Textured Looks
Fluting is not the only way to add dimension to an island, and knowing the alternatives helps you decide whether the grooved look is truly what you want. Each textured treatment sets a different mood.
- Fluting/reeding: Vertical grooves or ridges; refined, architectural, and the current favorite.
- Shaker or raised-panel doors: Traditional framed detail; classic but more expected.
- Board-and-batten or shiplap: Farmhouse texture with wider, flatter boards; more rustic than fluting.
- Slat or tambour: Chunkier ribbing, often used on wine bars and feature walls for a bold statement.
Fluting hits a sweet spot — it reads as high-end and detailed without committing to a specific era the way a raised panel or shiplap does. That versatility is a big part of why designers reach for it across modern, transitional, and even traditional kitchens.
Where to Use Fluting Beyond the Island
Once you fall for the look, it is tempting to add fluting throughout the kitchen, but restraint keeps it special. The island is the ideal home for it because it is a freestanding focal point that the texture flatters from every angle.
If you want to extend the detail, use it sparingly on a range hood surround, a bar or coffee station, or the base of a peninsula so it reads as a deliberate accent rather than a repeating motif. Pairing a fluted island with flat-front perimeter cabinets creates a pleasing contrast that lets the island stand out, whereas fluting every surface flattens the effect and can feel busy. A single fluted element per space is usually the most sophisticated approach — it draws the eye exactly where you want it and keeps the room from feeling over-designed. Think of fluting as jewelry for the kitchen: one striking piece elevates the whole room, while too many competing details dilute the impact.
Is a Fluted Island Worth It?
A fluted kitchen island delivers an outsized style payoff for the cost, especially compared with trendier moves like bold colors that date quickly. The texture is architectural and quietly timeless, it pairs with almost any cabinet color, and even a DIY panel wrap transforms a flat, forgettable island into the centerpiece of the room. As long as you are willing to give the grooves a periodic brush-out, fluting is one of the most rewarding upgrades you can make to a kitchen’s most-photographed surface.