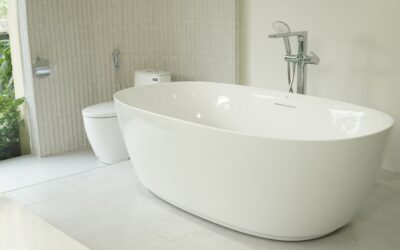
A gorgeous soaking tub can turn into a slow, leaking headache if the plumbing underneath it is an afterthought. A freestanding tub drain kit is the package of parts that carries water from the tub down through the floor to your existing waste line, and choosing the wrong style or finish is one of the most common mistakes in a bathroom remodel. Unlike a built-in tub with drains hidden behind an apron, a standalone tub leaves everything exposed, so the kit has to work flawlessly and look good doing it. This guide covers the types, the finishes, installation, and the pitfalls that lead to callbacks.
- What a Freestanding Tub Drain Kit Includes
- The Main Types
- Understanding Drain Placement: Center vs. End
- Choosing a Finish That Matches
- Installation Step by Step
- Testing for Leaks Before You Finish
- Matching the Kit to Your Tub Material
- What It Costs
- Avoiding Common Mistakes
- Frequently Asked Questions
What a Freestanding Tub Drain Kit Includes
These kits bundle the components you need to connect a tub with no built-in overflow plumbing to the drain rough-in in your floor. A typical kit contains the drain body and strainer, an overflow assembly and cover, connecting pipe or a flexible hose, gaskets, and often a decorative floor cover or standpipe.
The exact contents vary by tub design. Some freestanding tubs have an integrated overflow, in which case you need a drain-only kit. Others require a full kit with both drain and overflow. Confirm your tub’s design before ordering, because a mismatch means a return trip to the store mid-project.
The Main Types
Cable-Driven and Toe-Touch Drains
The opening and closing mechanism matters daily. A toe-touch (foot-actuated) drain opens and closes with a push of your toe, simple and reliable. A cable-driven drain uses a lever, often on the overflow cover, to raise and lower the stopper without bending down. Lift-and-turn and push-pull styles round out the common options.
Standpipe vs. Freestanding-Specific Kits
Standpipe kits route the drain up through a decorative floor pipe that matches the tub filler, common with center-drain freestanding tubs. Other kits connect below the floor and stay hidden. The choice depends on where your rough-in sits relative to the tub’s drain location.
- Toe-touch (foot lock) — no lever, opens with a toe press
- Cable-driven — lever on the overflow controls the stopper remotely
- Lift-and-turn — twist the stopper to seal or open
- Push-pull — simple manual stopper you pull up or push down
Understanding Drain Placement: Center vs. End
Before anything else, identify where your tub drains, because it dictates which kit and rough-in you need. A center-drain tub, common on symmetrical slipper and oval soakers, sends waste straight down through the middle of the tub, so the floor rough-in must land dead center. An end-drain tub places the outlet under the sloped back where the overflow sits, which usually means a rough-in offset toward one wall.
Getting this wrong is expensive. If the floor drain is roughed for a center-drain tub and you buy an end-drain model, the connection will not line up and you are into cutting the floor or adding awkward offsets. Confirm the tub’s drain location on its spec sheet and match the rough-in to it during framing, well before the tub arrives.
Choosing a Finish That Matches
Because everything is exposed, the drain finish should match your tub filler and other fixtures. Kits come in chrome, brushed nickel, matte black, oil-rubbed bronze, and brushed gold, among others. Buying the drain and the faucet as a coordinated set from the start saves the frustration of hunting for a matching black or gold drain later.
Pay attention to the quality of the finish, not just the color. A cheap plated drain can pit and discolor within a year in a wet environment, while a solid brass body with a quality finish holds up for a decade or more. On a fixture this visible, spending an extra $30 to $60 is worth it.
Installation Step by Step
Installing a freestanding tub drain kit is within reach of a confident DIYer, though the tolerances are tight. Work slowly and dry-fit everything first.
- Position the tub over the drain rough-in and mark the exact drain location on the floor
- Apply plumber’s putty or the supplied gasket under the drain flange
- Thread the drain body into the tub’s drain opening and hand-tighten, then snug with a drain wrench
- Connect the overflow assembly and route the connecting pipe or hose to the rough-in
- Seal all threaded joints with Teflon tape or the specified gaskets
- Set the tub in final position and connect to the P-trap below
Do not overtighten. Cross-threading or crushing a gasket cracks the seal and guarantees a leak. Snug plus a quarter turn is usually enough on these connections.
Testing for Leaks Before You Finish
Never skip the water test. Once everything is connected but before you caulk the tub to the floor or close up any access, fill the tub several inches and let it stand for 15 to 20 minutes while you watch every joint from below or through the access opening.
Then open the drain and watch the full flow drain out, checking the P-trap and every connection again under moving water. Static and flowing tests catch different leaks. Only after both pass clean should you seal the tub down.
Matching the Kit to Your Tub Material
The tub’s shell thickness changes which drain body seals properly, a detail cheap universal kits ignore. Acrylic and fiberglass tubs have a relatively thin deck, so most standard kits with their supplied gaskets seat fine. A cast iron or solid-surface stone resin tub has a much thicker drain shoulder, sometimes 1 to 2 inches, which demands a kit with a longer threaded drain body and often a thicker sealing gasket to bridge the depth.
If you force a thin-deck drain into a thick stone tub, the threads bottom out before the flange pulls tight and the joint weeps. Manufacturers of stone resin tubs usually specify or include a matched drain for exactly this reason, so use the recommended kit rather than a bargain-bin substitute on a heavy tub.
What It Costs
A basic freestanding tub drain kit runs $40 to $80 in chrome, while premium finishes like matte black or brushed gold in solid brass push $90 to $180. Standpipe kits that include the decorative floor pipe sit at the higher end. If you hire a plumber, expect $150 to $400 in labor to set the tub and connect the drain, depending on floor access.
Floor access is the biggest cost variable. A slab foundation with no crawlspace access below can require cutting the slab, which changes the math entirely, so plan the drain location during rough-in whenever possible.
Budget for the supporting parts too. A proper 1.5-inch P-trap in ABS or PVC adds $10 to $20, a can of plumber’s putty and a roll of PTFE tape another $8, and a flexible drain-to-trap connector when the geometry is tight runs $15 to $30. These small items are where a rushed project stalls, so gather them before you set the tub rather than mid-install with the tub already in place.
Avoiding Common Mistakes
Two errors cause most problems. First, ordering a kit that does not match your tub’s overflow configuration, which you avoid by reading the tub spec sheet. Second, misaligning the tub drain with the floor rough-in, which forces awkward connections that leak. Measure the rough-in and the tub drain position precisely before setting anything in place.
Get those two right, match the finish to your filler, and run a proper water test, and a freestanding tub drain kit disappears into a clean, reliable installation that supports your soaking tub for years without a single drip.
Frequently Asked Questions
Can I install a freestanding tub over a slab? Yes, but the drain rough-in must be set precisely in the slab before the pour, since cutting concrete afterward is costly and messy. On slab construction, coordinate the exact drain location with your plumber during framing.
Do I need an overflow? Building codes in many areas require an overflow on a bathtub, though some deep soaking tubs are designed and permitted without one. Check your local code and the tub’s specification before choosing a drain-only kit.
What size drain pipe does it use? Bathtub drains almost universally use 1.5-inch pipe into a 1.5-inch P-trap, stepping to the home’s larger waste line downstream. Confirm the kit’s outlet matches your trap.
Why is my new drain still dripping? The usual culprits are an overtightened or pinched gasket, missing PTFE tape on a threaded joint, or a P-trap connection that was never fully seated. Re-run the static and flowing water tests to isolate which joint weeps before tearing anything apart.