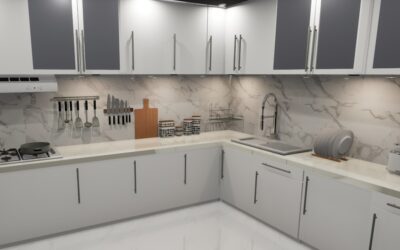
Before a single cabinet gets ordered, the smartest thing you can do for a narrow kitchen is put it on paper, and a well-made galley kitchen layout drawing is the tool that turns a cramped corridor into an efficient, professional-feeling workspace. A galley kitchen, defined by two parallel runs of cabinetry facing each other, is prized by chefs for its efficiency, but it lives or dies by its dimensions. Get the aisle width, appliance placement, and work triangle right on the drawing, and the finished kitchen practically runs itself. Get them wrong, and you are stuck with a room that fights you every time you cook. This guide covers how to plan and sketch a galley layout that works.
Part of our Kitchen Remodeling guide — explore the full guide →
The beauty of drawing your layout first is that mistakes are free on paper and expensive in cabinetry. A clear scale drawing lets you test appliance positions, aisle widths, and storage before committing money, which is exactly why designers never skip this step.
Why the Galley Layout Is So Efficient
The galley design places everything within a step or two, which is why it remains a favorite in restaurant kitchens where speed matters. With counters and appliances on two facing walls, a cook can pivot from sink to stove to prep surface without crossing the room. There is no wasted corner cabinet, no awkward diagonal, just two efficient runs of work surface and storage.
That efficiency depends entirely on proportion. Because a galley is inherently narrow, every inch of aisle width and counter depth carries more weight than it would in a larger kitchen. A drawing forces you to confront those proportions early, revealing whether your appliances will fit, your aisle will be comfortable, and your work zones will flow, all before you spend a dollar on cabinets.
Getting the Aisle Width Right
Aisle width is the single most important dimension in a galley kitchen, and the first thing your drawing should lock down. For a single cook, a minimum of 36 inches between the two counter faces is workable, though it feels tight when an oven or dishwasher door opens. For a kitchen where two people cook or where appliance doors open across the aisle, 42 to 48 inches is far more comfortable and is the range most designers recommend.
Anything narrower than 36 inches becomes frustrating fast, since two people cannot pass and opening a lower cabinet blocks the entire walkway. On the other end, an aisle wider than about 60 inches loses the galley’s step-saving efficiency, forcing you to walk back and forth. Marking the exact aisle width on your drawing, and taping it out on the actual floor to test it, is the best safeguard against a layout that looks fine on paper but feels wrong in person.
Placing the Work Triangle
The classic kitchen work triangle, connecting the sink, stove, and refrigerator, guides where your three main stations land. In a galley, these are split across the two runs, and a common, effective arrangement puts the sink and cooktop on one wall with the refrigerator and additional storage on the opposite wall. This keeps the two most-used stations, sink and stove, on the same side for easy movement between them.
Aim to keep the total distance between the three points reasonable, with each leg of the triangle ideally between 4 and 9 feet, so nothing is cramped and nothing is a hike. Avoid placing the refrigerator at the far end where retrieving ingredients means a long walk, and never position appliances so their doors collide across a narrow aisle. Sketching the triangle on your drawing with the appliance doors shown in their open positions reveals conflicts you would otherwise discover only after installation.
How to Create Your Drawing
Start by measuring the room precisely, including wall lengths, window and door locations and their swing, ceiling height, and the position of existing plumbing, gas, and electrical. Transfer these to graph paper at a consistent scale, such as one square equals six inches, or use a free online kitchen planner that lets you drag in cabinets and appliances to scale.
Draw the two parallel walls with their base and upper cabinets, then place your appliances in standard widths, 30 or 36 inches for a range, 24 inches for a dishwasher, 30 to 36 inches for a refrigerator. Mark the aisle width clearly between the runs. Show appliance and cabinet doors in their open positions, since a drawing that ignores door swing hides the exact clearance problems the drawing is meant to catch. Label every dimension so you and any contractor read the same numbers.
Maximizing Storage and Counter Space
A galley’s two long walls offer generous linear storage, and your drawing should exploit it fully. Run upper cabinets to the ceiling to capture vertical space, and consider open shelving on one wall to keep a narrow room from feeling boxed in. Deep drawers rather than door cabinets on the lower runs make the back of the storage reachable without kneeling into a dark box.
Counter space is precious, so plan continuous stretches rather than chopping them up with too many appliances. Keep at least 18 to 24 inches of landing counter beside the range and the sink for prep and for setting down hot pans. If one end of the galley is open, a shallow counter or a small peninsula there can add work surface without narrowing the aisle. Reflect these choices in your drawing so the balance of storage and open counter is intentional, not accidental.
Common Mistakes to Avoid
The errors that plague galley kitchens are almost all visible on a good drawing. The most frequent is an aisle that is too narrow, which no amount of pretty cabinetry can fix once built. Another is placing two opposing appliances, like a dishwasher and an oven, directly across from each other so their open doors clash in the aisle. Staggering them on your drawing solves the problem before it happens.
Poor lighting and a closed-off, tunnel-like feel are also common in galleys, so plan for layered lighting, under-cabinet strips plus overhead fixtures, and keep at least one end open where possible. Finally, resist overloading the layout with more cabinets and appliances than the footprint supports; a galley rewards restraint. Invest the time in a careful galley kitchen layout drawing, test the aisle on the real floor, and account for every door swing, and you will end up with the efficient, hardworking kitchen the galley design is famous for.
One-Wall Versus Two-Wall Galley Variations
Your drawing should also settle whether you are building a true two-wall galley or a modified single-wall version, since the choice shapes everything downstream. The classic galley uses two facing runs, which maximizes storage and keeps the work triangle tight. It suits rooms wide enough for a comfortable aisle and homeowners who cook seriously and want everything within a pivot.
In narrower spaces, a one-wall galley with all appliances and counters along a single run, sometimes paired with a slim island or a peninsula opposite, can feel more open and less corridor-like. This layout sacrifices some of the two-wall efficiency but reads as more spacious and connects better to an adjoining room. Sketching both options to scale lets you compare storage capacity against openness before committing, and it often reveals that a room you assumed had to be a tight two-wall galley actually works better as a single run with an island.
Turning Your Drawing Into Reality
Once your layout is finalized on paper, the drawing becomes a communication tool that keeps your whole project on track. Bring it to cabinet suppliers, appliance dealers, and any contractor or electrician so everyone works from the same dimensions, which prevents the costly miscommunications that derail renovations. A clear drawing with labeled measurements, appliance sizes, and door swings answers most of the questions a contractor would otherwise have to guess at.
Before ordering anything, double-check that your appliance selections match the openings in your drawing, since a range or refrigerator even an inch wider than planned can throw off the entire run. Confirm the location of existing plumbing and electrical against your design, because moving them adds cost you will want to know about early. Treat the drawing as a living document you refine as you gather real product dimensions and quotes, and it will guide your galley kitchen from a rough idea to a finished space that works exactly as you planned.