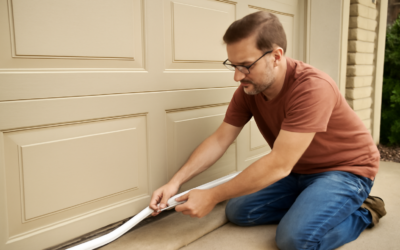
That strip of trim running down the sides and across the top of your garage door opening does far more than finish the look. Garage door stop molding holds the weatherstrip that seals the gap between the door and the jamb, blocking wind, rain, snow, dust, insects, and rodents from getting into your garage. When it rots, warps, or the seal cracks, you’ll feel the drafts and find leaves and water on the floor after every storm. This guide covers materials, correct sizing, and how to replace stop molding for a tight, lasting seal.
Part of our Garage Doors guide — explore the full guide →
What Stop Molding Does
The garage door stop molding is the L-shaped trim mounted around the door opening on the exterior side. Its vertical face carries a flexible vinyl or rubber flap that presses gently against the face of the closed door, creating the weather seal. Without it, you’d have an open gap letting the outdoors in along all three sides of the door.
Good stop molding does three jobs at once: it seals against weather and pests, it hides the gap for a clean appearance, and on the top it helps guide the door and keep it from rattling. A worn or missing seal is the most common source of a cold, drafty, leaky garage.
Material Options
Stop molding comes in a few materials, each with tradeoffs:
- Wood: Traditional and paintable, but prone to rot and warping where it meets the ground and takes rain. Prime and paint all sides if you use it.
- Vinyl (PVC): The most popular modern choice. It never rots, resists moisture, and often comes with the weatherseal already attached. Great value at $15 to $40 per door.
- Composite: A durable middle ground that resists rot like vinyl but paints and cuts more like wood.
- Aluminum-backed: Heavy-duty options with a metal spine for commercial or high-wear settings.
For most homeowners, vinyl stop molding with an integrated flexible seal is the best pick. It installs in one piece, won’t rot at the bottom where wood always fails first, and the pre-attached flap gives a reliable seal.
Sizing and Measuring
Measure the opening before buying. You’ll need two vertical pieces for the sides and one horizontal piece for the top. A standard single garage door opening is about 8 or 9 feet wide and 7 feet tall, while a double door runs 16 feet wide. Stop molding is commonly sold in 7-foot and 9-foot lengths, or in kits sized for single and double doors.
Measure the height of each side jamb and the width across the top, then add a little for trimming. The molding’s flexible seal should lap over the door face by about 1/2 to 3/4 inch when the door is closed, enough to seal without dragging so hard it wears fast or strains the opener.
Signs You Need to Replace It
Watch for these red flags:
- Daylight visible around the closed door from inside
- Water, leaves, or snow blowing in during storms
- Cracked, brittle, or torn weatherseal flaps
- Rotted, soft, or warped wood molding, especially at the base
- Drafts and higher heating or cooling bills in an attached garage
- Insects or rodents getting in around the door edges
If the wood is intact but only the rubber seal has failed, you may be able to replace just the weatherstrip. If the molding itself is rotted, replace the whole assembly with vinyl so you never fight rot again.
Tools and Materials
Gather these before you start: a pry bar, hammer, tape measure, miter saw or hacksaw, galvanized or stainless siding nails or screws, a caulk gun with exterior-grade sealant, and safety glasses. Use corrosion-resistant fasteners since this trim takes constant weather. Have your new vinyl stop molding cut roughly to length before you climb the ladder.
Step-by-Step Installation
Replacing stop molding is a manageable afternoon project:
- Close the garage door fully so you can position the seal against its face.
- Pry off the old molding carefully, working from the bottom up, and remove any old nails.
- Cut the new molding to length, mitering the top corners at 45 degrees for a clean joint or butting them square.
- Start with a side piece: hold it so the flexible seal just contacts the closed door face, applying light, even pressure along its length.
- Nail or screw the molding to the jamb every 12 to 16 inches, keeping the seal pressure consistent top to bottom.
- Install the second side, then the top piece, ensuring the seals meet neatly at the corners.
- Run a bead of exterior caulk along the outer edge where the molding meets the jamb to block water intrusion.
Getting the seal pressure right is the whole game. Too loose and drafts sneak through; too tight and the door strains against it and the flap wears out fast. Aim for the seal to gently flex against the door, contacting fully along its length with the door closed.
Sealing the Bottom Too
Stop molding seals the sides and top, but don’t forget the bottom of the door. A separate bottom seal, usually a U-shaped or bulb astragal that slides into a retainer on the door’s lower edge, closes the gap at the floor. If you’re upgrading the perimeter seal, replace the bottom seal at the same time so the whole opening is weathertight.
Also check that your garage floor is reasonably level where the door lands. A worn or uneven slab can leave gaps even with a fresh bottom seal, in which case a threshold seal glued to the floor makes a good complement.
Repair vs Full Replacement
You don’t always need to replace the whole molding. If the wood or vinyl trim is sound but only the flexible seal has failed, many systems let you replace just the weatherstrip. Some vinyl moldings use a two-piece design where the rubber flap slides into a channel in the trim, so you pull out the old seal and slide in a new one for a few dollars. This is the fastest, cheapest fix when the structure is intact.
Replace the entire molding when the wood is rotted, warped, or split, or when a one-piece vinyl unit is cracked and brittle from UV exposure. If you’re already dealing with rotted wood, switch to vinyl or composite so you never fight rot again at the base, which is always the first spot to fail. Weigh the cost: a replacement seal runs $10 to $20, while full molding for a single door is $15 to $40, so upgrading the whole assembly is often worth it for the durability.
Choosing the Right Seal Profile
Weatherseals come in a few flap profiles, and matching the profile to your gap matters. A wide flexible flap suits doors with a larger or uneven gap because it can flex to fill more space, while a thinner lip works on tight, square openings. Measure the gap between the closed door face and the jamb at several points, since a garage door frame is rarely perfectly straight, and choose a seal with enough flex to cover the widest spot.
Color is a practical consideration too. Stop molding and its seal come in white, brown, almond, and black, so pick one that blends with your door and trim. In cold climates, look for a seal rated to stay flexible in freezing temperatures, because a cheap vinyl flap can stiffen and crack in a hard winter, opening gaps right when you need the seal most. Spending a little more on a quality cold-rated seal pays off in northern states.
Maintenance and Longevity
Vinyl stop molding is nearly maintenance-free, but a quick annual check pays off. Look for cracks in the seal, especially after harsh winters, and confirm the flap still contacts the door along its full length. Wipe the seal clean so grit doesn’t wear it prematurely, and re-caulk the outer edge if you see gaps opening up.
Replacing worn garage door stop molding is one of the most cost-effective home improvements you can make, often under $50 in materials, and it immediately cuts drafts, keeps out pests, and protects everything stored in your garage. A tight seal all the way around the opening is what turns a leaky, blustery garage into a comfortable, usable space.