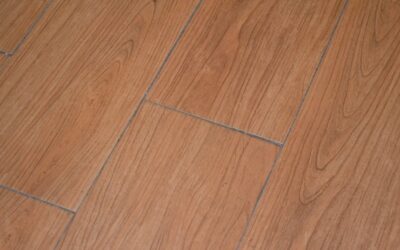
When a wood floor needs to go directly over concrete, glue down wood flooring is often the only installation method that makes sense, because you cannot drive nails into a slab. Bonding each board to the subfloor with adhesive creates one of the most solid, quiet, and stable wood floors you can build. It also demands the flattest subfloor, the right trowel, and real patience, since mistakes cure in place and do not un-stick. This guide covers the adhesives, the tools, the subfloor requirements, and how gluing down stacks up against nailing and floating so you can decide if it is the right route for your project.
What Glue Down Wood Flooring Actually Is
In a glue-down installation, each plank is set into a bed of flooring adhesive troweled onto the subfloor. The boards do not float freely and are not fastened mechanically; the glue holds everything permanently in place. This method works with solid wood in some cases, but it is most common and most reliable with engineered wood, whose plywood core is dimensionally stable and less prone to seasonal movement.
The result is a floor that feels rock-solid underfoot with no hollow bounce. Because every board is bonded, there is no clicking or shifting, which is why glue-down is the standard for wood over concrete and for large commercial spaces.
Choosing the Right Adhesive
Not all flooring glue is equal, and using the wrong one is a costly mistake. The market has largely moved to modern urethane and modified-silane (MS polymer) adhesives, and for good reason.
- Urethane adhesives — strong, flexible, and forgiving of minor board movement. A long-standing pro choice, though they are messy and require a solvent to clean off finished wood.
- MS polymer adhesives — the current favorite. Many combine adhesive and a moisture barrier in one product, wipe off cured wood surfaces without solvents, and stay elastic over time.
- Acrylic and water-based adhesives — cheaper, but add water to the equation and offer less bond strength. Generally best avoided for wood over concrete.
Always match the adhesive to your flooring manufacturer’s specification. Using an unapproved glue can void the warranty, and some adhesives are engineered to pair with specific moisture-control ratings.
Subfloor Flatness and Moisture: The Non-Negotiables
Glue-down is the least forgiving method when it comes to the subfloor. The standard is flat to within 3/16 inch over a 10-foot span. Any hump or dip leaves the board unsupported over the gap, and unsupported boards eventually work loose and become hollow spots. Grind down high points and fill low areas with a cementitious self-leveling compound before you start.
Moisture is the other make-or-break factor, especially over concrete. Concrete wicks moisture up from the ground, and that vapor will destroy a wood floor from below. Test the slab with a calcium chloride or relative-humidity probe test and compare the result to the adhesive’s limits. If the readings run high, use a moisture-barrier adhesive or roll on a separate epoxy moisture barrier first. Never glue wood to a green slab; new concrete should cure at least 60 days.
Tools and the Trowel That Matters Most
The single most important tool is the notched trowel, because it meters how much adhesive goes down. Too little and the boards never fully bond; too much and glue oozes up through the seams. Your adhesive’s label specifies the exact notch size, commonly around 3/16-inch V-notch for thinner engineered planks and up to a 1/4-inch square notch for wider or thicker boards.
Beyond the trowel you will want a chalk line for layout, a tapping block, weighted rollers or straps to hold boards tight while the glue grabs, blue painter’s tape to keep rows aligned, and adhesive remover wipes. Work in small sections, spreading only as much glue as you can cover before it skins over, which is often just 30 to 45 minutes of open time.
The Installation Process in Brief
With prep done, the actual install follows a rhythm. Snap a straight chalk line as your starting reference, usually along the longest wall or the room’s center, and leave a small expansion gap of about 1/2 inch around the perimeter. Spread adhesive with the correct notched trowel held at a consistent angle, covering only the area you can lay before the glue skins over.
Set the first row into the wet adhesive, aligning it precisely to your line, then work outward board by board. Engage the tongue-and-groove edges, tap them tight with a tapping block, and stagger the end joints at least 6 inches from row to row. Wipe up squeeze-out immediately, and use painter’s tape across the seams to hold planks together while the adhesive grabs. Weight or roll the boards to ensure full contact with the glue bed. Then stay off the floor for the cure time the adhesive specifies, often 24 hours before light traffic.
Glue Down vs. Nail Down vs. Floating
Each installation method has a clear best use, and choosing correctly saves headaches:
- Glue down — best over concrete and on-grade or below-grade floors. Most solid and quiet feel, no hollow spots. Slower, messier, and unforgiving of a bad subfloor.
- Nail down — the traditional method for solid wood over a plywood subfloor. Fast for a pro and very secure, but impossible on concrete without adding a wood subfloor first.
- Floating — planks click together and rest on an underlayment without bonding to anything. Fastest and most DIY-friendly, and easy to remove, but can feel slightly springy or sound hollow underfoot.
If you value a substantial, quiet floor and are installing over concrete, glue-down wins. If you are working over plywood and want speed, nail-down or floating may serve you better.
Pros and Cons at a Glance
Glue-down wood flooring rewards careful prep with unmatched stability. The upsides are a solid feel with no bounce, excellent performance over concrete, quiet underfoot, and long-term durability. The downsides are real too: it is the most labor-intensive and messiest method, it demands a near-perfect subfloor and verified moisture control, the adhesive has a short working window, and repairs or removal later are difficult because the boards are stuck fast.
For most homeowners tackling this themselves, the honest advice is to slow down and over-invest in subfloor prep. A glue-down floor is only as good as the surface beneath it, and time spent leveling and testing moisture pays off for the entire life of the floor. If your slab readings are borderline or you have never spread flooring adhesive before, getting a professional to handle at least the moisture assessment is money well spent, because the one thing you cannot fix later is a bond that failed from the bottom up.
Prefer to explore on your own?
See how new flooring looks in your actual room in seconds — free, no signup.
Try the free Floor Studio →