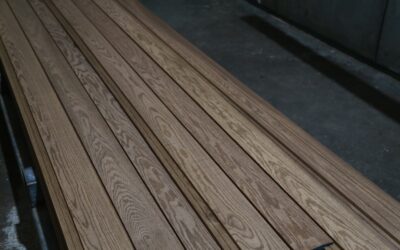
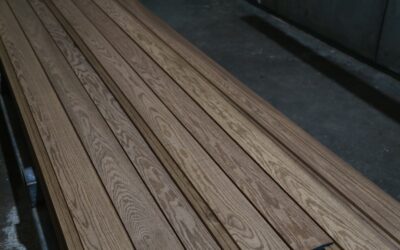
Installing wood flooring is one of the most rewarding home improvement projects you can tackle. A well-installed wood floor adds beauty, warmth, and significant value to your home. While professional installation is always an option, a handy homeowner with the right tools and preparation can achieve professional-quality results.
This guide walks you through every step of how to install wood flooring — from choosing your installation method and preparing your subfloor to laying the first row and finishing the final details. We cover all three installation methods: nail-down, glue-down, and floating.
- Before You Start
- Choosing Your Installation Method
- Tools and Materials Needed
- Subfloor Preparation
- Acclimating Your Wood Flooring
- Planning Your Layout
- Nail-Down Installation (Step by Step)
- Glue-Down Installation (Step by Step)
- Floating Installation (Step by Step)
- Finishing Touches
- Pro Tips for Better Results
- Common Mistakes to Avoid
- Frequently Asked Questions
- Can a beginner install hardwood floors?
- How long does it take to install wood flooring?
- Which direction should wood flooring run?
- Do I need underlayment for nail-down hardwood?
- Can I install solid hardwood over concrete?
- How much extra flooring should I order?
- Can I install wood flooring over radiant heat?
Before You Start
Before learning how to install wood flooring, make sure you have addressed these essentials:
- Know your wood type: Solid hardwood (3/4 inch thick) and engineered wood flooring (layered construction) install differently. Solid hardwood is nail-down only (over wood subfloors). Engineered wood can be nailed, glued, or floated.
- Know your subfloor: Wood subfloors (plywood or OSB) accept nail-down and floating installations. Concrete subfloors accept glue-down and floating installations. Solid hardwood should not be installed directly over concrete.
- Check moisture levels: Wood flooring and subfloor moisture levels must be within 2% to 4% of each other (measured with a moisture meter). Concrete slabs must test below 3 lbs per 1,000 sq ft MVER or below 75% RH.
- Room conditions: The room should be at its normal living temperature (60 to 80 degrees F) and humidity (30% to 50%) for at least one week before and during installation. HVAC should be running.
- Remove existing flooring: Remove old carpet, vinyl, or laminate down to the subfloor. Remove all baseboards and door casings that the flooring will meet. Undercut door casings with an oscillating multi-tool or jamb saw to allow the flooring to slide underneath.
Choosing Your Installation Method
Nail-Down (Solid Hardwood and Engineered Wood over Wood Subfloors)
The traditional method for solid hardwood. A pneumatic flooring nailer drives cleats or staples through the tongue of each plank at a 45-degree angle, blind-nailing the plank to the wood subfloor. This is the most secure installation method and the industry standard for 3/4-inch solid hardwood.
Best for: Solid hardwood over plywood or OSB subfloors. Also works for engineered wood 1/2 inch and thicker.
Glue-Down (Engineered Wood over Concrete or Plywood)
Each plank is adhered directly to the subfloor with a urethane or acrylic flooring adhesive. Glue-down creates the most solid, quiet floor with no hollow spots. It is the preferred method for engineered wood over concrete.
Best for: Engineered wood over concrete slabs. Also used for solid hardwood in some commercial applications.
Floating (Engineered Wood over Any Subfloor)
Planks are connected to each other (tongue-and-groove with glue, or click-lock) and “float” over the subfloor without being attached to it. An underlayment pad provides cushion and sound absorption between the flooring and subfloor.
Best for: Engineered wood over concrete, radiant heat systems, and situations where you want easier future removal.
Tools and Materials Needed
For All Methods
- Tape measure and pencil
- Chalk line
- Table saw or miter saw
- Jigsaw (for curved cuts and notches)
- Moisture meter
- Spacers (1/2-inch for expansion gap)
- Tapping block and pull bar
- Rubber mallet
- Safety glasses, hearing protection, and knee pads
- Oscillating multi-tool (for undercutting door casings)
Additional for Nail-Down
- Pneumatic flooring nailer (rented or purchased)
- Air compressor
- Flooring cleats or staples (size per nailer specifications)
- Finish nailer or brad nailer (for the first and last rows)
- 15 lb felt paper or rosin paper (underlayment)
Additional for Glue-Down
- Urethane flooring adhesive (check manufacturer recommendations)
- 1/4-inch x 3/8-inch V-notch trowel
- Adhesive remover and cleaning rags
- Painter’s tape (to protect plank surfaces from adhesive)
- Weights or heavy objects (to hold planks flat while adhesive cures)
Additional for Floating
- Underlayment pad (foam, cork, or combination with moisture barrier)
- Moisture barrier (6 mil poly sheet if underlayment does not include one)
- Wood glue (if using tongue-and-groove without click-lock)
Subfloor Preparation
Proper subfloor preparation is the most important step in any wood flooring installation. A bad subfloor leads to squeaks, gaps, and premature failure.
Plywood or OSB Subfloor
- Check flatness: Use a 6-foot straight edge to check for high and low spots. The subfloor must be flat within 3/16 inch over 10 feet. Sand high spots with a belt sander. Fill low spots with floor-leveling compound.
- Check for squeaks: Walk the entire floor and screw down any squeaky areas with 1-5/8-inch subfloor screws. Fix squeaks now — you cannot fix them after the hardwood is installed.
- Check moisture: Use a pin moisture meter to test multiple locations. The subfloor should read between 6% and 12% moisture content. The difference between the subfloor and flooring readings should be no more than 2% to 4%.
- Clean thoroughly: Sweep and vacuum all dust, debris, and drywall compound. Any debris under the hardwood will create bumps and squeaks.
- Install underlayment paper: For nail-down installation, roll out 15 lb felt paper or rosin paper. Overlap seams by 4 inches and staple it flat. This provides a moisture retarder and reduces squeaks.
Concrete Subfloor
- Check flatness: Same 3/16-inch-over-10-feet requirement. Grind high spots with a concrete grinder. Fill low spots with self-leveling compound.
- Test moisture: Perform a calcium chloride test or relative humidity test. Concrete must be below 3 lbs MVER or 75% RH. If readings are higher, apply a liquid moisture barrier before proceeding.
- Check for curing compounds: New concrete may have curing compounds on the surface that prevent adhesive from bonding. Test by dripping water on the concrete — if it beads up rather than absorbing, the surface needs grinding.
- Clean thoroughly: Remove all paint, adhesive residue, grease, and dust. The surface must be clean and porous for adhesive or barrier to bond.
Acclimating Your Wood Flooring
Acclimation is the process of allowing the wood flooring to adjust to the moisture and temperature conditions of the room where it will be installed. This is critical for preventing gaps, buckling, and cupping after installation.
- Store the flooring boxes in the installation room for 3 to 7 days (check your manufacturer’s specific recommendation).
- Open the boxes and remove any plastic wrapping so air can circulate around the planks. Stack boxes in a crisscross pattern for airflow.
- The room must be at its normal living conditions — HVAC running, temperature between 60 and 80 degrees F, humidity between 30% and 50%.
- Use a moisture meter to check the flooring’s moisture content after the acclimation period. It should be within 2% to 4% of the subfloor reading.
Planning Your Layout
Before installing a single plank, plan your layout carefully:
- Direction: Traditionally, wood flooring runs parallel to the longest wall or toward the main light source (toward windows). In hallways, run planks along the length of the hallway. Over plywood subfloors, run the flooring perpendicular to the floor joists for maximum strength.
- Expansion gap: Leave a 1/2-inch gap around all walls, cabinets, pipes, and fixed objects. Wood expands and contracts with humidity changes, and this gap prevents buckling. Baseboards will cover the gap.
- Stagger joints: End joints between planks should be staggered by at least 6 inches (12 inches is better) from the adjacent row. This creates a natural, random appearance and improves structural stability.
- Racking: Open several boxes and mix planks from different boxes during installation. This distributes any color variation evenly across the floor rather than creating visible patches of different shade.
- First row width: Measure the room width and calculate how wide the last row will be. If the last row would be less than 2 inches wide, rip the first row narrower to make the last row wider. Both the first and last rows should be at least 2 inches wide for a balanced appearance.
Nail-Down Installation (Step by Step)
Step 1: Snap a chalk line. Measure 3/4 inch from the starting wall (1/2-inch expansion gap plus 1/4 inch for the tongue) and snap a chalk line the length of the room. This is your alignment guide for the first row.
Step 2: Install the first row. Place the first plank with the tongue facing the room and the groove facing the wall. Align the edge with the chalk line. Since the flooring nailer cannot reach this close to the wall, face-nail the first row using a finish nailer. Drive nails through the face of the plank at a slight angle, placing them where the baseboard will cover the nail holes. Also blind-nail through the tongue at a 45-degree angle.
Step 3: Continue with the flooring nailer. Starting with the second or third row (once there is enough room for the nailer), use the pneumatic flooring nailer. Position the nailer’s shoe against the tongue of the plank, and strike the plunger with a rubber mallet to drive a cleat through the tongue into the subfloor. Space nails every 8 to 10 inches and within 2 inches of each end.
Step 4: Stagger end joints. Start each row with a different length plank so that end joints are staggered by at least 6 inches. Use cut-off pieces from the end of one row to start the next (as long as the piece is at least 8 inches long).
Step 5: Check alignment regularly. Every 4 to 5 rows, measure from the leading edge of the flooring to the far wall at both ends. If the measurements differ, the rows are drifting out of square. Correct by slightly adjusting the next few rows.
Step 6: Handle doorways. Undercut door casings and slide the flooring underneath for a clean look. At transitions to other rooms or flooring types, install a transition strip.
Step 7: Install the last row. Rip the last row to width, leaving a 1/2-inch expansion gap at the wall. Use a pull bar and mallet to pull the last row tight against the previous row. Face-nail the last row since the nailer cannot reach.
Glue-Down Installation (Step by Step)
Step 1: Prepare adhesive area. Snap a chalk line for the first row as described above. Only spread adhesive over an area you can cover in 30 to 60 minutes — the adhesive has a working time before it skins over.
Step 2: Spread adhesive. Using the recommended trowel size, spread urethane adhesive between the chalk line and an area about 2 to 3 rows wide. Hold the trowel at a 45-degree angle to create consistent ridges. Do not spread adhesive where you will kneel to install planks.
Step 3: Set the first row. Place the first plank tongue-side out, aligned with the chalk line. Press firmly into the adhesive and place spacers between the plank and the wall. Set the next plank end-to-end, engaging the tongue and groove, and press into the adhesive.
Step 4: Continue row by row. Spread more adhesive as needed, working 2 to 3 rows at a time. Engage each plank’s tongue into the groove of the previous row, then press down into the adhesive. Use a tapping block to close seams tight — never strike the plank directly with a mallet.
Step 5: Clean adhesive immediately. Wipe any adhesive that squeezes up between planks with the manufacturer’s recommended solvent immediately. Once urethane adhesive cures, it is extremely difficult to remove.
Step 6: Weight the installation. Place heavy objects on the newly installed sections to hold planks flat while the adhesive cures. Allow 24 hours before walking on the floor and 48 to 72 hours before moving furniture.
Floating Installation (Step by Step)
Step 1: Install underlayment. Roll out foam or cork underlayment across the entire floor. If the underlayment does not have a built-in moisture barrier and you are installing over concrete, lay 6 mil poly sheeting first. Tape all seams.
Step 2: Start the first row. Place the first plank with the groove facing the wall (cut off the tongue if the manufacturer recommends it). Place 1/2-inch spacers between the plank and the wall. For click-lock products, engage the end joints by angling the short end of the next plank into the previous plank and pressing down until it clicks.
Step 3: Continue row by row. For click-lock: angle the long side of each plank into the groove of the previous row, then press or tap down until it clicks locked. For tongue-and-groove without click-lock: apply a thin bead of wood glue in the groove, tap the plank tight, and wipe excess glue immediately.
Step 4: Stagger and fit. Stagger end joints by at least 6 inches. Cut the last plank in each row to fit, leaving the 1/2-inch expansion gap. Use the cut-off to start the next row if it is long enough.
Step 5: Install the last row. Measure and rip the last row to width. Use a pull bar to close the final row tight. Face the cut edge toward the wall where the baseboard will cover it.
Finishing Touches
- Install baseboards and shoe molding: Nail baseboards to the wall (not the floor) to cover the expansion gap. Add quarter-round shoe molding along the bottom of the baseboard for a finished look.
- Install transition strips: At doorways and where wood meets other flooring types, install T-moldings, reducers, or threshold strips as appropriate. For a guide on hardwood floor options and maintenance, see our hardwood flooring guide.
- Fill face nail holes: Use color-matched wood filler to fill any face-nail holes in the first and last rows.
- Clean the floor: Sweep and dry-mop the entire floor. Do not wet mop for at least 2 weeks after installation (longer for glue-down — follow adhesive cure time).
- Place furniture pads: Apply felt pads to the bottom of all furniture legs to prevent scratches.
Pro Tips for Better Results
- Rent the right nailer: For 3/4-inch solid hardwood, rent a pneumatic floor nailer (not a stapler). The nailer should be compatible with your plank width and thickness. Most rental shops carry the Bostitch MFN-201 or similar models.
- Use a sacrificial tapping block: Never strike the tongue or groove directly. Always use a tapping block against the tongue to close joints. Striking the tongue directly will damage it and compromise the joint.
- Work from multiple boxes simultaneously: This distributes natural color variation across the floor for a more uniform appearance.
- Dry-lay the first 3 rows: Before committing, lay out the first 3 rows without fastening to check the pattern, color distribution, and alignment. Make adjustments before you start nailing or gluing.
- Check for bowed planks: Before installing each plank, sight down its length to check for bowing. Slightly bowed planks can be pulled straight during installation, but severely bowed planks should be set aside and used for short cut pieces.
- Control your environment: If you are working in summer, run the air conditioning. In winter, run the heat. The room should be at normal living conditions throughout the installation.
Common Mistakes to Avoid
- Skipping acclimation: The number one cause of post-installation problems. Always acclimate wood flooring to the room for the recommended period.
- No expansion gap: Forgetting the 1/2-inch expansion gap will cause buckling when the wood expands in humid months.
- Not checking the subfloor: An uneven subfloor causes squeaks, gaps, and hollow spots that are impossible to fix without pulling up the floor.
- H-joints: When end joints in adjacent rows line up, it creates an “H” pattern that looks unnatural and weakens the floor structurally. Stagger joints randomly.
- Nailing too close to the end: Nailing or stapling within 1 inch of a plank end can split the wood. Stay at least 1 to 2 inches from the end.
- Not mixing boxes: Installing planks from one box at a time creates visible patches of color variation. Mix from multiple boxes.
- Hammering directly on planks: Always use a tapping block. Direct hits damage the tongue, groove, or surface.
Frequently Asked Questions
Can a beginner install hardwood floors?
Yes, with proper preparation and patience. Floating engineered wood is the easiest method for beginners — it requires no nailer or adhesive. Nail-down installation has a moderate learning curve; most beginners get comfortable with the nailer within the first 30 minutes. Glue-down is the most challenging because adhesive management requires experience.
How long does it take to install wood flooring?
For a 300-square-foot room, expect 1 to 2 days for a DIY nail-down or floating installation, including subfloor prep. Professional crews can install 100 to 200 square feet per hour. Glue-down installations take longer due to adhesive working time and the need to work in sections.
Which direction should wood flooring run?
Run planks parallel to the longest wall or toward the main light source for the most appealing visual effect. In hallways, always run planks along the length. When installing over a plywood subfloor, running perpendicular to the floor joists is structurally preferred but not always required for engineered wood.
Do I need underlayment for nail-down hardwood?
Yes. Install 15 lb felt paper or rosin paper over the plywood subfloor. This provides a moisture retarder and reduces squeaks caused by wood-on-wood friction. Do not use foam underlayment for nail-down installation — it compresses and causes fastener withdrawal.
Can I install solid hardwood over concrete?
Not directly. Solid hardwood must be nailed to a wood subfloor. To install hardwood over concrete, you need to first install a plywood subfloor system over the concrete (glued or on sleepers), then nail the hardwood to the plywood. Alternatively, use engineered wood flooring, which can be glued or floated directly over concrete.
How much extra flooring should I order?
Order 10% extra for standard rooms with straightforward layouts. Order 15% extra for rooms with many angles, doorways, and obstacles. Order 20% extra for diagonal installations. Keep any leftover material for future repairs.
Can I install wood flooring over radiant heat?
Engineered wood flooring is compatible with radiant heat — use floating or glue-down installation. Solid hardwood is generally not recommended over radiant heat because the direct heat can cause excessive drying and shrinkage. Consult both your flooring and radiant heat manufacturers for compatibility.
Prefer to explore on your own?
See how new flooring looks in your actual room in seconds — free, no signup.
Try the free Floor Studio →