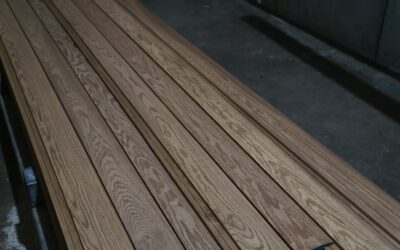
Installing hardwood flooring is one of the most impactful home improvements you can make. A well-installed hardwood floor adds warmth, beauty, and significant resale value to any room. While many homeowners hire professionals, a confident DIYer with the right tools and preparation can tackle this project successfully.
This guide walks you through everything you need to know about installing hardwood flooring, from choosing an installation method to making that final cut. Whether you are working with solid planks or engineered wood flooring, the principles covered here will set you up for a professional-looking result.
- Choosing Your Installation Method
- Tools and Materials You Will Need
- Subfloor Preparation
- Acclimating Your Hardwood
- Step-by-Step Nail-Down Installation
- Tips for a Professional Finish
- Common Installation Mistakes to Avoid
- Cost of Installing Hardwood Flooring
- Hardwood Flooring Maintenance After Installation
- Final Thoughts
Choosing Your Installation Method
Before you buy a single plank, you need to decide how the floor will be attached. The three primary methods for installing hardwood flooring are nail-down, glue-down, and floating. Each has specific advantages depending on your subfloor type, the product you have chosen, and the room conditions.
Nail-Down Installation
Nail-down is the traditional method used for solid hardwood flooring over wood subfloors. A pneumatic flooring nailer drives cleats or staples through the tongue of each plank at an angle, securing it firmly to the subfloor beneath. This method creates an extremely stable floor with minimal movement over time.
Nail-down installation works best over plywood or OSB subfloors that are at least 3/4 inch thick. It is not suitable for concrete slabs unless you first install a plywood underlayment system. Most solid hardwood planks 3/4 inch thick are designed specifically for nail-down installation.
Glue-Down Installation
Glue-down installation uses a urethane or acrylic adhesive spread directly on the subfloor. Each plank is pressed into the adhesive, creating a bond that holds the floor in place. This method works on both concrete and wood subfloors and is the preferred approach for engineered hardwood in many situations.
The key advantage of glue-down is that it creates a very solid feel underfoot with almost no hollow sound when walked on. It also adds a slight moisture barrier between the subfloor and the wood. The downsides include a messier installation process and more difficult repairs if individual planks need replacement later.
Floating Installation
Floating floors are not attached to the subfloor at all. Instead, planks click or lock together and rest on top of an underlayment pad. The weight of the assembled floor and friction keep everything in place. This method is popular for engineered hardwood and is the fastest of the three to install.
Floating installation is ideal for concrete subfloors, radiant heating systems, and situations where you want the option to remove the floor later without damage. However, it can produce a slightly hollow sound compared to nailed or glued floors, and it requires strict attention to expansion gaps around the perimeter.
Tools and Materials You Will Need
Having the right tools on hand before you start makes installing hardwood flooring far less stressful. Here is a comprehensive list organized by installation method.
Essential Tools for All Methods
- Tape measure and pencil
- Chalk line for reference lines
- Miter saw or circular saw for crosscuts
- Table saw for rip cuts along the length
- Jigsaw for irregular cuts around door frames and vents
- Pry bar and pull bar for fitting last rows
- Tapping block to close plank joints without damaging edges
- Spacers (1/2 inch) for expansion gaps
- Safety glasses, ear protection, and knee pads
- Moisture meter for subfloor and wood testing
Additional Tools by Method
Nail-down: Pneumatic flooring nailer (available for rent at most home centers), air compressor, rubber mallet, and 1.5 to 2-inch flooring cleats or staples.
Glue-down: Urethane flooring adhesive, 1/4-inch V-notch trowel, adhesive remover, and weighted rollers.
Floating: Underlayment rolls, utility knife, and 6-mil polyethylene moisture barrier if installing over concrete.
Subfloor Preparation
Proper subfloor preparation is arguably the most important step when installing hardwood flooring. A floor is only as good as what is underneath it. Skipping this step leads to squeaks, gaps, and premature wear.
Testing for Moisture
Use a pin-type or pinless moisture meter to check your subfloor. For wood subfloors, the moisture content should be within 2 to 4 percent of the hardwood planks themselves. For concrete, use a calcium chloride test or relative humidity probe. Concrete should read below 75 percent relative humidity or below 3 pounds per 1,000 square feet on a calcium chloride test.
If moisture levels are too high, do not proceed. Address the source of moisture first, whether that means improving drainage, running a dehumidifier, or applying a concrete sealer. Installing over a wet subfloor will cause cupping, buckling, and potential mold growth.
Checking for Flatness
Lay a straight 8-foot or 10-foot straightedge across the subfloor in multiple directions. The subfloor should not deviate more than 3/16 inch over 10 feet. High spots can be sanded down, and low spots can be filled with a floor-leveling compound. Significant dips or humps may require more extensive repair.
Cleaning and Securing
Sweep and vacuum the subfloor thoroughly. Remove any old adhesive residue, paint drips, or debris. For plywood subfloors, drive down any popped nails or screws and add additional fasteners to eliminate squeaks. Replace any water-damaged or delaminated sections of plywood before proceeding.
Acclimating Your Hardwood
Acclimation is the process of letting your hardwood adjust to the temperature and humidity of the room where it will be installed. Wood is hygroscopic, meaning it absorbs and releases moisture from the surrounding air. If you install planks that have not acclimated, they may expand or contract significantly after installation, causing gaps or buckling.
To acclimate properly, open the boxes of hardwood and spread the planks loosely in the installation room. Keep the room at normal living conditions, typically 60 to 80 degrees Fahrenheit with 30 to 50 percent relative humidity. Most manufacturers recommend acclimating for 3 to 5 days, but always check the specific product instructions.
Use your moisture meter to compare the planks with the subfloor throughout the acclimation period. When the difference is within the acceptable range, you are ready to install.
Step-by-Step Nail-Down Installation
Nail-down is the most common method for solid hardwood, so here is a detailed walkthrough of the process.
Step 1: Establish Your Starting Line
Measure out from the longest, straightest wall a distance equal to the width of one plank plus a 1/2-inch expansion gap. Snap a chalk line at this point parallel to the wall. This line will guide your first row and ensure everything stays straight.
Step 2: Install the First Two Rows
The first row is the most critical. Place planks groove-side toward the wall with spacers maintaining the expansion gap. Since you cannot angle the flooring nailer this close to the wall, face-nail the first row using a finish nailer, driving nails through the top of the plank about 1/2 inch from the wall edge. These nail holes will be hidden by baseboard trim later.
Also blind-nail through the tongue at a 45-degree angle by hand or with the finish nailer. For the second row, you may still need to hand-nail before the pneumatic nailer can fit. Stagger end joints by at least 6 inches from the previous row.
Step 3: Continue With the Flooring Nailer
Once you have enough clearance from the wall, switch to the pneumatic flooring nailer. Position the nailer’s base plate against the tongue of the plank and strike the plunger with a rubber mallet. The nailer drives a cleat at the correct angle automatically. Work across the room row by row, always checking that joints are tight and rows remain straight.
Step 4: Handle the Last Rows
As you approach the far wall, you will again lose clearance for the pneumatic nailer. Switch back to face-nailing with the finish nailer for the last two or three rows. Rip the final row to width on a table saw, leaving a 1/2-inch expansion gap. Use a pull bar to snug the last row into place.
Step 5: Install Transitions and Trim
Install baseboard molding and shoe molding to cover the expansion gaps. Use T-moldings or reducers at doorways and transitions to other flooring types. Never nail trim directly into the hardwood floor, as this restricts the floor’s ability to expand and contract.
Tips for a Professional Finish
Years of installer experience boil down to a handful of habits that separate average results from outstanding ones.
Rack Your Planks
Before installing, open several boxes and dry-lay a few rows to check the color and grain variation. Mix planks from different boxes to distribute any slight shade differences evenly across the room. This prevents noticeable color patches.
Stagger End Joints Properly
Never let end joints in adjacent rows line up or come within 6 inches of each other. A random stagger pattern looks the most natural. Some installers use an H-pattern or step pattern, but random staggering is the industry standard for a reason: it distributes stress more evenly and looks better.
Undercut Door Frames
Rather than trying to cut planks to fit around door casings and frames, use an oscillating multi-tool or a jamb saw to undercut the bottom of the frame. Slide the plank underneath for a clean, professional look with no visible gaps.
Control Your Environment
Keep the HVAC system running during and after installation. Sudden changes in temperature or humidity can cause the newly installed floor to react. Maintain consistent conditions for at least two weeks after installation to let everything settle.
Common Installation Mistakes to Avoid
Even experienced DIYers can fall into these traps when installing hardwood flooring.
- Skipping acclimation: This is the number one cause of post-installation problems. Never rush this step.
- Ignoring moisture testing: A subfloor that looks dry can still have moisture levels that are too high.
- Forgetting expansion gaps: Hardwood needs room to expand. Without gaps, the floor will buckle.
- Using the wrong fasteners: Always use the cleat size and type recommended by the flooring manufacturer.
- Poor stagger pattern: Aligned end joints create weak lines and look amateurish.
- Not checking the subfloor for flatness: Bumps and dips telegraph through the finished floor.
Cost of Installing Hardwood Flooring
If you are considering hiring a professional, expect to pay between $3 and $8 per square foot for labor alone in 2026. The total installed cost, including materials, typically ranges from $8 to $18 per square foot depending on the species, plank width, and your geographic area.
DIY installation can save you roughly 50 percent of the total project cost. Tool rental for a flooring nailer runs about $40 to $70 per day. A 500-square-foot room might take a skilled DIYer two to three full days to complete.
Hardwood Flooring Maintenance After Installation
Once your floor is in, protect your investment with proper care. Wait at least 24 hours before placing furniture back in the room. Use felt pads under all furniture legs. Avoid wet mopping and instead use a hardwood-specific cleaner with a damp microfiber mop. Keep humidity levels between 30 and 50 percent year-round to minimize seasonal movement.
If you opted for unfinished hardwood, you will need to sand and apply finish after installation. This adds 2 to 4 days to the project timeline but gives you complete control over the final look. Pre-finished planks are ready to use immediately after installation.
Final Thoughts
Installing hardwood flooring is a rewarding project that delivers decades of beauty when done correctly. The keys to success are thorough subfloor preparation, proper acclimation, and careful attention to expansion gaps and stagger patterns. Whether you choose nail-down, glue-down, or a floating method, take your time with the first few rows to establish a straight, solid foundation for the rest of the floor.
If you are still deciding on the right material, explore our guides on hardwood flooring and engineered wood flooring to compare your options before you start swinging that mallet.
Prefer to explore on your own?
See how new flooring looks in your actual room in seconds — free, no signup.
Try the free Floor Studio →