A curled corner, a lifting seam, or a soft bubble in the middle of the room usually isn’t a reason to replace the whole floor. The right glue for vinyl flooring repair can re-bond a loose plank or sheet in under an hour and hold for years, as long as you match the adhesive to the problem. Grab the wrong tube, though, and you’ll get a squishy ridge, a shiny residue that never dries, or a bond that pops loose the next humid week. This guide walks through the adhesive types that actually work, when to use each one, and the exact steps to get a flat, permanent fix.
Why Vinyl Flooring Lifts in the First Place
Before you reach for glue, understand what caused the failure. Glue-down luxury vinyl tile (LVT) and sheet vinyl lift when the original adhesive was applied too thin, when moisture wicked up from a slab, or when the floor was walked on before the adhesive tacked. Click-lock LVP and SPC planks “float,” so they aren’t glued at all, but individual planks can still cup or gap at the seams.
Peel-and-stick tiles are the most failure-prone. Their factory adhesive gives out after a few years of foot traffic and temperature swings, which is why edges curl first. Knowing the product tells you the fix: a floating plank rarely needs glue on its whole face, while a lifting sheet-vinyl seam needs a seam-specific product, not a general construction adhesive.
Types of Glue for Vinyl Flooring Repair
Not every adhesive that sticks to vinyl belongs on a floor. Flexibility, moisture tolerance, and a thin, non-telegraphing film matter more than raw grab strength. Here are the four categories worth keeping on the shelf.
1. Multipurpose Vinyl Flooring Adhesive
This is the go-to for re-bonding full-spread LVT or sheet vinyl that has lifted over a larger area. Water-based acrylic adhesives such as Roberts 2057 or Henry 356 stay slightly flexible, clean up with water while wet, and won’t telegraph through thin wear layers. Expect to pay $20 to $35 per gallon, which covers roughly 150 to 200 sq ft. For a single loose plank, buy the smallest quart you can find.
2. Vinyl Seam Sealer and Seam Glue
For sheet vinyl where two edges meet, a cold-weld seam sealer chemically fuses the vinyl together rather than gluing it to the subfloor. Products like Roberts SureSeal come with a fine applicator tip. This is the only correct fix for a splitting sheet-vinyl seam; multipurpose adhesive won’t bond the vertical edges.
3. Two-Part Epoxy or Polyurethane Adhesive
Reserve these for high-moisture zones, below-grade basements, or radiant-heat floors where a water-based product can fail. They cost more ($40 to $70 per kit) and give you a short working window, but they create a waterproof, permanent bond that shrugs off humidity.
4. Superglue and Vinyl Repair Kits for Small Spots
A dime-sized curled corner or a lifting peel-and-stick edge can be tacked down with a gel cyanoacrylate (superglue) or a dedicated vinyl repair kit. Use these sparingly and only on spots smaller than a few inches; they set hard and can create a slightly rigid patch.
Matching the Glue to the Repair
- Loose peel-and-stick tile: multipurpose vinyl adhesive or, for a corner only, gel superglue.
- Lifting glue-down LVT plank: water-based acrylic vinyl adhesive spread thin.
- Bubble in sheet vinyl: inject multipurpose adhesive through a slit, then roll flat.
- Splitting sheet-vinyl seam: cold-weld seam sealer.
- Basement or bathroom repair: two-part epoxy or moisture-cure polyurethane.
- Cupped floating click plank: usually not a glue problem; check for moisture and replace the plank.
Tools and Supplies You’ll Need
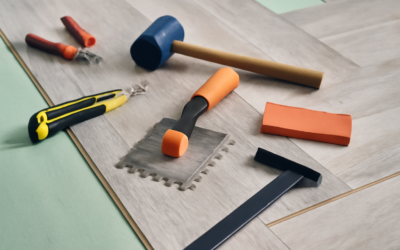
Gather everything before you open the tube; most vinyl adhesives skin over in 15 to 20 minutes. A basic repair kit includes the adhesive, a notched trowel or a plastic putty knife for spreading, painter’s tape, a utility knife, a syringe or glue injector for bubbles, a 75- to 100-pound floor roller (or a rolling pin and a stack of books for small areas), clean rags, and mineral spirits or warm water for cleanup depending on the adhesive base.
Step-by-Step: How to Use the Glue
- Acclimate and clean. Let the room sit at 65 to 85 degrees F for 24 hours. Sweep and wipe the exposed subfloor and the underside of the vinyl; any grit or old, powdery adhesive will telegraph as a bump. Scrape off loose residue with a putty knife.
- Test the fit dry. Set the plank or lift the sheet back into place without glue to confirm it lies flat. Trim any swollen edges with a utility knife.
- Apply a thin film. Spread multipurpose adhesive with the flat edge of a putty knife or a 1/16-inch notched trowel. Thin is the rule. Too much glue oozes at the seams and creates a raised ridge you’ll feel underfoot.
- Wait for the right tack. Most water-based vinyl adhesives need a 5- to 15-minute open time until they feel tacky but no longer transfer to your finger. Seat the vinyl during this window.
- Press and roll. Lay the vinyl from one edge to avoid trapping air, then roll it with a floor roller or press firmly from the center outward. Wipe squeeze-out immediately with a damp rag (water-based) or mineral spirits (solvent-based).
- Weight and cure. Tape the edges, set a stack of books or a weight on the spot, and keep foot traffic off for 24 hours. Wait 72 hours before wet-mopping.
Fixing Bubbles and Curled Edges
A bubble is trapped air or failed adhesive under the surface. Warm the spot with a hair dryer on low to soften the vinyl, then make a small slit along the length of the bubble with a sharp utility knife. Slide the tip of a glue syringe filled with multipurpose adhesive into the slit, squeeze a small bead underneath, press the vinyl down, and roll it flat. Wipe the excess, tape it, and weight it overnight. For a curled edge, lift it gently, work adhesive underneath with a thin putty knife, press, and clamp with painter’s tape and a weight.
Mistakes That Ruin a Vinyl Repair
The most common error is using too much adhesive, which never fully cures under a solid plank and stays spongy. The second is skipping the roll or weight step, so the bond dries with air pockets. Watch these too:
- Using construction adhesive or silicone caulk, which stay rubbery and telegraph through the surface.
- Gluing over a wet or dusty subfloor, guaranteeing a repeat failure.
- Walking on the repair too soon, which shifts the vinyl before the glue grabs.
- Ignoring the moisture source, so a slab keeps pushing adhesive loose no matter how good the glue is.
When to Repair vs. Replace
Glue makes sense for isolated problems: a plank or two, a single seam, or a curled edge. If more than about 15 to 20 percent of a room is lifting, or the vinyl is torn, gouged, or discolored, replacement usually costs less in time than chasing failures with a glue gun. For discontinued patterns, keep any leftover planks; a matched replacement beats a visible patch every time.
The Bottom Line
The right glue for vinyl flooring repair comes down to the failure you’re fixing: multipurpose acrylic for lifting planks and bubbles, cold-weld sealer for sheet seams, epoxy or polyurethane for damp rooms, and a dab of gel superglue for a stray corner. Spread it thin, respect the open time, roll it flat, and weight it overnight. Do that, and a repair that took twenty minutes will outlast the rest of the floor.
Prefer to explore on your own?
See how new flooring looks in your actual room in seconds — free, no signup.
Try the free Floor Studio →