Glue down vinyl flooring is a permanent installation method where vinyl planks or tiles are adhered directly to the subfloor using a specialized adhesive. While click-lock floating vinyl dominates the DIY market, glue-down installations offer distinct advantages in commercial settings, large open spaces, and situations where the most secure, solid-feeling floor is required.
This guide explains when glue-down vinyl flooring is the better choice, walks through the installation process step by step, and helps you decide between glue-down and floating methods for your project.
What Is Glue Down Vinyl Flooring?
Glue down vinyl refers to both the installation method (using adhesive to bond planks to the subfloor) and the specific products designed for this method. Glue-down vinyl planks are typically thinner than click-lock products (2 to 3 mm versus 4 to 8 mm) because they do not need a rigid core or locking mechanism — the adhesive provides stability.
Types of Glue Down Vinyl Products
- Dry-back vinyl planks — the most common type. Thin, flexible planks that must be adhered with a separate adhesive applied to the subfloor.
- Dry-back vinyl tiles — square tiles (typically 12×12 or 18×18) adhered with the same method. Popular for commercial applications.
- Peel-and-stick vinyl — planks or tiles with a factory-applied adhesive backing. Easier to install but generally less durable and less secure than spread adhesive.
- Glue-down luxury vinyl — premium-quality dry-back planks with thick wear layers and realistic textures, designed for both residential and commercial use.
Glue Down vs. Click-Lock (Floating) Vinyl
Understanding the differences helps you choose the right method:
Glue Down Advantages
- No hollow sound — planks bonded to the subfloor eliminate the hollow, tapping sound that floating floors can produce
- More stable — no expansion gaps needed at walls, no risk of planks separating over time
- Better for heavy loads — rolling chairs, heavy equipment, and high foot traffic perform better on glued floors
- Lower profile — thinner planks add less height to the floor, minimizing transition issues at doorways
- Larger areas without transitions — floating floors need transition strips every 40-50 feet; glue-down installations can cover unlimited area without breaks
- Warmer feel — direct contact with the subfloor reduces the “cool” sensation some floating floors have
Click-Lock Advantages
- Easier DIY installation — no adhesive to manage
- Faster installation — no adhesive application or open time to manage
- Easier removal — floating floors can be disassembled and reused
- More forgiving subfloor — rigid-core click-lock products (especially SPC) tolerate minor subfloor imperfections better
- No messy adhesive — cleaner installation process
When to Choose Glue Down Vinyl
Glue-down installation is the preferred method in these situations:
- Commercial spaces — offices, retail, restaurants, and healthcare facilities where durability and a solid feel are priorities
- Large open-concept spaces — areas over 40 feet in any direction where floating floors would require transition strips
- Over radiant heat — glue-down vinyl conducts heat from the subfloor more efficiently than floating floors with underlayment
- When ceiling height is limited — the thinner profile (2-3 mm vs 4-8 mm) preserves headroom in basements and rooms with low door clearances
- High-traffic areas — the permanent bond prevents planks from shifting or separating
- When the quietest floor is desired — glue-down eliminates all hollow sounds
Tools and Materials
Tools
- V-notch trowel (1/16 x 1/16 x 1/16 or as specified by adhesive manufacturer)
- Utility knife with fresh blades
- Straight edge or T-square
- Tape measure
- Chalk line
- 100-lb floor roller
- Knee pads
- Clean rags and mineral spirits (for adhesive cleanup)
Materials
- Glue-down vinyl planks or tiles (order 10% extra for cuts and waste)
- Vinyl flooring adhesive (pressure-sensitive or hard-set, as recommended by the flooring manufacturer)
- Floor leveling compound (if subfloor needs smoothing)
- Primer (if recommended for your subfloor type)
Step-by-Step Installation Guide
Step 1: Prepare the Subfloor
Subfloor preparation is even more critical for glue-down vinyl than for floating installations. Every imperfection in the subfloor will telegraph through the thin vinyl planks.
- Remove all existing flooring, adhesive residue, and debris.
- Fill cracks, holes, and low spots with floor patching compound.
- Sand or grind high spots.
- The subfloor must be flat within 3/16 inch over 10 feet (or tighter if the manufacturer specifies).
- Clean thoroughly — vacuum, then damp mop to remove all dust. Dust prevents adhesive from bonding.
- Test concrete subfloors for moisture. Most adhesives require less than 75% RH or 3 lbs MVER.
Step 2: Acclimate the Vinyl
Store the vinyl planks in the installation room for 48 hours before installation. The room should be between 65°F and 85°F during this period and throughout installation.
Step 3: Plan the Layout
- Snap chalk lines to create a reference grid aligned with the most visible wall or focal point.
- Dry-lay a few rows to check the layout, ensuring no row ends with a piece narrower than half a plank.
- Stagger end joints by at least 6 inches between adjacent rows.
Step 4: Apply Adhesive
- Spread adhesive over a manageable section (typically 3 to 4 rows at a time) using the trowel size specified by the adhesive manufacturer.
- For pressure-sensitive adhesive: allow the adhesive to become tacky (typically 15 to 30 minutes) before placing vinyl. The adhesive should feel sticky but not transfer to your finger.
- For wet-set adhesive: place vinyl while the adhesive is still wet, per manufacturer’s open time specifications.
- Do not spread more adhesive than you can cover within the open time.
Step 5: Install the Vinyl
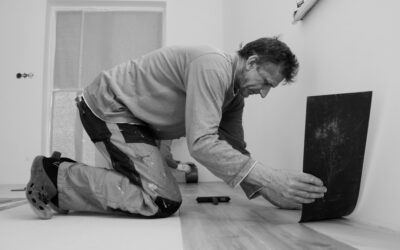
- Align the first plank along your chalk line, pressing it firmly into the adhesive.
- Butt subsequent planks tightly against each other — there should be no gap between planks.
- Press each plank firmly into the adhesive as you go.
- Use a J-roller or hand roller to press each plank into the adhesive during installation.
- Keep adhesive off the plank surface — wipe any excess immediately with a damp cloth.
Step 6: Roll the Floor
After installing each section, roll the floor with a 100-lb roller in both directions. This ensures full contact between the vinyl and adhesive and eliminates air pockets. Roll again within one hour and once more before leaving for the day.
Step 7: Allow Cure Time
- Light foot traffic is typically allowed after 24 hours.
- Full traffic and furniture placement should wait 48 to 72 hours.
- Do not wet mop for at least 5 days after installation.
Types of Adhesive
Pressure-Sensitive Adhesive (PSA)
The most common choice for vinyl plank and tile. PSA allows planks to be repositioned during installation and provides a firm bond once cured. It remains tacky permanently, so planks can be pulled up and replaced if needed.
Hard-Set (Wet-Set) Adhesive
Creates a permanent, rigid bond. Used in commercial applications and for vinyl products that require maximum hold. Once cured, removal requires scraping or solvents.
Spray Adhesive
A faster application method for large commercial installations. Provides even coverage with less mess than trowel application.
Glue Down Vinyl Flooring Costs in 2026
- Glue-down vinyl planks (residential): $2 to $5 per square foot
- Glue-down vinyl planks (commercial): $3 to $7 per square foot
- Adhesive: $0.30 to $0.75 per square foot
- Professional installation: $2 to $5 per square foot (labor)
- Subfloor preparation: $1 to $3 per square foot (if needed)
For a 400-square-foot room, expect to pay between $1,700 and $5,100 total for mid-range glue-down vinyl with professional installation.
Common Mistakes to Avoid
- Insufficient subfloor prep — every bump, ridge, and grain of dust will show through thin glue-down vinyl.
- Wrong trowel size — too much adhesive creates ooze between planks; too little causes poor bond. Use the size specified by the adhesive manufacturer.
- Ignoring open time — placing vinyl too soon (adhesive too wet) or too late (adhesive too dry) results in poor adhesion.
- Skipping the roller — rolling is essential for full contact. Skipping this step leads to bubbles and lifted edges.
- Using the wrong adhesive — always use the adhesive recommended by the vinyl manufacturer. Incompatible adhesives can cause discoloration, poor bond, or product damage.
- Moisture issues — installing over a concrete slab without moisture testing leads to adhesive failure and mold growth.
Maintenance
- Sweep or vacuum regularly to prevent grit from scratching the surface.
- Damp mop with a vinyl-safe cleaner — avoid excess water, especially within the first week.
- Use furniture pads under legs to prevent denting.
- Avoid dragging heavy items across the surface.
- Replace damaged planks individually — one advantage of glue-down is that individual planks can be heated, removed, and replaced without affecting surrounding planks.
Final Thoughts
Glue down vinyl flooring is the professional’s choice for installations that demand maximum stability, a solid feel underfoot, and seamless coverage across large areas. While click-lock LVP is easier for DIY projects, glue-down delivers a premium result that feels more like a permanent floor than a floating surface.
The key to success is meticulous subfloor preparation and adhesive management. If you invest the time in these two areas, a glue-down vinyl installation will look and feel exceptional for 15 to 20 years or more — with the added benefit of easy individual plank replacement if damage ever occurs.
Prefer to explore on your own?
See how new flooring looks in your actual room in seconds — free, no signup.
Try the free Floor Studio →