
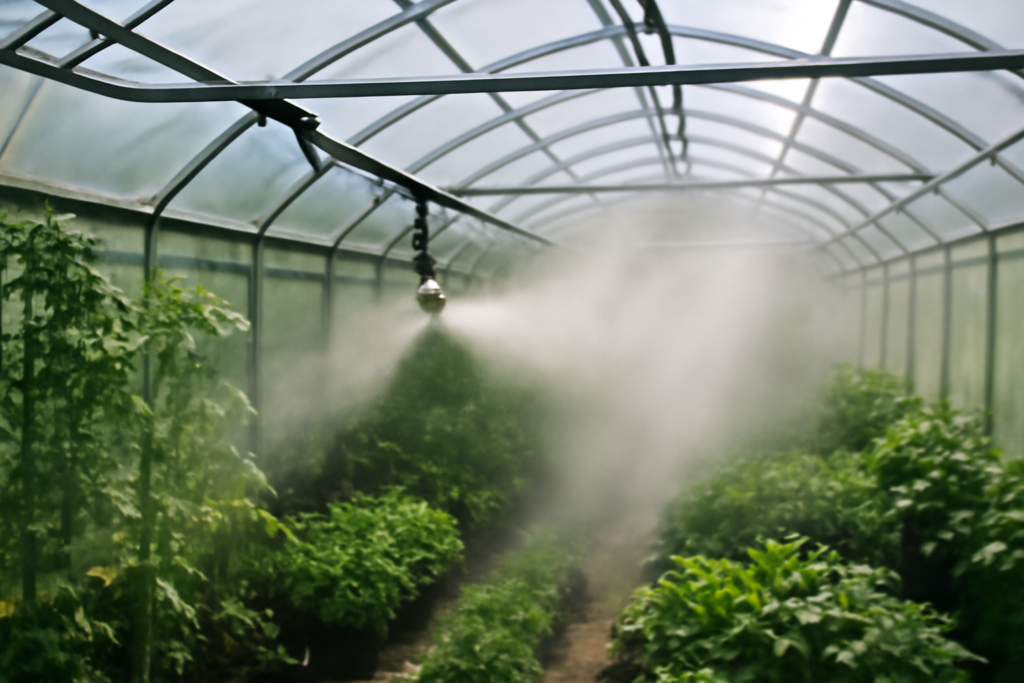
On a hot July afternoon, a small greenhouse can climb 30°F over outside temperature in under an hour. A greenhouse misting system fights that heat by spraying fine droplets that evaporate and pull energy out of the air, while also raising humidity for cuttings, seedlings and tropical plants. Get the droplet size, nozzle spacing and timing right and you have a hands-off climate tool. Get them wrong and you soak foliage, breed fungus and waste water.
The quick answer: for a hobby greenhouse, a low-pressure kit on a cycle timer is usually enough for propagation and light cooling. For serious evaporative cooling in hot, dry climates, a high-pressure pump system producing true fog-sized droplets does far more with less wetting. Either way, pair the misters with ventilation and air movement, and run them on a humidistat or short cycles rather than continuously.
- How a Greenhouse Misting System Works
- Low-Pressure vs High-Pressure Misting
- Nozzle Spacing and Layout
- Timers, Humidistats and Controls
- Cooling vs Propagation: Setting Goals
- Tools and Materials
- Installation Steps
- Electrical and Moisture Safety
- Troubleshooting
- General Cost Ranges
- When to Call a Pro
- Frequently Asked Questions
How a Greenhouse Misting System Works
Water pushed through tiny orifices breaks into droplets. The smaller the droplet, the faster it evaporates, and evaporation is what cools. Each gallon that evaporates absorbs a large amount of heat from the surrounding air. The drier the air, the more cooling you get, which is why misting shines in arid regions and struggles in muggy climates where the air is already near saturation.
The same spray serves a second job: keeping relative humidity high around unrooted cuttings so they do not lose water faster than they can take it up. Many gardeners searching for a plant misting system are really after this propagation benefit rather than cooling.
Low-Pressure vs High-Pressure Misting
Low-pressure systems (household water pressure)
These run on typical home pressure, roughly 40 to 70 psi, straight from a hose bib or supply line. Droplets are relatively large, so they fall onto benches and leaves before fully evaporating. Cooling is modest, often a few degrees, and surfaces get wet. They are inexpensive, easy to install with push-fit tubing, and perfect for propagation benches, orchid rooms and small hobby houses.
Mid-pressure systems (booster pump)
A small pump boosts pressure to around 100 to 300 psi. Droplets shrink, evaporation improves and wetting drops. This is a sensible middle ground for a medium hobby greenhouse in warm climates.
High-pressure fog systems
Dedicated pumps run 800 to 1,000 psi through stainless nozzles and rated high-pressure lines. Droplets are small enough to flash-evaporate in the air, producing a visible fog with little leaf wetness. Cooling can reach 10 to 20°F in dry conditions. These cost significantly more, need filtered water, and demand pressure-rated fittings throughout.
Nozzle Spacing and Layout
Spacing depends on nozzle output and the job you want done. Some starting points:
- Propagation benches: Nozzles every 2 to 3 feet along a line about 18 to 24 inches over the bench, so spray patterns overlap slightly.
- General cooling (low pressure): A line along the ridge or each side, nozzles every 3 to 4 feet, mounted as high as practical to give droplets time to evaporate.
- High-pressure fog: Lines at 6 to 8 feet high, nozzles every 3 to 5 feet, aimed away from walls and plant canopies.
- Near intake vents: Placing a mist line just inside the air inlet pre-cools incoming air and spreads the effect with airflow.
Point nozzles horizontally or slightly upward in cooling setups so droplets travel farther before landing. Add a drain valve at the low end of each line so water does not drip after the pump shuts off, and use anti-drip nozzles where available.
Timers, Humidistats and Controls
Continuous misting is the most common mistake. Plants need drying time, and constant spray saturates media and invites disease. Controls to consider:
- Cycle timers: Run in seconds on and minutes off, for example 10 seconds every 10 minutes during the hottest hours. Adjust by season.
- Humidistats: Turn misting on when relative humidity drops under a set point, such as 60 or 70 percent, and off when it is reached.
- Thermostats: Trigger cooling mist when air temperature passes a set point, such as 85°F.
- Combined controllers: Many kits combine a timer with temperature and humidity sensors, and some accept a light sensor so misting stops at night.
Night misting is rarely wise. Leaves need to dry before dark, when temperatures fall and humidity naturally rises.
Cooling vs Propagation: Setting Goals
Decide which job matters most before buying. For propagation, you want high humidity close to the plants, often with a clear tent or bench enclosure to hold moisture, and short frequent pulses. For cooling, you want the finest droplet you can afford, mounted high, combined with exhaust fans or roof vents that move saturated air out. Running a cooling mist in a sealed house simply raises humidity to 100 percent and stalls both cooling and plant transpiration.
If you mainly root cuttings, a basic greenhouse misting system kit with a low-pressure line and cycle timer is plenty. If summer heat is the problem, budget for higher pressure plus ventilation.
Tools and Materials
- Misting kit or components: tubing, nozzles, tees, end caps and mounting clips
- Inline filter (sediment filter at minimum; high-pressure systems need finer filtration)
- Backflow preventer on the supply connection
- Solenoid valve and timer, or pump with controller
- Humidistat and thermostat, or a combined sensor controller
- Tubing cutter, drill and screws, zip ties
Installation Steps
- Map the layout. Sketch benches, vents and fans. Mark nozzle positions and where the controller and pump will sit, away from spray.
- Connect the supply. Shut off the water, install a backflow preventer, then a filter and pressure regulator if your kit calls for one.
- Run the main line. Mount tubing on clips along the framing at the planned height. Keep bends gentle.
- Install nozzles. Cut in tees at each spacing mark, add nozzles and point them away from walls and electrical gear.
- Add the drain and end cap. Put a drain valve at the lowest point.
- Mount controls. Place the timer or controller in a dry enclosure. Put sensors at plant height, shaded, and out of direct spray.
- Flush and test. Run water with nozzles removed to flush debris, reinstall, then test for leaks and even coverage.
- Tune the schedule. Start with short pulses and adjust over a week while watching leaf dryness and humidity readings.
Electrical and Moisture Safety
Misting puts water, pumps and electrical controls in the same space. Plug pumps and controllers only into GFCI-protected, outdoor-rated outlets, and plug them directly into the wall rather than using extension cords or power strips. Before touching any wiring for a pump, solenoid or fan, turn off the breaker and confirm power is off with a non-contact voltage tester. Never test a live circuit. Low-voltage (24V) solenoids and controllers are simpler to handle, but the line-voltage supply that powers their transformer still demands respect. Any new circuit or outdoor outlet in a greenhouse should be added by a licensed electrician, and all enclosures should be rated for wet locations.
Moisture has its own risks. Wet foliage and wet framing feed fungal disease and mold. Fix leaks promptly, keep wood framing sealed, and make sure ventilation clears humid air. If mold growth appears on structural surfaces or covers more than about 10 square feet, bring in a remediation pro rather than scrubbing it yourself.
Troubleshooting
Nozzles clogging or spitting
Hard water scale and sediment are the usual culprits. Add or replace the filter, soak nozzles in a mild vinegar solution, and flush lines.
Leaves stay wet, disease showing up
Shorten pulses, lengthen off time, raise lines, stop misting before evening and increase airflow with circulation fans.
Little cooling effect
Humidity is probably too high or droplets too big. Improve exhaust, move lines to the intake side, or upgrade to a higher-pressure pump.
Dripping after shutoff
Install anti-drip nozzles or a drain valve at the low end.
General Cost Ranges
A low-pressure hobby kit typically costs tens of dollars up to around a couple hundred with a timer. Mid-pressure pump systems commonly run a few hundred dollars. High-pressure fog systems with stainless nozzles, filtration and controllers usually start near the high hundreds and can reach several thousand for larger houses. Water use is small in low-pressure cycles but adds up in hot climates when misting runs all afternoon.
When to Call a Pro
Hire help if you need a new circuit or outdoor outlet, a high-pressure system over a few hundred square feet, integration with fans and vents on a single environmental controller, or a hookup to a well or pressure tank. A greenhouse climate installer can size pumps to nozzle count and balance cooling against disease risk.
Frequently Asked Questions
How much can a misting system cool a greenhouse?
Low-pressure systems may lower temperature a few degrees. High-pressure fog in dry climates can drop it 10 to 20°F when paired with good ventilation.
How often should greenhouse misters run?
Short pulses work best, often 5 to 15 seconds every few to 15 minutes during heat, controlled by a timer or humidistat. Stop misting before evening so leaves dry.
Is a plant misting system good for cuttings?
Yes. Mist keeps humidity high so cuttings do not dry out before rooting. Use short frequent cycles and well-draining media to avoid rot.
Can misting cause mold in a greenhouse?
It can if foliage and surfaces stay wet for long periods. Limit run time, improve air circulation and ventilation, and fix drips.
Do I need filtered water for misting?
At least a sediment filter for low-pressure systems. High-pressure fog systems need finer filtration, and hard water may call for softening to prevent nozzle scale.


