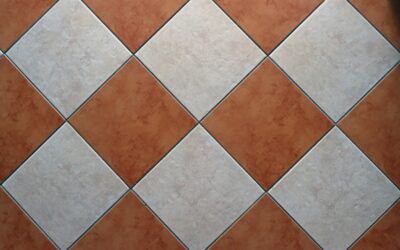
Cracked, crumbling, or stained grout makes an otherwise good tile floor look tired, and you cannot just smear new grout over the old. You have to remove it first, and that is exactly what a grout scraper is built to do. This humble hand tool, and its powered cousins, lets you clear out failed grout from the joints so fresh grout can bond properly. Knowing which type to use and how to handle it is the difference between a clean repair and a floor full of chipped tile edges. Here is everything a homeowner needs to know.
Part of our Tile & Grout guide — explore the full guide →
- Why You Need to Remove Old Grout
- Manual Grout Scrapers
- Powered Grout Removal Tools
- How to Remove Grout Without Damaging Tile
- Choosing the Right Tool for the Job
- Tips for a Clean Regrout
- Sanded vs Epoxy Grout: Know What You Are Removing
- Removing Grout Haze and Surface Buildup
- Caring for Your Grout Scraper
Why You Need to Remove Old Grout
New grout will not stick to a shallow, dirty joint. For a lasting repair, you typically need to remove the old grout to a depth of at least half the tile’s thickness, or roughly 1/8 inch at minimum, so the new grout has enough material to grip. Skipping this step is why so many DIY regrout jobs crack and pop out within months.
Removal also addresses the real problems behind ugly grout, like mold growing deep in the joint, hairline cracks that telegraph movement, or staining that no cleaner can reach. Clearing the joint and starting fresh fixes the cause, not just the appearance.
Manual Grout Scrapers
The simplest tools are handheld and inexpensive, usually $5 to $20, and they give you total control. They shine on small repairs and delicate tile where a power tool risks damage. Common manual options include:
- Carbide-tipped grout saw: A handle with a hardened blade that you drag along the joint to grind out grout. The most common manual choice.
- Triangular carbide scraper: A pointed tool that digs into corners and tight spaces.
- Reversible-blade grout rake: Offers two cutting edges and replaceable blades for longer life.
Manual scrapers take effort and time, so they suit a few cracked joints or a single shower wall rather than an entire floor. The upside is precision; it is very hard to damage a tile when you control every stroke by hand.
Powered Grout Removal Tools
For a whole floor or a full bathroom regrout, hand scraping becomes exhausting. Power tools dramatically speed the work. An oscillating multi-tool fitted with a carbide grout blade vibrates side to side, grinding grout quickly while giving you reasonable control. It is the most popular powered option for homeowners because it is fast yet forgiving.
A rotary tool with a grout-removal attachment cuts even faster using a high-speed bit and a guide that keeps the bit centered in the joint. It is efficient but less forgiving; one slip can chip a tile edge. For large projects, the time savings are worth the learning curve, but practice on an inconspicuous area first.
How to Remove Grout Without Damaging Tile
Protecting the tile matters as much as clearing the joint. Follow these steps for a clean result:
- Put on safety glasses and a dust mask; grout removal throws fine, sharp particles.
- Work the tool along the center of the joint, keeping pressure even and the blade off the tile edges.
- Take multiple shallow passes rather than trying to clear the full depth in one stroke.
- Clear the joint to at least half the tile thickness so the new grout has room to bond.
- Vacuum the dust out of the joints and wipe the area clean before applying new grout.
Patience is your best protection. Rushing is how chips happen, and a chipped tile edge is far harder to fix than a slow regrout.
Choosing the Right Tool for the Job
Scale decides the tool. A handful of cracked joints or a small backsplash repair calls for a manual carbide saw; it is cheap, controllable, and quick enough at that size. A full shower or a small floor justifies an oscillating multi-tool, which most DIYers already own or can buy affordably and reuse for dozens of other tasks.
A large floor or whole-house regrout is where a rotary tool with a grout attachment earns its place, provided you are comfortable with power tools. Whatever you choose, make sure the blade or bit is carbide or diamond rated for grout; a worn or wrong blade does more harm than good.
Tips for a Clean Regrout
Removal is only half the project. Once the joints are clear, vacuum thoroughly so no dust contaminates the new grout bond. Choose the correct grout type for your joint width, sanded grout for wider joints and unsanded for narrow ones, and match the color carefully if you are only repairing a section.
In wet areas like showers, seal the new grout once it has cured to resist moisture and mold, the very problems that ruined the old grout. A little prevention at the end saves you from doing the whole job again in a couple of years.
Sanded vs Epoxy Grout: Know What You Are Removing
The grout in your joints affects how hard removal will be. Standard cement-based grout, whether sanded or unsanded, is the most common and the easiest to scrape out with a carbide blade. It crumbles and grinds away with reasonable effort, which is why most homeowner regrout projects go smoothly.
Epoxy grout is a different animal. It is far harder, more chemical-resistant, and considerably tougher to remove, often dulling carbide blades quickly and resisting manual scraping almost entirely. If you discover your old grout is epoxy, a powered oscillating or rotary tool becomes nearly mandatory, and you should budget extra time and several blades. Knowing which type you have before you start sets realistic expectations for the job.
Removing Grout Haze and Surface Buildup
Not every grout problem requires digging out the joints. Sometimes the issue is grout haze, a thin cloudy film left on the tile surface after installation, or surface buildup that just needs scraping rather than full removal. For these, a plastic or wooden scraper paired with a grout haze remover lifts the residue without scratching the tile.
Be careful not to reach for a metal scraper on a glazed tile surface, since it can leave fine scratches that catch the light. Match the aggressiveness of the tool to the problem: a hard metal grout saw for removing failed joints, and a softer scraper or pad for cleaning the tile face. Using the wrong one in the wrong place is how surface cleaning turns into surface damage.
Caring for Your Grout Scraper
Carbide blades dull with use, especially on hard epoxy grout. Keep spare blades on hand for any sizable job, since a dull blade forces you to push harder and that is when tiles chip. Wipe tools clean after use and store them dry to prevent rust on the metal parts.
A grout scraper is a small, inexpensive tool that unlocks a major repair most homeowners assume requires a contractor. Match the type to the size of your project, work slowly to protect your tile, and you can clear out failed grout and restore a floor or wall to like-new condition for the cost of materials and an afternoon of work.