The tile gets all the attention, but anyone who has laid a terracotta floor knows the grout is what makes or breaks the finished look. Terracotta grout choices determine whether your saltillo floor reads as a warm, cohesive Mediterranean surface or a busy grid of clashing lines. Get the color and the sealing right and the grout practically disappears into the clay. Get it wrong and you fight grout haze, staining, and mismatched joints for years. I have grouted plenty of clay tile, and the difference between a good result and a frustrating one comes down to a handful of decisions made before you open the bucket.
Part of our Tile & Grout guide — explore the full guide →
Understanding Terracotta and Its Quirks
Terracotta, saltillo, and other clay tiles are unglazed, porous, and dimensionally irregular by nature. That is the charm, but it also shapes how you grout them. Because the tiles are handmade or extruded from natural clay, they rarely sit in perfectly straight lines, so grout joints are typically wide, usually 3/8 inch to 5/8 inch, sometimes more with rustic saltillo.
Those wide, irregular joints call for a sanded grout, which resists cracking and shrinkage across the gap. Unsanded grout is for narrow joints under 1/8 inch and will crack and slump in a wide terracotta joint. The porosity of the tile also matters: raw clay will suck moisture and pigment out of grout and can stain permanently if you skip the pre-sealing step.
Choosing the Right Grout Color
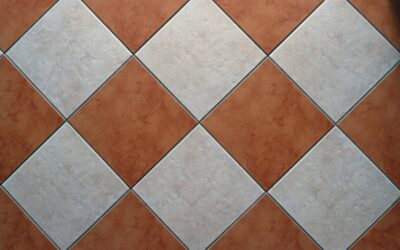
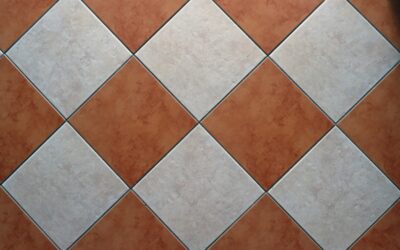
Color is where most terracotta floors are won or lost. The goal in nearly every case is a grout that blends with the clay rather than framing each tile. Bright white grout against orange terracotta creates a harsh checkerboard that fights the earthy, organic vibe most people want from clay tile.
- Warm beige and tan: The safest, most popular choice. Blends softly and reads natural against classic orange-red saltillo.
- Antique brown and earth tones: Slightly deeper than the tile, they hide dirt in high-traffic floors and give an aged, old-world look.
- Terracotta or clay-matched grout: A near-perfect tile match makes the floor read as a single continuous surface.
- Gray: A cooler, more contemporary contrast; use it deliberately when you want the grid to show for a modern take.
My rule of thumb: pick a grout one shade lighter or darker than the tile, never a stark contrast, unless you are specifically going for a graphic look. Always test the actual grout color against a spare tile after it cures, because wet grout looks dramatically different from cured grout.
Sanded, Epoxy, or Polymer Grout
For most terracotta floors, a quality polymer-modified sanded grout is the standard and works beautifully. It flexes with the floor, fills wide joints, and comes in a full range of earth tones. Reseal it periodically and it holds up for decades.
Epoxy grout is the premium option, and it earns its keep in kitchens, entryways, and anywhere spills and stains are constant. It is nonporous, never needs sealing, and shrugs off wine, oil, and grease. The tradeoffs are a higher price, roughly $80 to $150 per unit versus $20 to $40 for cement grout, plus a shorter working time and a stickier cleanup that demands you move fast. For a busy household floor that has to last, epoxy is often worth the extra effort.
The Critical Pre-Sealing Step
This is the step DIYers skip and then regret. Raw terracotta is a sponge. If you grout directly over unsealed clay, the tile face grabs grout pigment and moisture, leaving a permanent haze and stained borders around every tile that no amount of scrubbing removes.
Before grouting, apply at least one coat of a penetrating sealer to the tile faces and let it dry. This creates a barrier so grout wipes off cleanly instead of soaking in. Many pros apply a grout release or a coat of boiled linseed oil to saltillo before grouting for the same reason. Do not seal the joints themselves at this stage; you want the grout to bond in the gap. Seal the whole floor again after grouting cures.
Grouting and Avoiding Haze
Work in small sections so the grout does not set up before you clean it. Pack the joints fully with a rubber float held at a 45-degree angle, then strike off the excess diagonally so you do not drag grout out of the joints. Wait until the grout firms up, usually 15 to 30 minutes, before your first wipe with a damp, well-wrung sponge.
Rinse the sponge constantly and change the water often. Muddy water smears haze right back onto the tile. After the surface dries, a light cloudy film called grout haze is normal; buff it off with a dry microfiber cloth. If it is stubborn, a diluted grout haze remover clears it, but never use acidic cleaners on unsealed clay. Because you pre-sealed the tile, most haze wipes away easily.
Sealing the Finished Floor
Once the grout has cured for the manufacturer’s recommended time, usually 48 to 72 hours, seal the entire floor. You have two looks to choose from. A penetrating sealer keeps the matte, natural terracotta appearance and offers good stain protection while letting the clay breathe. A topical or enhancing sealer deepens the color and adds a low sheen along with stronger surface protection, popular for the classic glossy saltillo look.
Plan to reseal a terracotta floor every one to three years in living areas and more often in kitchens. Do a water-drop test to check: if water beads, you are protected; if it soaks in and darkens the clay, it is time to reseal. Kept sealed and cleaned with a pH-neutral cleaner, terracotta grout and tile together age into one of the warmest, most enduring floors you can put in a home.
Fixing and Refreshing Old Terracotta Grout
Plenty of homeowners inherit a terracotta floor with grout that has seen better days, and the good news is you rarely need to rip it out. If the grout is intact but dingy and discolored, a deep clean often restores it. Vacuum first, then scrub the joints with a soft brush and a pH-neutral or specialized stone-safe cleaner; steam cleaning works well on old clay grout too. Avoid acidic cleaners and harsh bleach, which erode cement grout and can etch or discolor the surrounding clay.
Where grout has cracked or crumbled out of the joints, remove the loose material with a grout saw or an oscillating tool, vacuum the debris, and repack those sections with fresh sanded grout color-matched to the original. Blending a small area is easier than most people expect once the tile faces are sealed. If the color is simply tired and uneven, a grout colorant or grout refresh product can recoat the joints in a uniform tone and add a layer of stain protection at the same time, which is far cheaper than regrouting the whole floor. Once the repairs cure, reseal the entire surface so the new and old grout weather together. Handled this way, an aging terracotta floor can look decades younger for the cost of a weekend and a few dollars in materials.
Prefer to explore on your own?
See how new flooring looks in your actual room in seconds — free, no signup.
Try the free Floor Studio →