Grout is the weakest link in any tile installation, and most people learn that the hard way when the once-white lines between their kitchen tiles turn a permanent shade of gray. Grout stain and sealer are the two products that fix and prevent that problem, but they are constantly confused for one another. A grout stain and sealer combination is not a single item; a stain restores or changes the grout’s color, while a sealer protects it from moisture and dirt. Knowing which one you need, and applying them in the right order, is what separates a lasting result from a job you redo next year.
Part of our Tile & Grout guide — explore the full guide →
This guide clears up the confusion, walks through the sealer types, and gives you a step-by-step application plan with real cure times.
Stain Versus Sealer: Two Different Jobs
Start with the core distinction, because buying the wrong product wastes a weekend.
A grout stain, also sold as grout colorant or grout paint, is a pigmented coating that changes or refreshes the color of existing grout. It bonds to the surface, hides stains you could never scrub out, and can transform dingy gray lines back to crisp white or a whole new shade. Crucially, most quality grout colorants also seal the grout as they cure, forming a protective film.
A grout sealer is a clear liquid that does not change color at all. Its only job is to block water, oil, and dirt from soaking into porous grout. Sealer keeps clean grout clean; it does nothing to fix grout that is already discolored.
In short: use a stain to fix ugly grout, use a sealer to protect grout that already looks right, and recognize that many colorants do both.


Types of Grout Sealer
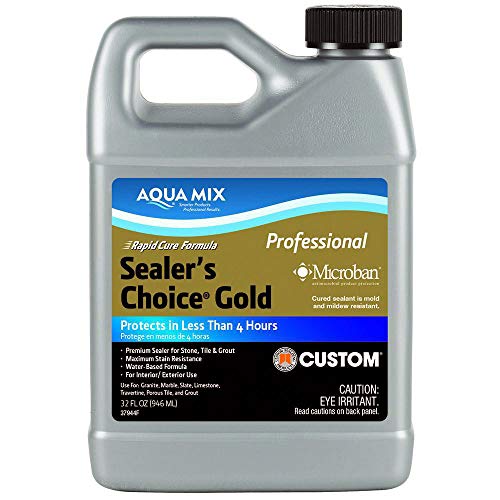
Not all sealers work the same way, and choosing the wrong type for the location leads to early failure. Two families dominate the shelf.
Penetrating Sealers
Penetrating sealers soak into the grout’s pores and repel moisture from within, leaving no visible film on top. They are the right choice for showers, floors, and any wet or high-traffic area because they let the grout breathe and will not peel. Silicone, siloxane, and fluoropolymer formulas fall in this group, typically costing $15 to $30 per bottle that covers 200 to 400 linear feet of grout line.
Topical (Membrane-Forming) Sealers
Topical sealers sit on the surface as a protective coat and often add a slight sheen. They resist stains well on countertops and backsplashes but can peel or wear in wet, high-traffic zones and may make floor tile slippery. Reserve them for low-moisture vertical surfaces where their glossy finish is an asset.
For most homeowners sealing a bathroom or kitchen floor, a penetrating sealer is the durable, low-maintenance answer.
When to Stain and When to Seal
Match the product to your grout’s actual condition. If the grout is clean and the right color but you want to prevent future staining, a penetrating sealer alone is all you need. If the grout is permanently discolored, cracked in color, or you simply want a different look, apply a grout colorant, which recolors and seals in one step.
New grout always needs sealing. Fresh cement-based grout must cure fully, then get a coat of sealer to protect it from day one. Epoxy grout is the exception; it is naturally non-porous and generally does not require a sealer at all.
How to Apply Grout Stain
Colorant is a detail job, but the payoff is dramatic. Set aside a Saturday and work methodically.
- Deep clean first. Scrub the grout lines with an alkaline cleaner and let them dry completely. Colorant will not bond to greasy or dusty grout.
- Test a hidden spot. Confirm the grout is unsealed; a drop of water should soak in. If it beads, strip the old sealer first, or the stain will not adhere.
- Apply with a small brush. Work the colorant into each grout line with a toothbrush-sized applicator, one section at a time.
- Wipe the tile. Remove excess from the tile face with a damp sponge before it dries, cleaning as you go.
- Let it cure. Most colorants need 24 hours before light use and up to 72 hours before heavy water exposure.
How to Apply Grout Sealer
Sealing clean grout is faster and forgiving. The technique varies slightly by sealer type.
- Clean and fully dry the grout; any trapped moisture ruins the seal.
- Apply the sealer along the grout lines with an applicator bottle, brush, or roller. Keep penetrating sealer off the tile where possible, or wipe it promptly.
- Let it soak in for the time on the label, usually 5 to 15 minutes.
- Apply a second coat for extra protection in showers and floors.
- Wipe away all excess before it hazes, then let it cure.
Cure Time and Reseal Frequency
Patience protects your work. Most penetrating sealers are dry to the touch in an hour but need 24 to 48 hours to cure fully before you expose them to water; keep the shower off for two days after sealing. Grout colorant typically wants 24 hours before light use and 72 hours before heavy wet exposure.
Sealer is not permanent. In showers and busy kitchen floors, reseal every one to two years. In low-traffic, dry areas, every three to five years is enough. A quick test tells you when: drip water on the grout, and if it soaks in rather than beading, it is time to reseal. Colorant lasts far longer, often a decade or more, because it also functions as a durable sealer.
Common Mistakes to Avoid
A few predictable errors ruin otherwise good grout work, and each is easy to sidestep once you know it. The most frequent is sealing dirty grout; the sealer locks the stains in permanently, so always deep clean and dry first. Another is applying colorant over grout that still holds an old sealer, which stops the pigment from bonding and leaves it flaking within weeks.
Rushing the cure time causes just as much grief. Turning the shower back on a few hours after sealing washes the product out before it sets, wasting the entire job. Leaving excess sealer to dry on the tile face is another common slip; it hazes into a stubborn cloudy film that takes solvent to remove. Finally, do not seal epoxy grout expecting a benefit, since it is already non-porous, and do not ignore cracked or missing grout, because sealer cannot fix a structural gap that needs regrouting first.
Frequently Asked Questions
Do I need both grout stain and sealer?
Not always. If your grout is clean and the right color, a sealer alone protects it. If the grout is discolored, use a colorant, which recolors and seals in one product, so you usually do not need a separate sealer on top of it.
Should I seal grout before or after staining?
Stain first, then seal only if your colorant does not already seal. Grout must be unsealed for colorant to bond, so never seal before staining. Most modern grout colorants include a sealing agent, so a second clear coat is optional.
How long does grout sealer last?
Penetrating sealer lasts one to two years in wet, high-traffic areas and three to five years in dry, low-use spots. Test with a water drop: beading means the seal holds, soaking means reseal. Grout colorant lasts a decade or more.
Can I stain grout a different color?
Yes. Grout colorant comes in dozens of shades and can lighten or darken existing grout, even taking gray lines to bright white. It only works on cement-based grout, though; epoxy grout is too smooth for colorant to grip.
Handled correctly, grout stain and sealer keep tile looking new for years. Fix the color with a colorant, guard clean lines with a penetrating sealer, respect the cure times, and reseal on schedule; that simple routine is the difference between grout you are proud of and grout you apologize for.