Grout is the weak link in almost every tile installation. It’s porous, it sits below the tile surface where dirt collects, and once it stains, scrubbing rarely brings it fully back. Knowing how to seal grout on tile floor is the single cheapest thing you can do to protect a floor you may have spent thousands installing. A $20 bottle of sealer and an afternoon of work can add years to the clean life of your grout lines.
Part of our Tile & Grout guide — explore the full guide →
The job isn’t hard, but timing and product choice matter more than most homeowners realize. Seal too soon and you trap moisture. Use the wrong sealer and you either get no protection or a hazy film you can’t remove. Here’s how to get it right the first time.
Why Sealing Grout Actually Matters
Standard cement-based grout absorbs liquid like a sponge. Coffee, red wine, grease from a kitchen, and muddy shoe traffic all soak into unsealed grout and leave permanent shadows. Sealer fills or coats the pore structure so spills bead up and sit on the surface long enough to wipe away.
There’s one big exception. Epoxy grout and most pre-mixed urethane grouts are already non-porous and do not need sealing. If your installer used one of those, you can skip this entirely. If you have traditional sanded or unsanded cement grout, which covers the vast majority of floors, sealing is a maintenance step you’ll want to repeat over the life of the floor.


Penetrating Sealer vs. Membrane Sealer
There are two families of grout sealer, and choosing the wrong one is the most common mistake.
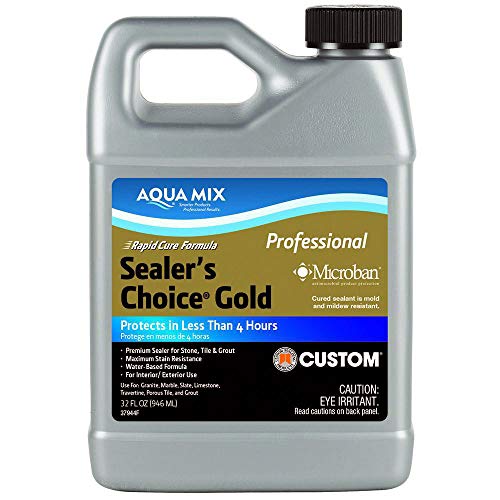
- Penetrating (impregnating) sealers soak into the grout and line the pores with a water- or silicone-based repellent. They leave no surface film, don’t change the grout color, and let the grout breathe. For floor grout, this is almost always the right choice.
- Membrane (topical) sealers form a coating on top of the grout, a bit like a clear paint. They can enhance color and block stains well, but they can peel, trap moisture underneath, and are not recommended for floors in wet areas or over grout that gets standing water.
For a bathroom, kitchen, or entryway floor, buy a quality penetrating sealer labeled for cement grout. Membrane products belong on decorative walls or backsplashes, not high-traffic tile floors.
Wait for the Grout to Cure First
If you just laid new tile, do not rush the sealer. Fresh cement grout needs to cure before it will accept a penetrating sealer, and sealing too early traps water that should be evaporating out. The standard wait is 48 to 72 hours for the grout to firm up, but full cure takes longer.
Most sealer manufacturers ask you to wait a full 7 days, and some say up to 10 days in humid conditions, before sealing new grout. When in doubt, wait the longer window. On an existing floor that’s already cured, timing isn’t an issue as long as the grout is clean and completely dry.
Step-by-Step: How to Seal Grout on Tile Floor
Set aside two to three hours for an average bathroom or a small kitchen, plus drying time. Here’s the sequence that gives professional results.
1. Deep Clean the Grout Lines
Sealer locks in whatever is already there, so any dirt you seal over is dirt you keep. Scrub the grout with a stiff nylon brush and a pH-neutral tile cleaner, or a mix of warm water and a little dish soap. For stained grout, use an oxygen-bleach powder paste and let it dwell 10 minutes before scrubbing. Rinse thoroughly.
2. Let It Dry Completely
Give the floor at least 24 hours to dry after cleaning. Penetrating sealer needs dry pores to soak in; damp grout will reject it and you’ll get patchy protection. Run a fan or open a window to speed things along.
3. Apply the Sealer
Work in small sections of about 10 square feet. Use the applicator on the bottle, a small foam brush, or a dedicated grout sealer roller with a wheel that rides only the grout line. Lay the sealer directly into the grout and keep it off the tile face as much as you can. On porous tile like natural stone, seal the whole surface instead.
4. Wipe Off the Excess
This step separates good jobs from hazy ones. Let the sealer sit for the time on the label, usually 5 to 15 minutes, then wipe any sealer that pooled on the tile with a clean, dry microfiber cloth before it dries. Dried penetrating sealer leaves a cloudy residue that’s a pain to remove.
5. Apply a Second Coat
Most grout benefits from two coats. Wait the recommended recoat window, often 30 minutes to an hour, then repeat the application and wipe-down. Two thin coats outperform one heavy coat every time.
6. Cure and Test
Keep the floor dry and off-limits for the cure period on the label, typically 24 to 48 hours before water exposure. Once cured, test it: drip a few drops of water on a grout line. If the water beads up, the seal worked. If it soaks in and darkens the grout, that spot needs another coat.
How Often to Reseal
Sealer wears off with foot traffic and cleaning. As a rule, reseal floor grout every one to two years in busy areas like kitchens and entryways, and every two to three years in low-traffic rooms. The water-drop test is your reminder. When water stops beading, it’s time to seal again. Bathroom shower floors, which see constant moisture, sit at the shorter end of that range.
Choosing the Right Applicator
The tool you use shapes how clean the job goes. For narrow grout lines on a tile floor, a roller-ball applicator bottle is the fastest way to lay sealer precisely into the joint without flooding the tile. Foam brushes and small artist brushes give you more control in tight corners and around fixtures, which is handy in a bathroom. Some people prefer a dedicated grout sealing pen for touch-ups and small areas.
Whatever you reach for, keep a stack of dry microfiber cloths within arm’s reach. You’ll be wiping excess constantly, and a damp or dirty cloth just smears sealer around instead of lifting it. If your tile is polished porcelain or glazed ceramic, the sealer wipes off the face easily. If it’s textured stone or unglazed tile, work more carefully, because those surfaces can hold onto sealer and haze.
Ventilation and Safety
Most grout sealers, especially solvent-based ones, give off fumes you don’t want to breathe in a closed room. Open windows, run a fan, and wear a respirator or at least a mask rated for vapors when you work. Gloves protect your hands from the sealer, and knee pads make a floor-level job far more bearable over a couple of hours. Water-based sealers are lower-odor and a good pick for interior rooms with limited airflow, though they may need an extra coat to match the water repellency of a solvent formula.
Common Mistakes to Avoid
A few missteps undo all your work. Don’t seal dirty grout, because you’ll lock stains in permanently. Don’t skip the wipe-down, or you’ll be buffing haze off tile for an hour. Don’t use a topical membrane sealer on a wet floor, since trapped moisture leads to peeling and mildew. And don’t walk on the floor before it cures, or foot traffic will pull the fresh sealer right out of the lines.
Once you understand how to seal grout on tile floor and build it into your maintenance routine, the payoff is real: grout lines that wipe clean instead of staining, and a tile floor that keeps looking new for years instead of graying out within a season.
Prefer to explore on your own?
See how new flooring looks in your actual room in seconds — free, no signup.
Try the free Floor Studio →