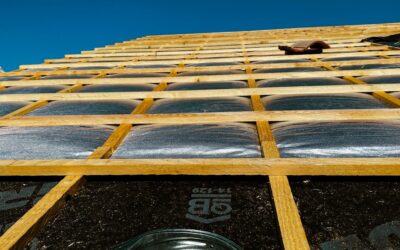
Most manufactured-home freeze-ups happen in the same spot: the water riser, the short vertical pipe that comes up out of the ground and into the underside of the home. Properly installed heat tape for mobile homes keeps that riser and the first few feet of supply line above freezing, while sealed skirting and a closed-up belly protect everything else. Get those three pieces right and most homes ride out a hard cold snap without a single burst fitting.
The short answer: use a UL-listed, self-regulating heat cable sized to the pipe length, wrap or run it along the riser from ground level up into the belly, cover it with closed-cell foam insulation, and plug it into a GFCI-protected outlet. Then walk the skirting, close the vents for winter, and patch any tears in the belly wrap. Those steps are the core of how to keep mobile home pipes from freezing.
- How Heat Tape for Mobile Homes Protects Your Plumbing
- Tools and Materials
- Step-by-Step: Installing Heat Tape on the Riser and Belly Lines
- Skirting, Vents, and the Belly: The Rest of Mobile Home Winterization
- Fire Safety: Classic Heat-Tape Mistakes
- Troubleshooting Frozen Lines
- Costs to Expect
- When to Call a Licensed Professional
- Frequently Asked Questions
Heat tape is also one of the leading causes of manufactured-home fires when it is old, overlapped, or covered with the wrong insulation. So this guide spends as much time on doing it safely as on doing it at all.
How Heat Tape for Mobile Homes Protects Your Plumbing
A manufactured home’s plumbing lives in a different environment than a site-built home’s. Supply lines run through the belly, the insulated cavity under the floor that is closed off with a fabric or plastic bottom board (often called belly wrap or underbelly). The water service enters through a riser, usually inside a small riser box or insulated sleeve, and that riser sits exposed to wind in the crawl space between the ground and the belly.
That riser is the weak point. Wind blowing through gaps in the skirting can drop the temperature around it well below the outside air’s reading. Heat tape for pipes under a mobile home adds a small, steady heat source right on the pipe, and insulation keeps that heat from bleeding away.
Self-regulating vs. constant-wattage cable
- Self-regulating cable adjusts its output along its length: it warms more where the pipe is colder and throttles back where it is warmer. It can be cut to length on some models and is far more tolerant of minor overlaps. This is the type most pros recommend for manufactured homes.
- Constant-wattage tape puts out the same heat everywhere and relies on a thermostat. It must never cross or overlap itself, and it is sold in fixed lengths that cannot be cut. Older mobile-home fires are often traced to this type being overlapped or wrapped in the wrong insulation.
Tools and Materials
- UL-listed self-regulating heat cable kit, sized to your riser plus the exposed supply run (a self-regulating heat tape kit with a built-in plug and indicator light is the easiest option)
- Closed-cell foam pipe insulation sized to your pipe diameter, or fiberglass pipe wrap only if the heat tape maker allows it
- Fiberglass or electrical tape rated for the heat cable, per the manufacturer’s instructions
- Non-contact voltage tester
- Flashlight or headlamp, knee pads, gloves, safety glasses
- Belly wrap repair tape for tears in the bottom board
- Foam board or insulated skirting panels and vent covers, if needed
Step-by-Step: Installing Heat Tape on the Riser and Belly Lines
- Inspect the outlet first. Heat tape must plug into a GFCI-protected outlet. Many older homes have an outlet near the riser that is not GFCI protected or has a worn weatherproof cover. If there is no suitable outlet within reach of the cable’s cord, do not run an extension cord under the home. A new or replacement outlet is a job for a licensed electrician.
- Remove any old tape. Unplug the existing tape, then turn off the breaker for that outlet and confirm power is off with a non-contact voltage tester before you handle old cords or connections. Peel back old insulation and look for scorched spots, brittle jackets, melted foam, or tape that was wrapped over itself. Replace any tape more than a few years old or showing damage.
- Check the pipe. Heat cable is designed for specific pipe types. Most kits are listed for metal and plastic pipe, but some require aluminum foil tape under the cable on plastic pipe to spread heat. Follow the kit instructions exactly.
- Measure the run. Measure from the lowest exposed point of the riser, usually just above ground, up through the riser box and along the supply line into the belly to the point where it is well inside the insulated cavity. Add length for valves and fittings, which need extra coverage.
- Attach the cable. Run the cable straight along the bottom of horizontal pipe (the 4 or 8 o’clock position) or spiral it on the riser at the spacing the maker specifies. Secure it every 12 inches or so with the approved tape. Keep the thermostat (on constant-wattage types) against the pipe, not in open air.
- Insulate over it. Slide closed-cell foam insulation over the pipe and cable, sealing the seams. Use only the insulation types the heat tape instructions list. Never cover the cable with foil-faced insulation unless the instructions explicitly allow it.
- Plug in and check. Plug the cable into the GFCI outlet. Many kits have an indicator light. Press the GFCI test button periodically during winter to make sure the protection works.
- Close the riser box. Refit the insulated cover or wrap around the riser so wind cannot reach the pipe directly.
Skirting, Vents, and the Belly: The Rest of Mobile Home Winterization
Heat tape handles the exposed riser. Everything else depends on keeping cold wind out of the crawl space and the belly intact. A thorough mobile home winterization checklist covers:
- Skirting gaps. Walk the perimeter and fix missing panels, cracks, and gaps at the ground. Soil erosion often opens a gap at the bottom edge.
- Skirting vents. Vents are needed in summer to release moisture, but closing or covering them during hard freezes cuts wind flow. Reopen them in spring to prevent moisture and mold problems.
- Belly wrap tears. Rodents, past plumbing repairs, and storms tear the bottom board. Any opening lets cold air hit the supply lines. Patch tears with belly wrap tape and replace missing insulation first.
- Access doors. Make sure the crawl-space access panel closes fully.
- Interior habits. During extreme cold, open cabinet doors on exterior walls and let a faucet drip slowly. Keep the thermostat set to at least 55°F even when you are away.
These steps together are how to prevent pipes from freezing in a mobile home. Heat tape alone, with drafty skirting and a torn belly, can still lose the fight.
Fire Safety: Classic Heat-Tape Mistakes
Fire investigators see the same heat-tape errors in manufactured homes year after year. Avoid every one of them:
- Overlapping constant-wattage tape. Crossing the tape over itself doubles the heat in one spot and can ignite insulation or the belly wrap.
- Old, cracked tape. Heat cable jackets degrade over years of sun, rodents, and flexing. Replace tape showing cracks, discoloration, or brittle spots.
- Wrong insulation. Some older tapes were never rated for foam or foil covering. Using an insulation the listing does not allow is a fire risk.
- Non-listed products. Use only UL-listed (or equivalent listed) cable, and never make homemade heat cable from other wire.
- Extension cords under the home. Extension cords under a mobile home get damp, chewed, and pinched. Plug directly into a GFCI outlet.
- Tape left on year-round with damage. Inspect every fall. Unplug self-regulating cable in warm months if the kit recommends it, and never leave damaged tape energized.
- Contact with combustibles. Keep cable clear of wood framing, loose insulation, and debris stored under the home.
A working smoke alarm in each bedroom, outside sleeping areas, and on the main living level is part of this plan too. Test them when you check the heat tape each fall.
Troubleshooting Frozen Lines
No water at any faucet
The riser is the most likely frozen point. Check that the heat tape is plugged in and the GFCI has not tripped. If it tripped, reset it once. If it trips again, the cable may be damaged, so unplug it and replace it rather than resetting repeatedly.
Water at some faucets but not others
A branch line in the belly is frozen, often under a bathroom or kitchen on an exterior wall or near a belly tear. Warm the room, open cabinet doors, and inspect the belly from below for a torn or missing section.
Safe thawing
Use a hair dryer on low or a space heater placed a safe distance away and never left unattended. Plug any space heater directly into a wall outlet, keep 3 feet of clearance from combustibles, and choose a model with tip-over and overheat shut-off. Never use a torch or open flame under a mobile home. Open the faucet on the frozen line so melting water can flow and relieve pressure.
Costs to Expect
- Self-regulating heat cable kit for a riser: roughly $30 to $120 depending on length
- Foam pipe insulation: a few dollars per 6-foot section
- Belly wrap patch tape and material: roughly $20 to $80
- Skirting repairs: from under $100 for a few panels to several hundred dollars for larger sections
- Professional riser and heat tape service: often a couple hundred dollars, more if the riser or supply line needs replacing
When to Call a Licensed Professional
Call a licensed electrician for any new or replacement outlet near the riser, for outlets that are not GFCI protected, and for GFCI trips you cannot trace to a damaged cable. Call a licensed plumber for a split riser, burst pipe in the belly, or damaged shutoff valve, since those repairs often mean opening the bottom board and working in tight quarters. Some parks and local jurisdictions also have rules about skirting and utility connections, so check with your park manager or local building department before major changes.
Frequently Asked Questions
Where should heat tape go on a mobile home?
Focus on the water riser from just above the ground up into the belly, plus any supply line that is exposed or outside the insulated belly. Valves and fittings need extra coverage.
Can I leave heat tape plugged in all winter?
Self-regulating cable is designed to stay plugged in through the cold season and adjust its own output. Constant-wattage tape relies on its thermostat. Either way, inspect it every fall and unplug any tape that looks damaged.
How long does mobile home heat tape last?
Many makers suggest replacing heat cable every three to five years, or sooner if you see cracks, discoloration, or rodent damage. Old tape is a common fire source.
Should I close skirting vents in winter?
Closing or covering vents during hard freezes helps keep wind off the plumbing. Reopen them in spring so moisture can escape from the crawl space.
Is heat tape enough to keep mobile home pipes from freezing?
Not by itself. It protects the riser, but intact skirting, a sealed belly, a warm interior, and dripping faucets in extreme cold all work together to prevent frozen lines.