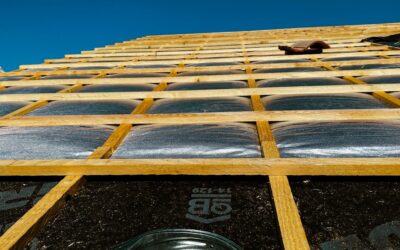
Most moisture problems in manufactured homes start underneath, not inside. A mobile home vapor barrier is a sheet of polyethylene laid over the soil under the home to keep ground moisture from evaporating up into the floor system. When it is missing or torn, damp air soaks the insulation in the belly, sags the bottom board, rusts the chassis and turns ductwork into a mold incubator.
The fix is usually simple: clear the crawl space, lay 6 mil polyethylene over the bare ground with overlapped seams, repair any holes in the underbelly, and make sure the skirting has proper ventilation. Federal manufactured housing installation standards call for a ground moisture barrier under homes with skirting unless the site is arid and the local authority waives it, so check your installation manual and local rules.
- How a Mobile Home Vapor Barrier Works
- Tools and Materials
- Step-by-Step Ground Cover Installation
- Repairing the Underbelly (Bottom Board)
- Skirting Vents and Airflow
- Keeping Ductwork Dry
- Mold and Moisture Safety
- Troubleshooting
- Seasonal Maintenance Checklist
- Cost Ranges
- When to Call a Pro
- Frequently Asked Questions
Manufactured homes differ from site-built crawl spaces in important ways. The floor is enclosed by a bottom board, the ducts run inside that belly, and the skirting is usually a thin perimeter panel rather than a foundation wall. Those details change how you approach moisture.
How a Mobile Home Vapor Barrier Works
Bare soil releases a surprising amount of water vapor, even when it looks dry on top. Under a skirted home, that vapor collects in the enclosed space and condenses on the coldest surfaces it can find: the bottom board, metal ducts, water lines and the steel frame.
Ground cover stops most of that vapor at the source. Skirting vents then flush out whatever humidity gets past it. The underbelly, also called the bottom board or rodent barrier, keeps the floor insulation dry and in place. All three parts need to work together. A perfect ground cover cannot save a home with a torn belly and crushed ducts, and good ventilation cannot keep up with a wet, uncovered dirt floor.
Some owners call the ground cover a mobile home moisture barrier. The terms mean the same thing in practice: an impermeable plastic layer over the soil.
Tools and Materials
- 6 mil polyethylene sheeting roll (black or clear; thicker reinforced sheeting holds up better where you crawl often)
- Utility knife and tape measure
- Seam tape rated for polyethylene, or overlap only if allowed
- Landscape staples or smooth stones to hold the sheeting
- Bottom board patch material and compatible tape or adhesive
- Foil-faced duct tape and mastic for duct repairs
- Rake, shovel and a contractor bag for debris
- Kneepads, gloves, safety glasses, headlamp and a dust mask or respirator
Step-by-Step Ground Cover Installation
- Inspect first. Remove a skirting panel and look underneath with a strong light. Note standing water, sagging belly sections, disconnected ducts, leaks, animal damage and any odor of sewage.
- Fix leaks and drainage. Repair plumbing drips before anything else. Grade soil away from the home and extend downspouts so roof water does not pour under the skirting.
- Clear debris. Remove sharp rocks, wood scraps, old insulation and trash that could puncture the plastic or feed mold.
- Roll out the sheeting. Work from the far side toward the access point. Cut around piers and anchors so the plastic lies flat on the soil.
- Overlap seams. Lap adjoining sheets at least 12 inches. Taping seams improves performance, especially in damp climates.
- Cover the full area. The barrier should cover the ground under the entire home. Running it a few inches up the inside of the skirting helps, but do not seal vents shut.
- Secure the edges. Pin with landscape staples or weigh down with smooth stones so crawling or wind will not shift it.
- Replace skirting panels and confirm vents are open and unblocked.
Repairing the Underbelly (Bottom Board)
The bottom board is a woven or fabric-like sheet stapled to the underside of the floor joists. It holds insulation in place and keeps rodents and moisture out. Over time, it tears from plumbing repairs, animals and water weight.
- Find wet insulation. Sagging pockets usually mean water is pooling inside. Cut a small slit to drain it, then find and fix the leak.
- Replace soaked insulation. Wet fiberglass loses most of its value and can grow mold. Pull it out and replace with dry insulation once the floor is dry.
- Patch holes. Cover tears with bottom board patch material, extending a few inches past the damage, and secure with compatible tape, adhesive or staples into the framing.
- Support large repairs. For big sections, add strapping across the joists before closing the belly.
Skirting Vents and Airflow
Skirting should have ventilation openings so humidity does not build up. Many installation manuals call for a minimum vent area based on floor square footage, with vents placed near each corner to encourage cross flow. Check the manual for your home, or local code, for the exact requirement.
- Keep vents clear of soil, mulch, snow and plants.
- Install screened vents to keep animals out.
- Never vent a clothes dryer under the home. Dryer exhaust must go to the outdoors past the skirting.
- Make sure the access panel closes securely so pets and pests stay out.
Keeping Ductwork Dry
In most manufactured homes the main supply duct runs inside the belly, with a flexible crossover duct connecting the halves of a multi-section home. When those ducts leak or sit in damp air, they collect condensation, especially during air conditioning season.
- Inspect the crossover duct. It should be off the ground, supported with straps and free of kinks or tears.
- Seal loose connections with mastic or foil tape rated for ducts.
- Replace crushed or waterlogged flex duct.
- Look for standing water inside duct runs; if you find it, a technician should clean and inspect the system.
Mold and Moisture Safety
Moisture comes first, mold second. Stop the water source before cleaning or covering anything. Wear gloves, eye protection and at least an N95 respirator when crawling under a damp home, because disturbed insulation and mold release particles you should not breathe.
Small areas of surface mold on hard materials can often be cleaned with detergent and water after the leak is fixed and the area dries. If mold covers more than about 10 square feet, or if you see it spreading on floor framing, hire a mold remediation professional. Never seal a ground cover over soaked soil or standing water; correct drainage first.
Troubleshooting
Floors feel soft or spongy. Water may have reached the subfloor. Check for leaks and wet insulation in the belly, and have soft areas inspected.
Musty smell inside. Look for missing ground cover, closed vents or a wet duct. Odors often travel through the supply registers.
Condensation on the plastic. Some is normal in humid weather. Heavy dripping suggests poor ventilation or water draining under the home.
Standing water on top of the barrier. Surface water is running under the skirting. Fix gutters, downspouts and grading.
Seasonal Maintenance Checklist
A ground cover is not a one-time job. Animals, utility work and freeze-thaw cycles can shift or tear it, and small problems grow fast in an enclosed space. Build a quick routine around the seasons:
- Spring: Check for standing water after snowmelt and heavy rain. Clear debris from skirting vents and confirm downspouts discharge well away from the home.
- Summer: Look for sweating ducts and damp insulation during peak air conditioning months.
- Fall: Insulate exposed water lines, check heat tape where your area requires it, and patch any belly tears before cold weather.
- Winter: Keep vents clear of drifting snow and watch for frozen pipe leaks after hard freezes.
Cost Ranges
Ground cover materials are inexpensive. A roll of 6 mil polyethylene large enough for a single-section home typically costs well under a couple hundred dollars, and doublewides need more. Bottom board repair kits and tape add a modest amount. Professional installation of ground cover and belly repair is often priced per job and can range from a few hundred dollars to over a thousand depending on access, damage and insulation replacement.
When to Call a Pro
Bring in a manufactured home service technician or licensed contractor for leveling issues, damaged piers or tie-downs, extensive bottom board replacement, or plumbing and HVAC repairs. Mold over 10 square feet calls for a remediation specialist. If the crawl space is too tight or wet to work in safely, let a pro handle it.
A well-installed mobile home vapor barrier is one of the least expensive ways to protect the floor, ducts and frame. Pair it with a sound belly and open skirting vents, and most moisture issues fade away.
Frequently Asked Questions
Is a vapor barrier required under a mobile home?
Federal installation standards generally require a ground moisture barrier under skirted homes unless the site is in an arid area and the local authority allows otherwise. Check your installation manual and local rules.
What thickness of plastic should I use under a mobile home?
Six mil polyethylene is the common minimum. Thicker or reinforced sheeting resists tearing better where you crawl often.
Should the ground cover go up the skirting?
Running it a few inches up the inside of the skirting helps keep edges in place, but never cover or block the vents.
Can I put a vapor barrier over wet ground?
Fix drainage and leaks first. Laying plastic over standing water or saturated soil traps moisture and can make conditions worse.
How often should I inspect under my mobile home?
Check at least once a year and after big storms. Look for torn plastic, sagging belly sections, loose ducts and leaks.