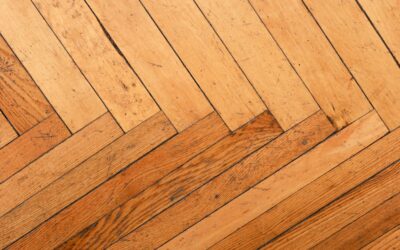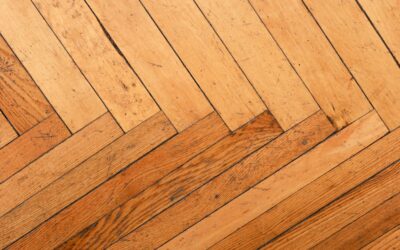
Walk into any high-end kitchen showroom right now and you will spot the same pattern: a zigzag of rectangular tiles laid at 45 or 90 degrees. Herringbone flooring tiles have been around since the Romans paved their roads, yet the look has never been trendier. Before you order your first case, there are a few realities about waste factors, grout lines, and subfloor prep that nobody mentions in the glossy catalog photos.
Part of our Tile & Grout guide — explore the full guide →
- What Makes a Herringbone Tile Layout Different
- Material Options Worth Considering
- Cost Breakdown: What You Will Actually Spend
- The Subfloor Prep Nobody Warns You About
- Design Ideas That Actually Work at Home
- Pros of Herringbone Flooring Tiles
- Cons You Should Weigh Carefully
- DIY or Hire a Pro?
- Where to Buy and What Brands to Trust
What Makes a Herringbone Tile Layout Different
Herringbone is not a product. It is a pattern. Any rectangular tile with a length-to-width ratio of 2:1 or greater can be installed in a herringbone layout, though 12×24 and 6×24 planks have become the most popular sizes. Unlike a standard offset or stacked layout, herringbone forces every piece to meet at a perpendicular angle, which doubles your cuts and demands a dead-flat subfloor.
Because each tile ends abuts the side of another tile, even a 1/16-inch difference in plank length telegraphs across the floor. Porcelain rectified tiles (square-cut edges, tight tolerances) are the gold standard here. Pressed ceramic with pillowed edges forgives alignment errors but creates wider grout joints.
Material Options Worth Considering
Porcelain leads the category because it shrugs off moisture, scratches, and heavy furniture. Wood-look porcelain planks at 6×36 or 8×40 inches capture the herringbone aesthetic without the maintenance of real hardwood. Natural stone, especially Carrara marble and travertine, still rules the luxury space, though you will pay $12 to $28 per square foot just for the material.
Ceramic holds the budget end. Expect $2.50 to $6 per square foot for decent 6×24 ceramic planks rated for residential traffic. Glazed ceramic works beautifully on walls and bathroom floors, but I steer clients toward porcelain anywhere a kitchen stool might drag or a dog might bolt.
Cost Breakdown: What You Will Actually Spend
Sticker shock is common once installers quote the labor. Herringbone pattern installation typically runs 30 to 50 percent higher than a standard straight layout. In most US markets, labor alone lands between $8 and $14 per square foot for tile set in herringbone. Add materials, and a 200-square-foot kitchen can climb to $4,500 to $7,000 installed.
- Porcelain plank tile (12×24 or 6×24): $4 to $10 per sq ft
- Marble or travertine herringbone mosaic sheets: $15 to $35 per sq ft
- Pre-assembled mesh-backed mini herringbone: $9 to $18 per sq ft
- Installation labor (herringbone premium): $8 to $14 per sq ft
- Waste factor you need to order: 15 to 20 percent extra
The Subfloor Prep Nobody Warns You About
This pattern punishes a lumpy subfloor. ANSI A108 calls for no more than 1/8-inch variation over 10 feet, and with long planks laid diagonally, even that tolerance can produce visible lippage. Plan on self-leveling compound over concrete slabs that dip or crown, and add a crack isolation membrane like Schluter DITRA on wood subfloors.
If you are retrofitting over an older plywood subfloor, check deflection first. A 1/4-inch cement backer board alone is not enough for 24-inch planks. You want 3/4-inch plywood fastened every 6 inches plus the backer, or switch to an uncoupling membrane rated for large-format tile.
Design Ideas That Actually Work at Home
Classic 45-degree herringbone running parallel to the longest wall makes small rooms feel bigger. A 90-degree (straight) herringbone reads more modern and pairs well with Shaker cabinetry. For a statement entryway, consider a double herringbone using two contrasting tile colors: a warm oak-look plank alternating with a dark walnut-look creates movement without being busy.
Grout color is where most homeowners get tripped up. Match the grout within one shade of the tile for a seamless flow, or go two shades darker to emphasize the pattern. Stark white grout against dark tile looks sharp in photos but turns gray within a year, even with sealer.
Pros of Herringbone Flooring Tiles
- Timeless pattern that survives design trends
- Porcelain options are waterproof and kid-proof
- Works in kitchens, baths, entryways, and mudrooms
- Adds resale value in mid to high-end homes
- Compatible with radiant heat systems
Cons You Should Weigh Carefully
- Installation labor costs 30 to 50 percent more than straight-lay
- Waste factor of 15 to 20 percent increases material spend
- Subfloor flatness requirements are strict
- Grout lines multiply, requiring more cleaning time
- Mistakes during install are hard to hide
DIY or Hire a Pro?
Herringbone flooring tiles sit at the outer edge of what I recommend as a DIY project. If you have tiled a straight-lay floor before and own a good wet saw with a laser guide, you can pull it off with patience and careful layout lines. Budget two to three times as long as a standard install, and chalk both axis lines plus a 45-degree reference line before spreading any thinset.
Hiring a pro? Ask to see photos of completed herringbone jobs, not just straight-lay portfolios. A tile setter who quotes the same price for both layouts is likely underestimating the work and will cut corners to make up time.
Where to Buy and What Brands to Trust
Home Depot and Lowe’s stock porcelain plank tiles from MSI, Daltile, and Florida Tile starting around $3 per square foot. For mid-range, look at Emser Tile and Marazzi through flooring dealers, typically $5 to $9 per square foot. High-end specifiers turn to Ann Sacks, Walker Zanger, or European imports like Mutina and Ceramica Vogue when budget allows.
Order one case before committing. Lay out a dry 4×4 section on cardboard and live with the pattern under your actual kitchen lighting for a day. Colors shift dramatically between showroom LED and warm residential bulbs, and a herringbone install is not something you want to redo because the tone felt off.
Prefer to explore on your own?
See how new flooring looks in your actual room in seconds — free, no signup.
Try the free Floor Studio →