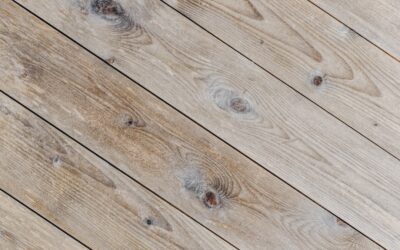
The herringbone pattern has decorated palace floors since 16th century France (the Galerie Francois I at Fontainebleau is the textbook example), but it has resurged in American homes since 2018 as buyers seek something more elevated than straight planks. Herringbone wooden flooring typically costs 30 to 50 percent more than the same wood laid in straight runs, once you factor in shorter blocks, higher waste, and the additional install labor. Material runs $9 to $22 per square foot for engineered options and $12 to $30 per sqft for solid, with installed all-in pricing landing between $18 and $45 per square foot.
- Herringbone vs Chevron: Know the Difference
- Engineered vs Solid Herringbone
- Top Brands for Herringbone Wooden Flooring
- Pattern Math: How to Plan a Herringbone Layout
- Subfloor Prep Is Make or Break
- Installation Methods and Labor Cost
- Pros of Herringbone Wooden Flooring
- Cons and Pitfalls to Know
- Cost Example: 500 Square Foot Living Room
- Care and Maintenance
Herringbone vs Chevron: Know the Difference
People mix these up constantly. In a true herringbone, rectangular blocks sit at 90 degrees to each other and the ends are square cut. In a chevron, the blocks are cut at a 45 or 60 degree angle on the ends so they form continuous V-shapes that meet at perfect points. Herringbone is more forgiving, more affordable, and more historically accurate for English and American interiors. Chevron is the French look (think Versailles), more dramatic, and roughly 20 to 30 percent more expensive due to the angled cuts.
Engineered vs Solid Herringbone
Engineered herringbone is the right answer for the vast majority of installs in 2026. The reasons:
- The plywood or HDF core stays dimensionally stable, which matters because each small block has more edges that can cup or gap
- Engineered installs over concrete subfloors, radiant heat, and below-grade locations where solid cannot go
- Pre-finished factory coatings (7 to 9 layers of aluminum oxide) hold up better than site-finished poly
- Lower waste because boards are pre-cut to standardized herringbone dimensions
Solid herringbone is reserved for high-end traditional projects, heritage renovations, and homeowners who want the option to refinish three or four times over a 60-year service life. It demands a perfectly flat plywood subfloor (not concrete), full nail or staple-down install, and stable indoor humidity (35 to 55 percent year-round).
Top Brands for Herringbone Wooden Flooring
The shortlist of brands consistently producing strong herringbone in 2026:
- Carlisle Wide Plank Floors (US): Custom site-finished and pre-finished herringbone in white oak, hickory, and reclaimed species. $18 to $30 per sqft material. The premium American option for design-forward builds.
- Mirage (Canada): Engineered herringbone in red oak, white oak, maple, and hickory. $9 to $14 per sqft. Industry-leading factory finish, 35-year residential warranty.
- Stuga (Boen-made for the US): The Misty Mood and Bistro lines in European white oak herringbone. $11 to $14 per sqft. Direct-to-consumer with strong design support.
- Ted Todd (UK): Premium UK and European brand, 100+ herringbone options including reclaimed and color-stained European oak. £85 to £160 per sqm material.
- Junckers (Denmark): Solid Nordic beech and oak herringbone, 22 mm thick. Sports-floor heritage, exceptional durability.
- Boen (Norway): Engineered oak herringbone in 70 mm and 100 mm widths. $7 to $11 per sqft.
- Hakwood (Netherlands): High-end European oak herringbone in custom finishes. Project pricing $15 to $28 per sqft.
Pattern Math: How to Plan a Herringbone Layout
Getting the pattern to look right starts with the room measurements. Standard herringbone block sizes in the US:
- Small: 4 by 16 inch blocks (1:4 ratio) – traditional, busy pattern, good for small rooms
- Medium: 5 by 24 inch (1:5 ratio) – the most popular contemporary scale
- Large: 7 by 36 inch or 9 by 48 inch (1:5 to 1:6 ratio) – dramatic, suited to open floor plans with 10+ ft ceilings
The pattern can be laid parallel to the longest wall (most common) or rotated 45 degrees on a diagonal (more dynamic, more waste). A diagonal layout adds about 5 to 8 percent to material waste compared to a square layout. Always order 12 to 18 percent waste for any herringbone install.
Subfloor Prep Is Make or Break
Herringbone is far less forgiving than straight plank. A 1/8 inch dip in the subfloor that you would never notice under wide planks becomes obvious when the pattern lines lose their geometry. Standards to hit:
- Concrete: flatness within 3/16 inch over 10 feet, MVER under 3 lbs / 1000 sqft / 24 hours per ASTM F1869, internal RH under 75 percent per ASTM F2170
- Plywood: minimum 3/4 inch tongue-and-groove over 16 inch on-center joists, screwed every 8 inches, sanded smooth at all seams
- Acclimation: 5 to 10 days at jobsite humidity, plank temperature within 5 degrees of room
Floor leveling compound to fix high and low spots is non-negotiable. Add $1 to $3 per sqft for prep on most jobs.
Installation Methods and Labor Cost
Three install methods, depending on the product:
- Glue-down: The standard for engineered herringbone over concrete or wood. Use a high-grade urethane like Bostik Best, Mapei Ultrabond, or Stauf SPU570. Labor: $7 to $12 per sqft.
- Nail-down: For solid herringbone over plywood. Each block is hand-blind-nailed at 6 to 8 inch intervals. Labor: $10 to $18 per sqft.
- Floating click-lock: Some engineered products like Quick-Step Disegno offer clickable herringbone. Labor: $5 to $9 per sqft. Easiest DIY option but pattern looks slightly less crisp than glued.
Always hire an installer who has done at least five herringbone jobs and ask to see photos. Ledger boards or chalk lines must be perfectly square because any error compounds across the room.
Pros of Herringbone Wooden Flooring
- Premium visual impact that sets a home apart on resale, especially in $750K+ markets
- Period-appropriate for Colonial, Victorian, English, and French-inspired interiors
- Visually elongates narrow rooms when laid parallel to the long axis
- Hides minor floor settling better than long planks (each block is small)
- Uses shorter offcut lumber, which is more sustainable
Cons and Pitfalls to Know
- 30 to 50 percent material and labor premium over straight plank
- Demands premium subfloor prep; small dips become visible
- Higher waste factor (12 to 18 percent) than straight install (5 to 10 percent)
- Repairs are harder; replacing a damaged block requires careful pattern matching
- Can feel busy in small rooms or with patterned furniture and rugs
- Overspecified for entry-level homes where straight plank looks cleaner
Cost Example: 500 Square Foot Living Room
Realistic budget for an engineered white oak herringbone install in a 500 sqft room:
- Material at $12 per sqft with 15 percent waste: 575 sqft x $12 = $6,900
- Adhesive (4 buckets at $90): $360
- Floor prep and leveling: $1,000
- Tear-out of existing flooring: $750
- Installation labor at $9 per sqft: $4,500
- Underlayment, transitions, baseboard reset: $600
Total: roughly $14,100, or $28 per sqft installed. Solid herringbone in the same room would land closer to $35 to $45 per sqft installed.
Care and Maintenance
Daily care matches any wood floor: dust mop or vacuum two to three times a week, damp mop weekly with a wood-safe pH neutral cleaner like Bona Hardwood Floor Cleaner, never use steam mops or vinegar. Place felt pads under all furniture, keep area rugs in entries, and maintain indoor humidity between 35 and 55 percent year-round. With proper care, engineered herringbone will outlast 25 years easily, and quality solid herringbone is a heritage floor that goes 60 to 100 years with periodic refinishing.
Prefer to explore on your own?
See how new flooring looks in your actual room in seconds — free, no signup.
Try the free Floor Studio →