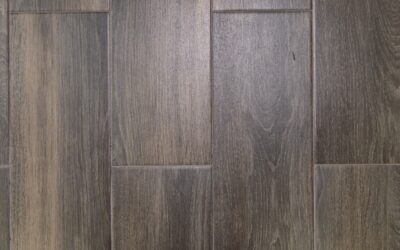
Sometimes a scratch is too deep to blend and a board is too damaged to save, maybe it’s water-stained, deeply gouged, or has a crack running through it. When that happens, the fix is to replace a piece of hardwood floor entirely. It sounds intimidating, but swapping out a single plank or two is a very achievable weekend project for a patient DIYer with a few basic tools. Done right, the new board disappears into the field and nobody will ever know it was replaced.
This guide covers the whole process: matching the replacement board, removing the damaged plank without harming its neighbors, dry-fitting, gluing or nailing the new piece in, and finishing it to match. I’ll flag the spots where people go wrong so you can avoid them.
Match the Replacement Board First
Before you pry up anything, source your replacement. You need the same species (oak, maple, hickory), the same width, and critically the same thickness and profile. Solid strip flooring is typically 3/4 inch thick with tongue-and-groove edges. Measure the width of your existing boards precisely; older floors often run 2 1/4 inches while newer ones may be 3 1/4 or 5 inches. If you saved leftover boards from the original install, this is the moment they pay off.
If you have no leftovers, take a full board to a flooring supplier to match. Reclaimed and salvaged boards can be a good match for older floors. Don’t stress about matching the color exactly, an unfinished replacement can be stained to blend, and even the original boards have aged and shifted tone over the years. You’ll finish the new piece to match at the end.
Tools and Materials You’ll Need
Gather a circular saw or oscillating multi-tool, a sharp chisel, a hammer, a pry bar, a drill, safety glasses, and a dust mask. For fastening you’ll want wood glue and either finish nails or flooring cleats. To finish, have on hand matching stain, polyurethane, and sandpaper in 120, 150, and 220 grit. A rubber mallet and a scrap tapping block protect the board edges during fitting. Set your circular saw blade depth to just the board thickness, about 3/4 inch, so you don’t cut into the subfloor or, worse, a pipe or wire beneath.
Remove the Damaged Plank
You can’t simply pry a tongue-and-groove board up, because its edges interlock with the boards on both sides. Instead you cut it out. Mark a rectangle inside the damaged board, staying about an inch from each end and away from the edges. Drill a starter hole, then use your circular saw to plunge-cut two parallel lines down the length of the board, staying inside the edges. Finish the corners with a chisel or oscillating tool.
Now the center strip lifts out. With the middle gone, the edges are free to collapse inward. Carefully chisel and pry the remaining edge pieces away from the tongue and groove of the neighboring boards. Work gently, your goal is to remove the bad board while leaving the grooves of its neighbors intact. Vacuum out all the debris so the replacement seats flat.
Prep the New Board
Dry-fit the replacement before any glue comes out. Here’s the catch: the new board has a tongue on one edge and a groove on the other, but you can’t slide it in from the side the way it was originally installed. The solution is to remove the bottom lip of the groove on the new board so it can drop straight down over the existing tongue. Run a chisel or table saw along the lower groove shoulder to shave it off, leaving the top lip to sit over the neighboring board’s tongue.
Test the fit. The board should drop into place and sit flush with the surrounding floor. Sand or trim as needed until it seats perfectly. A proud board that sits high will need to be planed; a low board means the subfloor needs a shim. Take your time here because a good dry fit is 90 percent of a clean result.
Glue and Fasten the Replacement
Once the fit is right, apply construction adhesive or wood glue to the subfloor and a bead along the tongue and groove edges. Set the board’s remaining tongue into the adjacent groove first, then drop the modified edge down into place. Use a tapping block and rubber mallet to snug it tight against its neighbors, never hammer the board directly or you’ll crush the edge.
For extra hold, especially on a longer board, drill pilot holes and drive a couple of finish nails at a slight angle near the ends, then set the nail heads below the surface with a nail punch. Fill the holes with matching wood filler. Wipe away any squeezed-out glue immediately with a damp cloth before it cures. Weight the board with something heavy overnight while the adhesive sets.
Sand, Stain, and Finish
With the board secured and the glue cured, it’s time to blend. Lightly sand the new plank flush with the surrounding floor using 120 grit, then step up through 150 and 220 for a smooth surface. Sand only the new board and feather just barely into the edges of the neighbors. Wipe away all dust with a tack cloth.
Apply stain to match the surrounding floor, testing on a scrap first and building up in thin coats until the tone matches. Let it dry fully, usually a few hours, then seal with two or three thin coats of polyurethane in a sheen matching the rest of the room, sanding lightly between coats with 220 grit. Feather the finish edges so there’s no visible seam. Keep traffic off for 24 hours and you’re done.
Handling Nailed and Glued Floors Differently
How your floor was originally installed changes the removal a little. Traditional solid strip flooring is blind-nailed through the tongue into the subfloor, so once you cut the damaged board out, you’ll find those angled cleats or staples holding the neighboring edges. Pull or cut them flush so the replacement seats fully; a leftover nail head will hold the new board proud. Work carefully around them with a cat’s paw or an oscillating tool with a metal-cutting blade.
Glue-down engineered floors are a different animal. The board is bonded to the subfloor with adhesive, so after you plunge-cut the center out, you’ll need to chisel and scrape the remaining pieces free and then grind or scrape off the old adhesive ridge underneath so your replacement sits flat. Take your time cleaning the substrate, because dried adhesive lumps are the main reason a replacement board sits high. For engineered floors, also confirm your replacement matches the exact wear-layer and total thickness, engineered boards vary more than solid strip.
Safety and Subfloor Checks
Before any cutting, protect yourself and what’s below. Set your circular saw blade to just the board thickness, because plunging deeper risks hitting electrical cables, water lines, or radiant heat tubing running in or just below the subfloor, an expensive and dangerous surprise. If you know utilities run beneath, switch to an oscillating multi-tool with more control, or investigate the layout first. Wear safety glasses and a dust mask, since sawing finished flooring throws fine dust and finish particles.
While the board is out, take the opportunity to inspect the subfloor. If you find moisture, soft spots, or the cause of the original damage, a leak, a squeak from a loose subfloor panel, fix it now while you have access. Screw down any loose subfloor to a joist to kill a squeak, and let a damp area dry fully before sealing the new board in. Addressing the underlying issue means you won’t be back replacing the same board in a year.
Final Tips for a Seamless Result
The difference between an invisible repair and an obvious patch comes down to patience at two stages: the dry fit and the color match. Rushing either shows. If you’re replacing several boards in a row, stagger the end joints so they don’t line up, which looks unnatural. And keep a couple of spare boards from any future flooring purchase, because the ability to replace a piece of hardwood floor cleanly is only as good as your access to a matching board.
Prefer to explore on your own?
See how new flooring looks in your actual room in seconds — free, no signup.
Try the free Floor Studio →