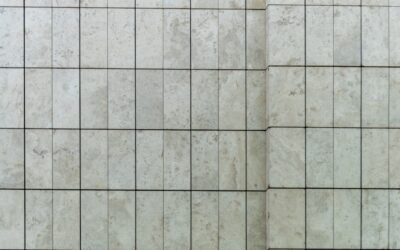
Timing the first sponge pass is the make-or-break moment of any tile job. Ask how long let grout dry before sponging and the practical answer is usually about 15 to 30 minutes, until the grout firms up to a thumbprint-hard haze. Sponge too soon and you pull grout out of the joints; wait too long and you fight a stubborn film. Getting the window right gives you clean, even lines.
Part of our Tile & Grout guide — explore the full guide →
The Short Answer, With Context
For most cement-based grouts, you wait roughly 15 to 30 minutes after spreading before your first cleanup pass. The grout should feel firm and look slightly hazy on the tile surface, no longer wet and glossy. A reliable test is to press a fingertip lightly into a joint; if it holds its shape and resists denting, it is ready.
That said, this is a range, not a rule. Always follow the directions printed on your specific grout, because formulations differ. Manufacturer instructions are the final word, and the time on the bag accounts for how that particular product behaves.
What Affects the Drying Time
Several conditions push the right moment earlier or later, which is exactly why a single fixed number does not work for every job.
- Grout type: sanded, unsanded, and epoxy grouts each set at different rates, with epoxy following its own timeline.
- Temperature: warm rooms speed setting, so you may need to sponge sooner; cool rooms slow it down.
- Humidity: high humidity extends drying time, while dry air shortens it.
- Tile porosity: porous tiles pull moisture from the grout and can firm it faster.
- Mix consistency: a wetter mix takes longer to reach the firm, hazy stage.
How to Tell Grout Is Ready
Rather than watching only the clock, read the grout itself. When freshly applied, it looks wet and reflective. As it cures, the surface dulls and a light powdery haze appears across the tile. That haze is your cue that the joints have firmed enough to clean without disturbing them.
Do the thumbprint check before committing to the whole area. Press gently on a joint in an inconspicuous spot. If your finger leaves a clean impression and grout sticks to it, give it a few more minutes. When the joint feels hard and your finger comes away clean, start sponging.
The Right Sponging Technique
Use a clean, dense grout sponge dampened with water and wrung out until it is barely damp, never dripping. Excess water is the most common mistake, because it dilutes the grout, weakens the joints, and creates pinholes and uneven color as it dries.
- Wring the sponge nearly dry before each pass.
- Wipe gently in a diagonal motion across the tile, not along the joints, so you do not gouge the grout.
- Use light pressure and let the sponge lift the haze rather than scrubbing.
- Rinse the sponge frequently in clean water and wring it out again.
- Change the rinse water often once it turns cloudy.
Plan on a few passes spaced a little apart. The first shapes and cleans the joints; later passes remove the remaining haze as it continues to firm.
Common Mistakes to Avoid
Sponging too early is the biggest culprit. If the grout is still soft, the sponge drags it out of the joints, leaving shallow, uneven lines that look sloppy and trap dirt later. On the other end, waiting hours can let a hard haze set that takes serious effort to remove.
Other frequent errors include a soaking-wet sponge, scrubbing back and forth along the joints, and reusing dirty rinse water that just smears haze around. Slow down, keep the sponge clean and barely damp, and let the grout do its part by firming on schedule.
Different Grout Types, Different Timing
Not all grout follows the same clock, so it helps to know what you are working with. Sanded and unsanded cement grouts generally fit the 15-to-30-minute window before the first sponge pass, with the firm-haze test as your guide. These are the most common grouts in home tile work.
Epoxy grout behaves differently. It cures chemically rather than by drying, and many epoxy products require cleanup with water and a sponge much sooner, sometimes while still workable, because once epoxy hardens it is extremely difficult to remove from tile. Pre-mixed urethane grouts also have their own timing. Whenever you switch grout types, read that product’s directions first, since the cement-grout rule of thumb will not always apply.
How Many Sponge Passes You Need
Cleaning grout is rarely a one-and-done step. The first pass, after the grout firms to that thumbprint-hard haze, shapes the joints and removes the bulk of the excess from the tile face. Work in sections and keep the sponge barely damp so you do not pull grout from the lines.
A second pass, a little later once the joints have firmed further, removes most of the remaining film. A final light buffing with a dry cloth lifts the last haze after the grout has set more fully. Spacing these passes out, rather than rushing them all together, is what produces crisp, uniform joints. Resist over-wetting at any stage, because excess water is the enemy of strong, even grout color.
Dealing With Haze After the Fact
A light film often remains even after good sponging. Let the grout continue to cure, then buff the tile with a clean, dry microfiber cloth to lift the haze. If a stubborn film lingers after the grout has fully set, a haze remover designed for your grout type can help, applied according to its instructions.
Resist the urge to attack haze with extra water during the first hour, since that only reintroduces the early-sponging problem. Patience between passes is what produces crisp, professional-looking joints.
The Takeaway
When you wonder how long let grout dry before sponging, think roughly 15 to 30 minutes, then trust the thumbprint test over the clock. The grout should be firm and hazy, not wet, before you make a gentle diagonal pass with a barely damp sponge. Adjust for your grout type, temperature, and humidity, follow the product’s directions, and you will end up with clean, durable joints that make the whole tile job look right.