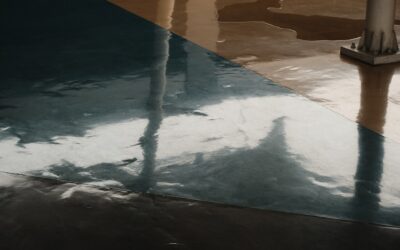
A two-car garage epoxy job that costs $1,200 from a contractor takes a determined DIYer one weekend and roughly $400 in materials. The catch is that epoxy is unforgiving. Skip the surface prep and your $400 floor peels off in sheets within six months. Understanding how to apply epoxy flooring correctly comes down to one rule: you spend 70% of your time on prep and 30% on the actual coating.
Part of our Epoxy, Concrete & Garage Floors guide — explore the full guide →
This guide walks through a 100% solids two-part epoxy system with decorative flakes and a polyaspartic topcoat. That is the same spec used by professional installers for 20-year garage and basement floors.
Materials You Need for a 400 sq ft Garage
Buy a complete kit or assemble parts. Rust-Oleum EpoxyShield Pro, Behr Premium Granite Grip, and Rocksolid Polycuramine are common retail kits. For pro-grade, consider Sherwin-Williams ArmorSeal 1000 HS or Epoxy.com Product 633.
- 2 to 3 gallons of two-part 100% solids epoxy primer/base coat
- 5-10 lbs of decorative chip flakes (1/4 inch is standard)
- 1 to 2 gallons of polyaspartic or polyurethane topcoat
- Muriatic acid for etching (1 gallon) OR a concrete grinder rental
- 9-inch 3/8 nap roller covers (3-4 of them)
- Spiked shoes, painter’s tape, plastic mixing buckets, drill with paddle mixer
- Moisture meter or plastic sheet for moisture test
Step 1: Test the Slab
Tape a 2×2-foot square of plastic sheeting to the concrete and leave it 24 hours. Condensation under the plastic means moisture is migrating up through the slab and epoxy will fail. New concrete needs 28-60 days to cure before coating. If your slab passes, move on. If it fails, you need a moisture-tolerant primer like Sika Sikafloor 81 EpoCem before the epoxy goes down.
Check for sealers too. Drip water on the bare concrete. If it beads, the slab is sealed and nothing will stick until you grind the sealer off.
Step 2: Repair and Clean
Fill cracks wider than 1/16 inch with an epoxy crack filler like PC Concrete or Quikrete Self-Leveling. Patch spalls and pits with a polymer-modified concrete patch. Let everything cure per the label, usually 24 hours. Then degrease the entire slab with a heavy-duty concrete cleaner. Oil stains need a poultice — apply, let sit 30 minutes, scrub, rinse. Any oil left behind becomes a fish-eye in the finished floor.
Step 3: Profile the Concrete
This is the step DIYers skip and regret. The slab needs a CSP-2 to CSP-3 profile (think 60-grit sandpaper texture) for the epoxy to bond mechanically.
Option A — Acid etching: Mix muriatic acid 1 part to 3 parts water in a plastic watering can. Wear chemical-resistant gloves, eye protection, and a respirator. Pre-wet the slab, apply the solution, scrub with a stiff broom for 10 minutes, then rinse three times with clean water. The slab should feel like 60-grit sandpaper when dry. Etching does not work on hard-troweled or sealed concrete.
Option B — Diamond grinding: Rent a walk-behind grinder ($90/day) with diamond cup wheels. This is the pro method, removes contamination, and creates a perfect profile in 90 minutes for a two-car garage. Worth the money.
Step 4: Mix the Epoxy
Two-part epoxy comes in Part A (resin) and Part B (hardener). Pour Part B into Part A in the exact ratio on the label, never the other way around. Mix with a drill paddle for 3 minutes, scraping the sides and bottom. The pot life starts the moment the parts touch — usually 30-45 minutes at 70°F. Faster in summer heat, slower in cold.
Apply only when ambient and slab temperature sit between 55°F and 85°F with humidity below 80%. Cold concrete causes amine blush, the white waxy haze that ruins adhesion.
Step 5: Roll the Base Coat
Cut in the perimeter with a 4-inch brush, working in 6-foot sections. Pour a ribbon of mixed epoxy and roll it out with a 9-inch 3/8 nap roller in a W pattern, then back-roll in straight lines. Aim for 8-10 mils wet film thickness — the kit will tell you the coverage rate, typically 200-250 sq ft per gallon. Work toward the door so you do not paint yourself in.
Step 6: Broadcast the Flakes
While the base coat is still wet (within the first 30 minutes), broadcast color flakes by tossing them up and out so they fall flat. Walk in spiked shoes if you need to reach the center. For full coverage, use about 1 lb of flakes per 25 sq ft. For a partial decorative look, use 1 lb per 100 sq ft. Let the floor cure 12 to 24 hours, then scrape and vacuum any loose flakes the next day.
Step 7: Apply the Topcoat
The topcoat locks in the flakes, fills the texture, and provides UV and chemical resistance. Polyaspartic cures in 4-6 hours and lets you drive on the floor in 24. Polyurethane is cheaper but takes 72 hours to fully cure. Mix and roll exactly as you did the base coat. One coat is standard for residential, two coats for a commercial-grade finish.
Knowing how to apply epoxy flooring properly is mostly discipline — measure ratios, hit the temperature window, and never coat over a slab you have not profiled. Done right, the finish lasts 15-20 years and shrugs off oil, salt, and dropped wrenches.
Prefer to explore on your own?
See how new flooring looks in your actual room in seconds — free, no signup.
Try the free Floor Studio →