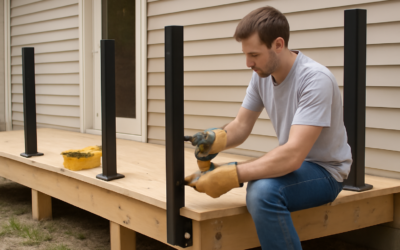
A railing post you can wiggle by hand is a railing post that will fail when someone leans on it — and railings exist precisely to catch people who lean. Learning how to attach a 4×4 post to a deck for railing the right way means anchoring the post through the deck’s structural framing, not just the surface boards, so it can resist the 200-pound load that building codes require. This step-by-step guide covers the blocking, hardware, and bolting sequence that turns a wobbly post into an anchor you’d trust with your life.
Part of our Decks & Outdoor guide — explore the full guide →
- Why Surface-Mounting Alone Fails
- Tools and Materials You'll Need
- Step 1: Add Solid Blocking Behind the Rim Joist
- Step 2: Position and Plumb the Post
- Step 3: Drill and Bolt Through the Frame
- Step 4: Add Tension-Tie Hardware for Extra Strength
- Step 5: Verify Against Code
- Final Checks and Common Mistakes
Why Surface-Mounting Alone Fails
The most common mistake is fastening a post to the top of the decking with a few screws or a surface bracket into the deck boards. Deck boards are only fastened to the joists themselves, so a post mounted to them has no real leverage against a side load. Push on it and the whole assembly flexes, then loosens over a season of use.
A guardrail post must tie into the deck’s rim joist or added blocking with through-bolts. That connection transfers the tipping force of someone leaning on the rail down into the frame, where the structure can actually resist it. Everything in this guide builds toward that solid, framed connection.
Tools and Materials You’ll Need
Gather everything before you start so you’re not stopping mid-job:
- Pressure-treated 4×4 posts, cut to your railing height plus the depth of the framing.
- Two 1/2-inch galvanized or stainless carriage bolts per post, plus washers and nuts.
- Pressure-treated 2x blocking material.
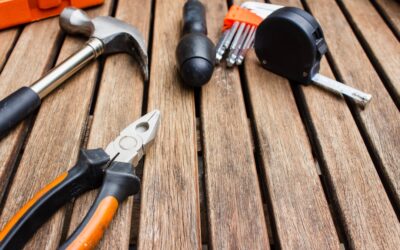
- A drill and 1/2-inch bit, a socket wrench, and a level.
- Structural screws for the blocking, and optionally a tension-tie hardware kit for extra strength.
Use hot-dip galvanized or stainless hardware throughout. The chemicals in modern pressure-treated lumber corrode ordinary steel fast, and a rusted bolt is a compromised connection.
Step 1: Add Solid Blocking Behind the Rim Joist
The post bolts through the rim joist, and to keep that joist from flexing, install solid blocking. Cut a length of 2x lumber to fit snugly between the rim joist and the first inner joist, right where the post will sit. Fasten this blocking to the joists with structural screws so it braces the rim joist against the outward pull of the bolted post.
For posts at a corner or where the rim runs parallel to the joists, add extra blocking between joists so there’s solid material to bolt into. This hidden framing is what separates a code-compliant railing from a decorative one.
Step 2: Position and Plumb the Post
Set the post on the inside or outside face of the rim joist, depending on your design — outside-face mounting is common and keeps the deck surface clear. Hold the post against the rim, check it for plumb on two adjacent faces with a level, and clamp it in place so it can’t shift while you drill.
Take a moment to sight down the deck edge and confirm the post lines up with the others in the run. A post drilled in the wrong spot is hard to fix, so measure twice here.
Step 3: Drill and Bolt Through the Frame
With the post clamped, drill two 1/2-inch holes through the post and the rim joist (and the blocking behind it). Stagger the bolts diagonally — one high, one low — rather than stacking them vertically, so they resist the tipping force better and don’t split the wood along a single grain line. Follow these points:
- Space the two bolts several inches apart vertically for maximum leverage against tipping.
- Insert carriage bolts from the post face, through the rim and blocking.
- Add a washer and nut on the back side and tighten firmly with a socket wrench.
- Snug the nuts until the washers just begin to bite into the wood — tight, but not crushing.
Two properly placed 1/2-inch bolts through solid blocking create a connection strong enough to meet the 200-pound load requirement.
Step 4: Add Tension-Tie Hardware for Extra Strength
For the strongest possible connection — and one many inspectors now expect — add engineered tension-tie hardware. These galvanized brackets bolt the base of the post directly to the joists or blocking, dramatically increasing the connection’s resistance to the tipping load. They’re inexpensive insurance and often the detail that gets a railing past inspection.
Install the tie per the manufacturer’s nailing and bolting schedule; it typically fastens to the post with lag screws and to the framing with structural screws or bolts. Don’t improvise the fastener pattern — the hardware’s rated strength depends on using every specified fastener.
Step 5: Verify Against Code
Before building out the rest of the railing, confirm your post meets local requirements. The key rules across US codes are a guardrail height of at least 36 inches (often 42 on higher decks), the ability to resist a 200-pound concentrated load at the top in any direction, and post spacing no greater than about 6 feet. Push hard on each finished post — any noticeable movement means the connection needs more blocking or hardware.
Many jurisdictions require an inspection of deck railings, so check with your building department before you attach balusters and rails. It’s far easier to add a tension tie now than to disassemble a finished railing later.
Final Checks and Common Mistakes
Once all posts are bolted, run a string line to confirm they’re aligned, and recheck each for plumb before installing rails. Avoid the classic errors: never rely on screws alone, never skip the blocking, and never use uncoated hardware against treated lumber. Get the post-to-frame connection right and every other part of the railing goes together easily on top of a foundation you can genuinely trust.